How to Draw a Moose
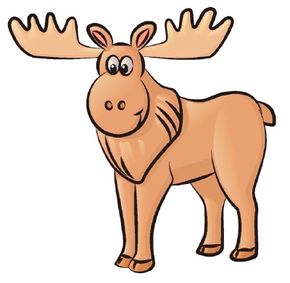
This curious moose looks like it might be peering through some trees in the forest. Find out how to recreate this drawing in only five steps.
In this section, we’ll show you how to draw the above moose. Either draw it freehand while looking at your computer monitor or print out this page to get a closer look at each step.
Advertisement
Follow the red lines in each illustration to learn exactly what to draw in that step. The lines drawn in previous steps are shown in gray. We’ll show you an illustration of each step and then give you a description of how to draw it.
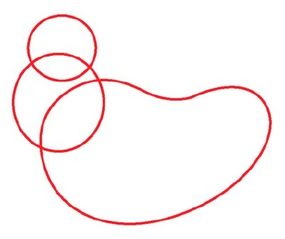
Step 1: Draw a kidney-bean shape for the body and two circles for the head and nose.
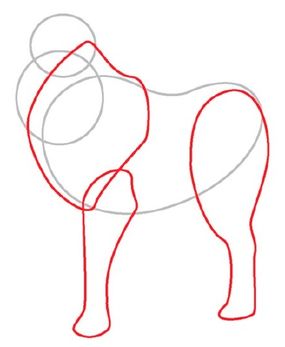
Step 2: Sketch the shapes for two legs, and add a thick rectangular shape for the neck.
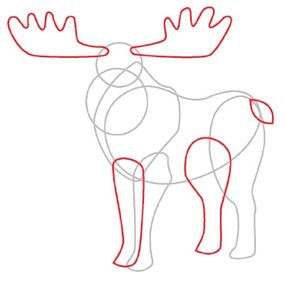
Step 3: Draw a small football shape for the tail. Add the other two leg shapes, and draw two shapes like a fat comb for the antlers.
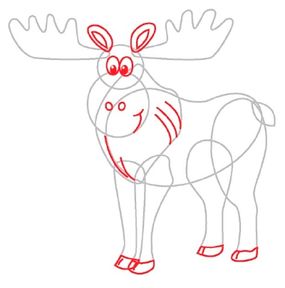
Step 4: Draw ovals for the eyes and nostrils. Put in the ear forms, and add details inside the ears and eyes. Sketch the hoof shapes, and add curved lines for the hair, mouth, and hoof details.
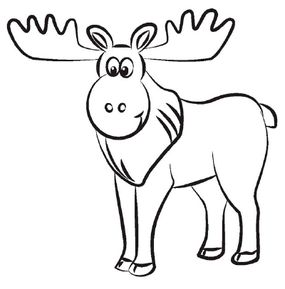
Step 5: Use a felt-tip pen to trace over the lines you want to keep, and erase the extra pencil lines.
Display your finished moose drawing as is, or color it with your favorite markers, paint, or crayons first. In addition to the moose, there is another forest animal that is just as easy to draw. Go to the next section to learn how to draw a rabbit.