Paint Crafts

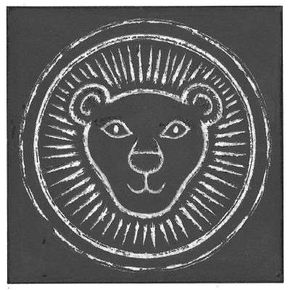
The Scratch Board paint craft.

Kids love to create, and these paint crafts projects help them learn new tricks and techniques while creating art that is worthy of a frame -- or at least a treasured spot on the fridge.

In this article, you'll find paint craft projects that utilize handy kitchen ingredients such as salt or corn syrup, and others that teach kids new ways to think about color and texture.

Advertisement

The following paint craft projects show budding artists great ways to use paints to create unique works of art.

Salt And Watercolor Painting

Salt tastes great on French fries, but it also creates a cool painting.

Big Brush Art

Discover how a big paintbrush yields big art.

Straw-Blown Painting

Make a painting without ever touching the page. Use the air in your lungs to push paint across the canvas.

Corn Syrup Painting

Corn syrup isn't just for pancakes anymore. Make your own corn syrup paints for a picture that looks wet even after it's dry.

Poster Re-Design

Make an old poster brand new when you dive into this paint craft.

Framed Stained Glass

Craft a piece of homemade stained glass and make a regular window look like a work of art.

Brayer Scraper Art Technique

Like modern art and design? This paint craft technique lends a modern look to books, journals, and whatever else you choose to paint.

Magic Marble Painting

Up and down and over it goes; where it stops, no one knows. Use a marble as your brush for this paint craft activity.

Two-Day Paintings

If you have the patience for it, this paint craft will pay off. Paint half on the first day and half on the second for a special look.

Scratch Board

This awesome paint craft is a bold alternative to the typical look of a painting. Use a black scratch board and reverse the contrast of your picture.

Finger-Paint Transfer

Make your own finger paints and then make a copy of your picture -- no photocopier needed.

Emotional Painting

Get your feelings down on paper with this simple but emotionally rewarding paint activity.

Blot Painting

This paint craft produces mirror images of abstract shapes. After you create a blog painting, you can try and find 'accidental' images.

Paint With Texture

Make your own textured paint and take your painting to the next level when you create a 3-D picture.

With so many paint crafts to choose from, it's hard to decide. So, visit the next page to try a salt and watercolor picture -- an easy way to get started.

Looking for more cool paint crafts? Check out these links:

Advertisement

Salt and Watercolor Picture

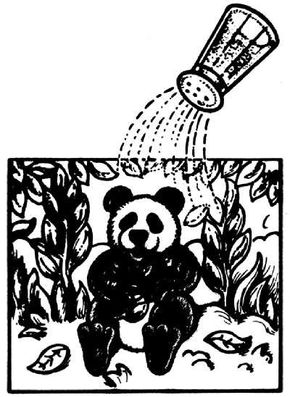
The Salt and Watercolor Picture.

The Salt and Watercolor Picture paint craft shows that while salt is great on popcorn, it's way more entertaining to sprinkle over a painting. The salt crystals in this activity turn a regular painting into a special-effects masterpiece.

With some supplies from your art box and the kitchen, you can create a unique Salt and Watercolor Picture in as much time as it would take to watch a movie.

Advertisement

What You'll Need:
  • Newspaper
  • Pencil
  • Drawing paper
  • Watercolor paints
  • Paintbrush
  • Salt

Step 1: Cover your work surface with newspaper.

Step 2: Sketch a picture, such as a panda bear in a forest, on a piece of drawing paper. Paint the drawing using watercolor paint.

Step 3: While the paint is still wet, sprinkle it with salt. Let it dry. The painting will take on a textured look, and the paper may even crinkle and pucker.

You can use this painting technique to make textured backgrounds for holiday cards, stationery, and more.

Read on to the next page to discover how different your paint crafts look when you simply change the size of your paintbrush.

Looking for more cool paint crafts? Check out these links:

Advertisement

Big Brush Art

With the Big Brush Art paint craft, you can explore a whole new paint style by just changing the size of your brush. Good artists know that sometimes an unusual paintbrush creates an especially remarkable picture.

Experimenting with size and scale is vital to developing a truly artistic eye. Change your brush and discover new ways to see regular objects.

Advertisement

What You'll Need:
  • Large cardboard box
  • Scissors
  • Newspaper
  • 1-inch paintbrush or foam brush
  • Poster paints

Note: Adult help needed.

Step 1: Cover your work area with newspaper.

Step 2: Cut out a large panel of cardboard.

Step 3: Paint a painting on your cardboard canvas using a 1-inch paintbrush and poster paint. Illustrate something big such as a skyscraper, the Grand Canyon, or even a Ferris wheel.

You can also paint something that is small on a large scale. Try filling the whole space with one autumn leaf or a bouquet of sunflowers.On the next page, experiment with another kind of brush -- one that doesn't have any bristles at all.

Looking for more cool paint crafts? Check out these links:

Advertisement

Straw-Blown Painting

A Straw-Blown Painting is an interesting painting activity. Rather than using a brush to apply your paint, you'll use the air in your lungs.

By moving a paint-filled straw around on your canvas and blowing into one end, you'll be able to create designs that would be hard to do with a typical paintbrush. So take a deep breath -- and go for it.

Advertisement

Note: This activity is not for children younger than 10 years old.
What You'll Need:
  • Newspaper
  • Removable tape
  • Drawing paper
  • Poster paints
  • Plastic drinking straw

Step 1: Cover your work surface with newspaper.

Step 2: Tape a piece of drawing paper in the center of your work area.

Step 3: Dilute the poster paint with a little bit of water. Place one color of diluted poster paint on the paper. Now use your straw to blow the paint around on the paper. Before the paint dries, add another color and splash it around. Let the paint overlap and blend. Try blowing your paint from one corner or out from the center.

Step 4: When you're finished painting, let the paint dry.

Try finding different-sized straws to use in your Straw-Blown Painting. Smaller straws will create more delicate pictures; larger straws will put more paint on the page and create a bolder picture.

Once you've learned to work with straws, consider using some corn syrup for your next art project. Continue reading to find out how.

Looking for more cool paint crafts? Check out these links:

Advertisement

Corn Syrup Paint

Painting with a batch of Corn Syrup Paint will result in a picture that dries with a shiny gloss. The sugar in the corn syrup is what gives this paint craft project its glossy effect. When you're done, your picture will look like it's still wet.

This technique can be especially good for undersea pictures, pictures of lizards or reptiles, and fashion designs.

Advertisement

What You'll Need:
  • Newspaper
  • Corn syrup
  • Measuring spoon
  • Food coloring
  • Clean plastic egg carton
  • Heavyweight white paper
  • Black crayon
  • Paintbrush

Step 1: Cover your work surface with newspaper.

Step 2: To make the paint, mix one tablespoon of corn syrup with five or six drops of food coloring in a section of the empty egg carton. Repeat with the other colors of food coloring, keeping each paint mixture in a separate egg carton section.

Step 3: Using a black crayon, draw a design with thick outlines on a piece of heavyweight white paper. If you draw a baseball player, outline his pants, shirt, arms, and head with thick black crayon lines.

Step 4: Color in each section with the corn syrup paint; don't let the colors touch one another across the black lines.

This homemade paint is also great for drawing a jack-o-lantern or Christmas tree. Since the paint is so shiny, it will seem like your pictures are all lit up.

You can use your corn syrup paint in all kinds of other paint crafts, including the Poster Redesign project on the next page.

Looking for more cool paint crafts? Check out these links:

Advertisement

Poster Redesign

A Poster Redesign is a great way to make the old new again. If you're tired of the same old poster hanging in your room, transform it completely.

Gather a few tools, decide what poster needs work, and then get creative -- don't be afraid to alter the image in a big way. The more you allow your poster to change, the more brand new it will seem when you're done.

Advertisement

What You'll Need:
  • Newspaper
  • Large poster
  • Poster paints
  • Paintbrush
  • Markers
  • Blunt ­scissors
  • Pencil
  • Construction paper
  • Removable tape

Step 1: Cover your work surface with newspaper.

Step 2: Get creative! If you're using a poster of Michael Jordan, make the famous basketball player into a football player by painting a football helmet and uniform on Michael. Make a poster of puppies into a poster of the latest space aliens. Use markers to draw in antennas on the puppies, spaceships in space, and stars in the sky.

Step 3: Let the paint dry and hang your new poster on the wall.

Use these new posters as a game for your next party. You can play pin the helmet on Michael or pin the antenna on the space alien puppies.

Draw helmet or antenna shapes on construction paper. Cut them out, put a piece of removable tape on the back of each, and use them as the game pieces to 'pin' on the poster.

On the next page you'll find a project that will dress your windows as well as your walls.

Looking for more cool paint crafts? Check out these links:

Advertisement

Framed Stained Glass

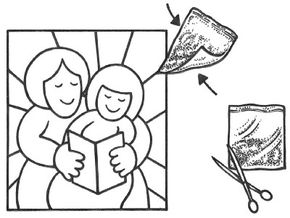
The Framed Stained Glass paint craft.

Create the Framed Stained Glass work of art and share its beauty with your family and friends -- even people walking by outside. When you hang this paint craft in the window, the colors will shimmer and dazzle in the sunlight.

Keep your eye out for stained glass windows in your neighborhood or look at pictures of stained glass windows in a book or on a website. What colors look the best? What kinds of people and animals can you see? Use these ideas in your piece of stained glass.

Advertisement

What You'll Need:
  • Picture frame
  • Paper towel
  • Glass cleaner
  • Electrician's tape or duct tape
  • Newspaper
  • Black marker
  • Acrylic paints
  • Cornstarch
  • Small containers
  • Squeeze bottle or plastic sandwich bag
  • Blunt ­scissors
  • Paintbrush

Note: Adult help needed.Step 1: Cover your work surface with newspaper.

Step 2: Have an adult remove a piece of glass from a picture frame. Carefully wipe it with glass cleaner and a paper towel to remove any dust or smudges.

Step 3: With an adult's help, put tape around the edges of the glass. Then draw your design on the glass using black marker. Use lines to break up the picture into shapes with a geometric background.

Step 4: Add in 1 teaspoon of cornstarch at a time with black acrylic paint until it becomes thick like frosting. Put the mixture in a squeeze bottle or in a plastic sandwich bag; cut a tiny piece off the tip of the bag. Carefully squeeze the mixture over your marker outline. Let it dry completely.

Step 5: Thin out the acrylic paints with water in small containers. Paint in the stained glass design. After the paint has dried, remove the tape and place the glass in the frame.

Now hang your Framed Stained Glass artwork in a sunny window so everyone can enjoy your multi-colored creation.

The paint craft project on the next page will show you how to decorate personal items like books and journals.

Looking for more cool paint crafts? Check out these links:

Advertisement

Brayer Scraper Art Technique

The Brayer Scraper Art Technique jazzes up your favorite journal or notebook. You choose the colors, you select the designs, and you even make the painting tools.

Give a wooden box a design upgrade with this palette tool, or decorate note-cards to give to friends and family. The designs change with the size and shape of the combs you cut out.

Advertisement

What You'll Need:
  • Pencil
  • Cardboard
  • Blunt scissors
  • Newspaper
  • Finger paints
  • Palette
  • Brayer
  • Finger-paint paper

Step 1: To make painting tools, draw a comb on the cardboard. Cut it out. Make different combs to create different paint patterns. Make a comb with lots of tiny teeth or a few spaced-out teeth.

Step 2: Cover your work surface with newspaper.

Step 3: Put some finger paint on a flat palette. Roll the brayer in the paint, then roll the inked brayer in stripes on the finger-paint paper.

Step 4: Run the cardboard combs over the wet paint to create a design. Scrape each comb in a square section of paint to make patchwork designs. Let your painting dry flat on the newspaper.

On the next page, learn how to use another non-paintbrush painting tool to create a totally unique work of art.

Looking for more cool paint crafts? Check out these links:

Advertisement

Magic Marble Painting

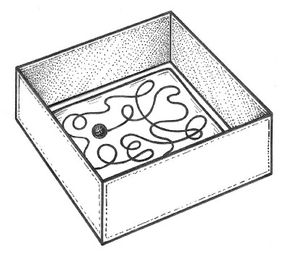
Magic Marble Painting paint craft.

This amazing Magic Marble Painting technique creates loopy, curvy designs on the page. This paint craft uses gravity to create a modern art piece that will be different every time.

You can try to guide the marble to make a face or another specific picture, but it's okay to just let the marble run wild, too. In fact, you might like those designs the best.

Advertisement

What You'll Need:
  • Blunt scissors
  • Drawing paper
  • Removable tape
  • Cardboard box
  • Rubber gloves
  • Poster paints
  • Marbles

Step 1: Cut a piece of drawing paper to fit the bottom of your box. Tape the paper to the bottom of the box.

Step 2: Wearing rubber gloves, dip a marble in poster paint.

Step 3: Place the marble on the paper. Now tilt, wiggle, and twirl the box around to make designs -- the marble is your paintbrush.

Step 4: Let the paint dry. Then use more marbles dipped in other colors to add to your design.

Experiment with different colors of paper and paint. Start with red paper and make only white marble tracks. Or try black paper with fluorescent-colored paints. Once all the colors are dry, remove the paper from the box and display your artwork on the wall.

Try the next page for a paint craft that takes a little patience but yields a distinctive, inside-and outside-the-lines kind of art.

Looking for more cool paint crafts? Check out these links:

Advertisement

Two-Day Paintings

The Two-Day Painting activity uses your painting and drawing skills -- when it's done, you can show off your many talents.

You have to color outside the lines first, but don't worry; you can add in lines later to define your masterpiece. This paint craft takes more time than others, but the finished product is worth it.

Advertisement

What You'll Need:
  • Newspaper
  • Watercolor paints
  • Paintbrush
  • Watercolor paper
  • Markers

Step 1: Cover your work surface with newspaper.

Step 2: Use watercolor paints to paint the background of a scene, such as a sunset beach or desert dunes, on watercolor paper. For the sunset beach, paint brown sand, blue water, and an orange-yellow sun setting on the horizon.

Step 3: Blend your colors, and let the paint dry. The next day, draw over the dry painting with markers to create sharp edges and lines. Add the silhouettes of palm trees on the beach or yucca, cactus, and roadrunners to your desert.

You can also create a still life painting using this technique. Try painting a bowl of fruit in washes of color without adding any detail -- just use splashes of purple for grapes, red for apples, and yellow for bananas. Wash in a background too. The next day, draw in the shapes of the fruit and the bowl.

If you're interested in another paint craft with a lot of character (but a very different look), try the Scratch Board activity on the next page.

Looking for more cool paint crafts? Check out these links:

Advertisement

Scratch Board

The Scratch Board paint craft.

If you're tired of paintings on white paper, the Scratch Board paint craft is for you. This paint activity flips the painting process around: You start with a black canvas, not a white one, and you take paint away to create the image.

You can use the Scratch Board to create any image you wish, but big, bold designs work especially well here. Self-portraits, animals, or coins are just a few possibilities.

What You'll Need:
  • Newspaper
  • Card stock or poster board
  • Crayons
  • Black poster paint
  • Dish soap
  • Spoon
  • Bowl
  • Paintbrush
  • Tools such as a metal nail file, toothpick, or pointed craft stick (to scratch in the design)

Step 1: Cover your work surface with newspaper.

Step 2: Color a piece of card stock or poster board with crayons in assorted colors, covering it completely with a thick layer -- color very hard.

Step 3: Mix black poster paint and 2 drops of dish soap together. Paint mixture over the layer of crayon. Let it dry completely.

Step 4: Use a nail file, toothpick, or craft stick to scratch off the paint in a design or a picture, just as if you were drawing a picture on a piece of paper.

See the contrast between dramatic black and bold brights? Your picture practically jumps off the paper.

The next paint craft project shows you how to create a copy of a painting without the help of a copy machine.

Looking for more cool paint crafts? Check out these links:

Finger-Paint Transfer

This Finger-Paint Transfer paint craft activity produces twice as much art in the same amount of time as it takes to create other paintings.

Make your own finger-paints with simple household ingredients, then use the paints to create a picture. Once you're done, make a copy of it to give to a friend or family member.

What You'll Need:
  • Newspaper
  • 1-1/2 cups liquid starch
  • 1/2 cup water
  • 1 cup flour
  • Small bowls
  • Food coloring
  • Baking sheet or plastic tablecloth
  • Finger-paint paper

Step 1: Cover your work surface with newspaper.

Step 2: To make the finger paint, mix liquid starch, water, and flour together. Stir until it reaches a smooth consistency.

Step 3: Divide the mixture into several small bowls and add a few drops of food coloring to each bowl.

Step 4: Dip your fingers in the paint and draw your design right on the baking sheet or plastic tablecloth. (Cleanup is easy since this finger paint washes off easily.)

Step 5: To make a print of your picture, place a piece of finger-paint paper over your artwork and press. Lift the paper off and let it dry flat.

Step 6: Store any extra paint in airtight containers. Place plastic wrap over the surface of the paint to keep the air out.

Feeling like doing another painting? The next page shows you how to put your emotions into your artwork.

Looking for more cool paint crafts? Check out these links:

Emotional Painting

Emotional Painting is a paint craft that will help you get your feelings down on paper. Sometimes expressing yourself through art is the best way to share your thoughts.

Are you feeling blue, green with envy, or pretty in pink? Color a self-portrait to match your mood. Don't think about how it will look in the end; just concentrate on putting your emotions into a work of art.

What You'll Need:
  • Newspaper
  • Drawing paper
  • Pencil
  • Watercolor or poster paints
  • Paintbrush

Step 1: Cover your work surface with newspaper.

Step 2: Draw a picture on a piece of drawing paper. Draw the same picture on another piece of paper, or make a photocopy of your first drawing.

Step 3: Now think of warm and cool colors. Warm colors are the colors of fire: red, orange, and yellow. Cool colors are the colors of ice: blue, green, and purple. Think of what the colors would be for opposite emotions such as love/hate, happiness/sadness, and anger/peace.

Step 4: Once you've assigned colors to the different emotions, paint your pictures. Paint one picture in the colors of one emotion, then paint the other picture in the colors of the opposite emotion. Let the paint dry and compare your paintings.

If you paint an 'angry' red painting, the calming, soothing blue painting you paint afterward might just help calm you down.

If you'd like to try a painting style that lets chance do the work, try the Blot Painting activity on the next page.

Looking for more cool paint crafts? Check out these links:

Blot Painting

The Blot Painting paint craft is like looking in the mirror: Whatever goes on the left side of the paper is reflected on the right.

Using this technique is tricky. Don't get too much paint on one side of your paper or you'll end up with one color all over the page. If you place just enough paint on the page and press carefully, you'll get some wild combinations and fascinating shapes.

What You'll Need:
  • Newspaper
  • Construction paper
  • Poster paint
  • Paintbrush
  • Markers

Step 1: Cover your work surface with newspaper.

Step 2: Fold a piece of construction paper in half, then unfold it.

Step 3: Use a paintbrush to dribble small amounts of poster paint on one half of the paper. Refold the paper, and rub it gently. Unfold it and let it dry. Your picture will have blots of color.

To create rainbow-colored blots, mix dots of colors when you dab the paint on the paper. Use markers to draw a design around the blots of color. For example, your blot painting might look like two seals balancing two balls, so draw in flippers on the seals and stripes on the balls.

If you're tired of flat paintings, the next paint craft is for you -- go to the next page to learn how to utilize texture in your paintings.

Looking for more cool paint crafts? Check out these links:

Paint With Texture

When you use the Paint With Texture technique, your bumpy paint will create an effect that will take a regular painting and make it three-dimensional.

It's up to you to decide what kind of textures you want. We've got a list to start with below, but think what else you might be able to put into your paints to make new textures. Every material will produce a different 3-D result.

What You'll Need:
  • Newspaper
  • Textured materials such as sawdust, dry coffee grounds, sand, dried herbs, or washed and crushed eggshells
  • Clean plastic egg carton or small containers
  • Poster paints
  • Pencil
  • Drawing paper
  • Paintbrush

Step 1: Cover your work surface with newspaper.

Step 2: Place small amounts of textured materials, such as sawdust, in sections of the empty egg carton or in small containers. Add poster paint in each section, and mix the textured materials and paint together.

Step 3: Draw a picture on a piece of drawing paper. Paint it in with the textured paint.

Whether you draw a porcupine or a fire truck, your painting can have a 3-D effect when you use this technique. Use plain poster paint to create smooth areas of paint on your picture, too.

Looking for more cool paint crafts? Check out these links:

Advertisement

Loading...