Imaginative Crafts

Stretch and Wreck Cars can be any kind of auto you can imagine.

Imaginative Crafts teach kids to bring their own imaginations to life. Develop artistic skills and encourage playful thought while you and your kids create crafts that you will cherish for years.

Choose a craft that sparks your child's imagination, and join in the activity yourself. You'll be surprised how much fun you can have.

Advertisement

On the following pages, you'll find imaginative crafts that give your kids a chance to express themselves and have fun while doing it.

Opposite Ads Craft

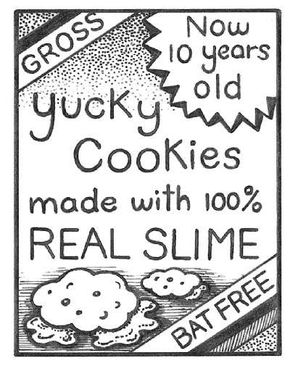
Make outrageous advertisements with your kids for funny products that you dream up together. Learn this imaginative craft.

The Newest State Craft

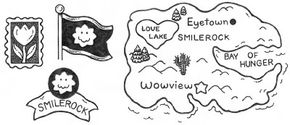
Inspire your kids to dream up their ideal state with this great imaginative craft. Create towns, tourist attractions, a state motto, and more.

Rebus Story Craft

Challenge your kids to tell a story with pictures with the Rebus Story Craft. Get great ideas about new ways to tell stories with this activity.

Big Box Bonanza Craft

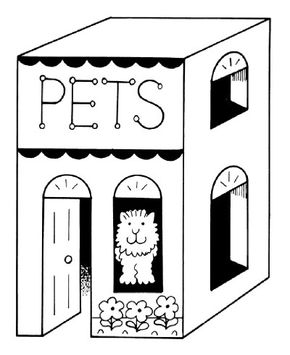
Construct a pretend building with your kids with this imaginative craft. Learn how to turn an ordinary cardboard box into your ideal structure.

Stretch and Wreck Cars Craft

Make crazy cars of all shapes and sizes with your kids with the Stretch and Wreck Cars Craft. Build outrageous autos and then have fun playing.

Giant Dice Craft

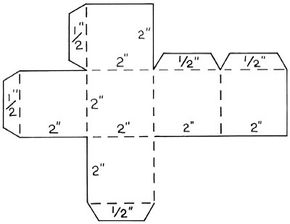
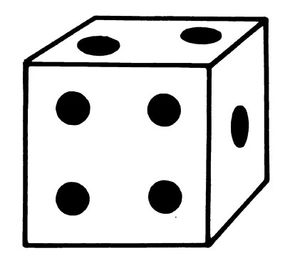
Tired of losing your dice? When you and your kids make giant dice, you'll never have to hunt for them again.

A Grandparent's Story Craft

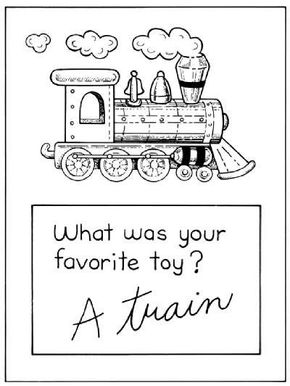
Get the whole family involved in an imaginative craft that you will treasure for generations. Teach your kids how to preserve a grandparent's memories.

Magic Wand Craft

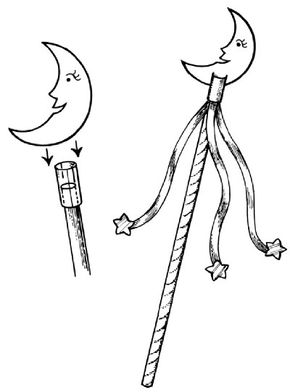
Add some magic to your child's life -- teach them how to make their own magic wand. Get directions on how to make this imaginative craft.

Cut a Castle Craft

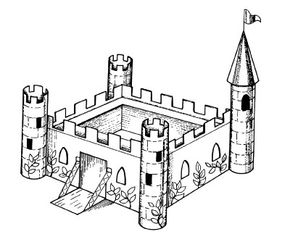
Learn how to make a castle out of a cake box. Stimulate your child's imagination working with them to create a magic kingdom.

Pretend Store Craft

Have a blast with your kids when your make the Pretend Store Craft. Decide what you'd like to sell, make your own money, and soon you'll be open for business.

Design a Menu Craft

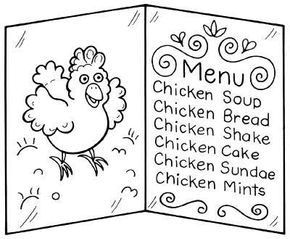
Encourage your kids to design a menu from their imaginations. Would they serve silly food or real food? Find out when you participate in this activity together.

Ready to get started? the Opposite Ads Craft asks kids to dream up silly products and then advertise them. Learn this imaginative craft on the next page.

Looking for more crafts you can make with your kids? See:

Advertisement

Opposite Ads Craft

Dream up absurd products for the Opposite Ads Craft.

When you and your kids make the Opposite Ads Craft, you will make two or three ads for the same pretend product. Then show them to your friends to see which one "sells" your product the best.

How to Make the Opposite Ads Craft

What You'll Need:

  • Drawing Paper
  • Colored Pencils
  • Markers or Crayons

Step One: Think about how would you sell the worst video game, the yuckiest cookies, or the dumbest school. How could you eat, much less sell, computer chip cookies or slimy cookies?

Advertisement

Step Two: Advertisements always have a picture or a photo, writing called copy, and a headline. Invent your own yucky product.

Step Three: Draw a picture and headline for the worst ad, and give your product an awful name. If you don't want to sell something bad, sell something that isn't usually for sale. Sell a field trip, honesty, or a dentist appointment.

If you could live anywhere, what would that place be like? Encourage your kids to let their imaginations run wild with The Newest State Craft. Read about it on the next page.

Looking for more crafts you can make with your kids? See:

Advertisement

The Newest State Craft

The Newest State Craft helps you dream up your ideal place to live.

In The Newest State Craft, you and your kids will invent a state that includes all your favorite things -- skiing, sailing, amusement park cities, and even towns that sell nothing but ice cream.

How to Make The Newest State Craft

What You'll Need:

  • Atlas or Map (for ideas)
  • Drawing Paper
  • Pencil
  • Colored Pencils or Markers

Step One: In order to add the next state to the union, you need to invent it. Look through an atlas to find a state shape you want to copy.

Advertisement

Step Two: Draw the shape on a piece of paper, and make a map of your new state.

Step Three: Name the state and add geographical features. Draw mountains, lakes, shorelines, cities, and the state capitol.

Step Four: Color in your new state. Then draw the state flag, seal, and flower.

Step Five: Now create another state. This time make it as silly and illogical as possible. The state motto can be "We live to ski" or "Fast food kingdom." Think of city names to go with the state theme.

Get great ideas about new ways to tell stories with your kids in the Rebus Story Craft. Learn this imaginative craft on the next page.

Looking for more crafts you can make with your kids? See:

Advertisement

Rebus Story Craft

Can you decifer the code? Once upon a time...

The Rebus Story Craft challenges kids to come up with creative tales. The next time friends come to play, ask everyone to make one rebus story. Then everyone gives their own story to someone else to tell.

How to Make The Rebus Story Craft

What You'll Need:

  • Black Felt-Tip Pen
  • Drawing Paper
  • Markers

Step One: Create a story with pictures for words. You can make up your own story or use your favorite fairy tale.

Advertisement

Step Two: Write your story on a piece of paper. As you write it down, draw certain words, especially repeated words, as a picture. For example, if you wrote a story about a king, you could draw a picture of a crown as the symbol for the word king.

Use the symbols throughout your story.

Step 3: Write and draw a whole story, and bind the pieces of paper together to make a book. (See Mother Moose Illustrated on page 64 for binding instructions.)

Step 4: You can also use a stamp to repeat the pictures over and over instead of drawing them.

The Big Box Bonanza craft teaches you and your kids how to make the building of your dreams out of a cardboard box. Read about this activity on the next page.

Looking for more crafts you can make with your kids? See:

Advertisement

Big Box Bonanza

Make any building you can imagine with The Big Box Bonanza Craft.

The Big Box Bonanza Craft turns an ordinary box into something special. With a little imagination, you can make it into a pretty house or a favorite store.

How to Make the Big Box Bonanza Craft

What You'll Need:

  • Big Appliance Box
  • Scissors or Craft Knife
  • Newspaper
  • Poster Paints
  • Paintbrush
  • Large Piece of Fabric (optional)

Step One: Make your box into a house or store. Have an adult help you cut out windows, shutters, and a door.Step Two: Then cover your work area with newspaper. Paint flowers, bricks, shingles, or a store sign on the box. Add any trims you want to decorate your house or store. Let the paint dry.

Advertisement

Step Three: You can also make a puppet stage for puppet projects. Cut a big opening in one side of the box. Hang a piece of fabric over the opening to make a curtain. Decorate your puppet stage box using poster paints.

Imagine the funniest car you and your kids can dream up, and then make it with the Stretch and Wreck Cars Craft. Learn this craft on the next page.

Looking for more crafts you can make with your kids? See:

Advertisement

Stretch and Wreck Cars Craft

Build your ideal automobile with the Stretch and Wreck Cars Craft.

The Stretch and Wreck Cars Craft encourages kids to create their ideal automobile. Invent a car with a pool in the back seat, or design a futuristic car. Let your imagination go full speed.

How to Make Stretch and Wreck Cars

What You'll Need:

  • Old Magazines and Car Advertisements
  • Blunt Scissors
  • Drawing or Construction Paper
  • Craft Glue ­
  • Markers

Step One: Cut out cars and other vehicles from magazines and ads. Cut the cars into separate pieces.

Advertisement

Step Two: Then mix and match the pieces to make your own imaginary vehicle. Glue the pieces together on a piece of drawing or construction paper. Add more door parts between the front and back of a car to make a "limo."

Step Three: Glue extra-big tires on a small car. Add a bus front to a luxury car back. Glue the different parts together to create crazy stretch and wreck cars.

Step Four: Draw a scene around your vehicle.

The Giant Dice Craft allows you and your kids to create playtime accessories that won't go unnoticed. Find out how to make Giant Dice on the next page.

Looking for more crafts you can make with your kids? See:

Advertisement

Giant Dice Craft

Make your Giant Dice based on this pattern.

After you and your kids make the Giant Dice Craft, no more lost dice. These over-sized cubes are fun to use and hard to lose!

How to Make the Giant Dice Craft

What You'll Need:

  • Pencil
  • Poster Board (at least 8 1/2 x 6 1/2 inches)
  • Blunt Scissors
  • Ruler
  • Markers
  • Craft Glue

Step One: Draw the pattern shown on the poster board. (Make a bigger pattern for larger dice or a gift box.) Be sure to follow the dimensions exactly. Each square is 2 inches on each side; the tabs are 1/2 inch wide.

Advertisement

Step Two: Cut along the solid lines and score on the dotted lines. Scoring makes it easier to fold the poster board. To score, use a ruler to guide the point of your scissors as you "draw a line" along the dotted lines.

Step Three: Decorate the 6 squares. Make dots as on regular dice, or draw numbers, letters, fractions, or shapes.

Paint your dice with dots, or other images. You choose!

Step Four: Make the cutout into a box by folding along the scored lines. Place glue on the tabs and tuck them inside the box to hold it together.

Get the whole family involved with A Grandparent's Story Craft. Teach your kids to preserve their grandparent's memories with the activity on the next page.

Looking for more crafts you can make with your kids? See:

Advertisement

A Grandparent's Story Craft

Make cards with questions for your grandparents to answer.

A Grandparent's Story Craft is a great activity for the whole family. When you combine your drawing with a grandparent's story, you create a generational piece of artwork.

How to Make A Grandparent's Story Craft

What You'll Need:

  • 3 x 5-inch Index Cards
  • Construction Paper
  • Craft Glue
  • Markers or Colored Pencils
  • Hole Punch
  • Yarn
  • Blunt Scissors

Step One: Make a book about your grandparents. Think of a question and write it on an index card. Try to come up with 8 to 10 questions. You can ask questions such as "What was your favorite toy?" or "Where did you live when you were ten?"

Advertisement

Step Two: Have them write the answer on the card. If your grandparents live far away, mail the cards back and forth.

Step Three: Once you have all the cards, glue each one to the bottom half of a sheet of construction paper. Draw a picture above the card to illustrate your grandparent's answer.

Step Four: Decorate a separate sheet of construction paper for the front cover.

Step Five: To bind your book, set all the pages together and punch 4 holes along the left edge. Cut a piece of yarn, thread it through the holes, and tie it in a bow.

Bring magic into your children's life. Teach them to make the Magic Wand Craft. Get directions on the next page.

Looking for more crafts you can make with your kids? See:

Advertisement

Magic Wand Craft

Top your wand with a tin foil ornament.

Make the Magic Wand Craft with your kids, and then watch them play as if they have magic powers. With a wave of the magic wand you can become a magician or even a fairy godmother.

How to Make the Magic Wand Craft

What You'll Need:

  • 2 Yards of Ribbon
  • Blunt Scissors
  • Ruler
  • Craft Glue
  • 24-inch Wood Dowel with 1/2-inch diameter
  • Sequins or Small Jingle Bells (optional)
  • Cardboard
  • Ballpoint Pen or Black Felt-Tip Pen
  • Aluminum Foil
  • Old Paintbrush

Step One: Cut a 24-inch piece of ribbon. Glue one end of the ribbon to one end of the wood dowel. Wrap it around the dowel. Once you reach the bottom, trim off the excess ribbon and glue the end in place.

Advertisement

Step Two: To make the wand streamers, cut a few strips of ribbon with varying lengths. Glue one end of each strip to the top end of the dowel. If you want, add some sequins or small jingle bells to each streamer end.

Step Three: Cut a small strip of cardboard about 1 inch long. Wrap and glue the strip of cardboard around the dowel 1/2 inch from the top end, covering the ends of the ribbons.

Step Four: Have an adult cut two small slits in the cardboard across from each other. Draw and cut out a moon, star, or other magical symbols from the aluminum foil.

Step Five: To stiffen the foil, coat one side with glue and let it dry. Insert the foil shape in the slits. Add a dab of glue to hold it in place.

Make a magic kingdom to go with your magic wand. Read about the Cut a Castle Craft on the next page.

Looking for more crafts you can make with your kids? See:

Advertisement

Cut a Castle Craft

Decorate your kingdom in your favorite colors.

The Cut a Castle Craft is an entertaining creative project for you and your kids. You'll be the ruler of the land in your very own castle.

How to Make the Cut a Castle Craft

What You'll Need:

  • White Cake Box
  • Blunt Scissors
  • 4 Paper Towel Tubes
  • White Paper
  • Transparent Tape
  • Markers or Poster Paints and Paintbrush
  • Construction Paper Scraps
  • Craft Glue
  • Toothpick

Step One: Cut a drawbridge in the side of the clean cake box. Cut out a square from the top of the box. The hole is the opening for the courtyard, and the rim is the base for the battlement.

Advertisement

Step Two: Make four towers from the paper towel tubes. Wrap white paper around the tubes, and secure it with tape. Make a cone for the roof of 1 tower. Tape it to the top of a tube. Tape a tower to each corner of the box.

Step Three: To make the wall around the battlement, cut four strips of white paper into a comb shape. Make them long enough for each side of the box. Tape them around the castle's top edge.

Step Four: Use markers or paint to decorate the castle with windows, vines, and bricks.

Step Five: To make a flag for the castle tower, cut a scrap piece of construction paper in a triangle. Glue it to a toothpick. Insert the toothpick in the top of the cone on the tower, and glue it in place.

If you had a store, what you sell? When you and your kids make the Pretend Store craft, you can sell anything -- real or imaginary. Read about it on the next page.

Looking for more crafts you can make with your kids? See:

Advertisement

Pretend Store Craft

After making the Pretend Store Craft, tell you kids to invite their friends over and have each of them design their own store. Together they can make a mini-mall.

How to Make the Pretend Store Craft

What You'll Need:

  • Ruler
  • Scissors
  • Assorted Colors of Construction Paper
  • Clean Foam Food Trays (from fruits or vegetables only)
  • Markers
  • Shoe Box with Lid
  • Craft Glue

Step One: Have an adult help you with the cutting. Make several different types of stores for your mini-mall. All you need is some play money and a cash register to get started.

Step Two: To make play money, cut several 2 1/2 x 6-inch pieces from green construction paper. Decorate them to make your own dollar bills. Add the amounts -- $1, $5, $10, and even $100. Cut several circles from foam food trays to make the coins. Decorate them with markers.

Step Three: Make a cash register from a shoe box. Cut the lid in half. Use one half as the cash drawer. Place the lid half back on the box, and turn the box upside down. Pull out one half of the lid and place your play money inside.

Step Four: To make the cash register buttons, cut small circles from different colors of construction paper. Write numbers and words such as "Total" and "Void" on the buttons. Glue them to the box.

Step Five: Now you're ready to play store. For a grocery store, gather food cartons and boxes. Collect junk mail for a post office. Use stuffed animals for a pet store. Gather old shopping bags for your purchases. Draw your store's sign on a piece of construction paper.

The Design a Menu Craft turns your family's creative energy to food. Learn how to make this imaginative craft on the next page.

Looking for more crafts you can make with your kids? See:

Design a Menu Craft

Think of real food you would serve, or dream up funny menu items.

The Design a Menu Craft challenges your kids to think creatively about food. Ask them to imagine a restaurant that serves silly food. Then invent a fun menu for the new restaurant.

How to Make the Design a Menu Craft

What You'll Need:

  • Construction paper,
  • markers,
  • black felt-tip pen

Step One: Design a menu for a specialty restaurant. Make it silly with chicken everything -- soup, chicken desserts, and even chicken drinks.

Step Two: Fold a large piece of construction paper in half lengthwise. Write your items on the menu, and decorate it to match your restaurant theme. You can even add outrageous prices for your silly dishes.

Step Three: If you don't want a silly menu, make a real one with your favorite dishes. Use a grocery store circular to cut and paste food pictures on the menu.

Step Four: Play a game of restaurant with your friends. Gather some play dishes, a tray, and an apron. Draw order forms on a piece of paper.

Step Five: Give your friends a menu and take their orders.

Looking for more crafts you can make with your kids? See:

Advertisement

Loading...