Indoor Crafts for Kids

Treasure box
Make a treasure box for your own treasures.
©2007, Publications International, Ltd.

Come inside -- it's time to create! These indoor crafts are simple projects you can use to make toys, games, gifts, and more.

Whether you want to make a plaything for your feline friend or put on a miniature puppet show, you'll find a great idea here. You can do indoor crafts when it's rainy or cold outside -- or when you just feel like making something cool.

Advertisement

Follow the links bellow to learn more about indoor crafts:

Jazzy Jigsaw Puzzle

Make the pieces and put together your own puzzle.

Plastic Spoon Puppets

You'll have spoonfuls of fun with plastic spoon puppets.

Achievement Award

Give a special friend some recognition for accomplishing so much.

Treasure Box

Make this box and store your treasures safe inside.

Pom-Pom Cat Toy

Your handiwork will amuse your favorite animal companion.

Simple Yut-nori

This Korean game is easy to make and fun to play.

Tin Can Luminaries

Illuminate a room with pinpoint patterns of light.

Magnetic Fridge Faces

You can be the star of your own refrigerator magnets!

Cone Creature Craft

An incredible cone creature can be as crazy and creative as you can conceive.

Creative Cards

This indoor craft gives a friendly, personal touch to your greeting cards.

Artful Book Cover

Keep your textbook clean and looking cool with an artful book cover.

Snazzy Scrapbook

Affix your memories to the pages of your own handmade scrapbook.

Dot Collage

The dots collide in this collage.

Stick-in Plant Decoration

Add a cheerful accent to a potted plant.

Keep reading to learn about a jigsaw puzzle you can make yourself.

For more craft activities and indoor fun, check out:

Advertisement

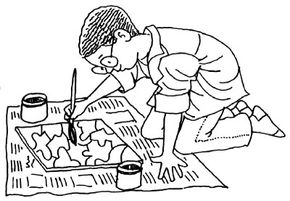
Jazzy Jigsaw Puzzle

Jazzy jigsaw puzzle
Create a jazzy jigsaw puzzle.
©2007 Publications International, Ltd.

Create fun puzzle pieces with this indoor craft for kids. You'll have fun putting your own jazzy jigsaw puzzle back together -- or you can mail it to family or friends as a surprise.

What You'll Need:

  • Thin poster board
  • Pencil
  • Photo, magazine picture, or drawing
  • Glue stick
  • Scissors

Step 1: Cut the poster board to your desired finished size. You may want to start small at first, to practice your puzzle-making skills.

Advertisement

Step 2: Next, cut a photo or picture to the size of the poster board. Glue the photo or picture to the board with the glue stick.

Step 3: On the backside of the poster board, about 1 inch from the left edge, draw a zigzag line from top to bottom with a pencil. Draw a similar line 1 inch away from that, and continue across the board.

Step 4: Now draw zigzag lines from side to side -- perpendicular to the first set of lines -- about 1 inch away from each other. Cut along each line.

Step 5: Turn each puzzle piece face up and put together your own designer jigsaw creation!

Keep reading to learn about some entertaining puppets you can make from a surprising utensil.

For more craft activities and indoor fun, check out:

Advertisement

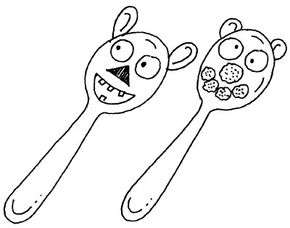
Plastic Spoon Puppets

Plastic spoon puppets
Playful plastic spoon puppets.
©2007 Publications International, Ltd.

A spoonful of fun makes these plastic spoon puppets a real treat!

What You'll Need:

  • Clean plastic spoons
  • Small pom-poms
  • Colored paper
  • Scissors
  • Glue
  • Wiggle eyes
  • Small paper cups

Step 1: Glue pom-poms and colored paper to the bowl of a plastic spoon to create a colorful face. Add wiggle eyes.

Advertisement

Step 2: Cut out paper bunny, puppy, clown, or other ears, and glue them on.

Step 3: Make a miniature puppet theater by cutting a slit in the bottom of a small paper cup.

Step 4: Stick the spoon end down through the cup opening and through the slit. Use the spoon handle to push the puppet out of the cup and perform the show!

The next craft is the perfect way to recognize your friends' achievements.

For more craft activities and indoor fun, check out:

Advertisement

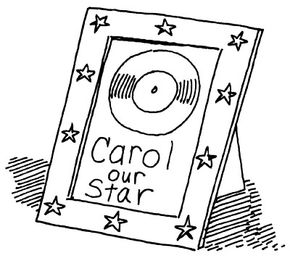
Achievement Award

Achievement award
An achievement award recognizes accomplishment.
©2007 Publications International, Ltd.

When you want to recognize someone for a major achievement, surprise them with this achievement award!

What You'll Need:

  • Newspaper
  • Inexpensive 8 x 10-inch picture frame and cardboard liner
  • Discarded music CD
  • Acrylic gold paint
  • Paintbrush
  • Small game pieces or metal charms
  • Clear gel glue
  • White paper
  • Pencil
  • Low-plush velvet fabric remnant
  • Gold glitter marker
  • Rubber cement

Step 1: Spread out the newspaper and lay the CD and the picture frame on it. (You can use the glass of the frame for some other project -- but set the cardboard liner from the picture frame aside for this one.)

Advertisement

Step 2: Paint one side of the CD and the frame gold.

Step 3: When the frame is dry, use clear gel glue to attach the metal trinkets to the outside of the frame.

Step 4: While the trinkets dry, trace around the cardboard liner on white paper. Cut this out, and use it as a pattern to cut out the velvet.

Step 5: Practice writing on velvet scraps with the gold glitter marker. Plan what to write. Be brief! You will write the name of the person receiving the award first, then the kind of award.

Step 6: Brush the backside of the velvet and the front of the cardboard liner with rubber cement. Then put them together and let dry.

Step 7: Use the rubber cement to glue the CD to the top center of the velvet (be sure there is enough room around the edges to put this piece into the frame).

Step 8: Write the award information on the velvet with the marker. Let the words dry, and put it into the frame. Surprise your super-achieving friend!

Read on to learn about a stylish way to store up your treasures on earth.

For more craft activities and indoor fun, check out:

Advertisement

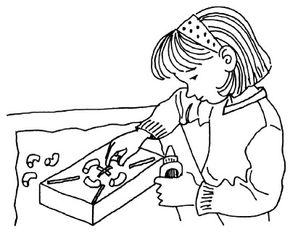
Treasure Box

Treasure box
Make a box for your treasures.
©2007 Publications International, Ltd.

Your treasures deserve to be stored in a special place of their own -- why not keep them in a customized treasure box that you can make yourself?

What You'll Need:

  • Uncooked pasta (wagon wheels, cartoon characters, other shapes)
  • Cardboard school supply box
  • Yarn
  • White glue
  • Gold acrylic paint
  • Paintbrush
  • Glitter markers

Step 1: Play with the pasta shapes on the box and come up with combinations that form interesting patterns or pictures. Do the same with pieces of yarn.

Advertisement

Step 2: Glue the yarn and pasta shapes on the box. Let the box dry for a day.

Step 3: Paint the box gold with the acrylic paint. Let dry for a few hours.

Step 4: Add surface details with glitter markers in contrasting colors. Now fill that sparkly box with treasures!

The next indoor craft is a fun toy for one of your best indoor friends.

For more craft activities and indoor fun, check out:

Advertisement

Pom-Pom Cat Toy

Pom pom cat toy
Make a pom pom cat toy.
©2007 Publications International, Ltd.

It's nice to make crafts for special people, but don't leave out your feline friends! Pom-pom cat toys are fun to make and a riot for Fluffy to play with.

What You'll Need:

  • Solid-color or multicolored scrap yarn
  • Medium-size crochet hook
  • Scissors
  • Cardboard

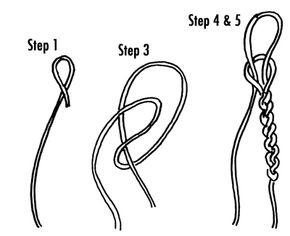
Step 1: Curl one end of the yarn over itself to form a circle. Hold the circle closed with your thumb and index finger. Push part of the long end of the yarn through the circle with your thumb.

Advertisement

Step 2: Pull the loop that is created through the circle with your other hand. Pull tightly so that you form a closed loop. You just made a slipknot! The slipknot will have a short and a long end.

Step 3: Stick the curved part of the crochet hook through the slip knot. Pull the slip knot almost closed around the hook. Wrap the long end of the yarn twice around the index finger of your other hand.

Step 4: Hold the short end of the yarn with the thumb and middle finger of the same hand. With the curved part of the hook, grab a piece of yarn from your index finger and pull it through the slip knot on the crochet hook. Pull slightly so that you form a closed loop. You've made the first link in the chain!

Step 5: Continue making links in the chain until the chain is about 3 feet long.

Step 6: Make a pom-pom by wrapping some yarn around a 2-inch piece of cardboard about 50 times. Pinch the middle of the yarn, and pull it off the cardboard.

Step 7: With the yarn still held flat between your fingers, knot a piece of yarn tightly around the middle. Snip open the "loop" on either side of the middle.

Step 8: Fluff and trim the ends of the pom-pom, but don't trim the long ends of the yarn you used to tie off the middle.

Step 9: Use the long ends to attach the pom-pom to the end of the chain. Twitch the toy left and right, just out of reach of your feline friend. "Here, kitty, kitty, catch me if you can!"

Keep reading to learn about an ancient board game you can make yourself.

For more craft activities and indoor fun, check out:

Advertisement

Simple Yut-nori

Yut Nori, a Korean game
Play a game of yut-nori.
©2007 Publications International, Ltd.

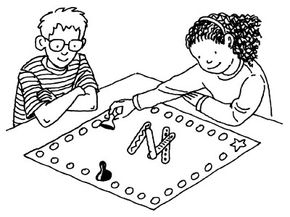
Yut-nori has been popular in Korea for thousands of years. Learn to play this simple game and watch the time fly by!

What You'll Need:

  • Tagboard
  • 4 craft sticks
  • Sticker dots
  • Markers
  • Game pieces

Korean children traditionally play this game between Lunar New Year and the first full moon. But you can play this simplified yut-nori any time you like.

Advertisement

Step 1: To make a board, cut out a square or circle from tagboard. Place the sticker dots in a border around the outside of the square or circle.

Step 2: Designate one dot as the starting place by using a different-colored or different-shaped sticker or by coloring around that dot with markers.

Step 3: Decorate the four craft sticks on one side only.

How to Play: Each player takes a turn tossing the sticks in the air. The player then moves a game piece according to how the sticks land.

  • If all four sticks land with the decorated side up, the player moves four dots.
  • If three sticks land with decorations up, the player moves three dots.
  • Two decorated sticks move the player 2 dots.
  • One decorated stick means 1 dot.
  • But, if all the sticks land blank side up, the player moves 5 dots!

If a player lands on a dot where another player's game piece is resting, the second player must go back to the starting dot. The first player all the way around the board is the winner!

If you enjoy playing simple yut-nori, why not take a trip to the library and look for more information on the game and its place in Korean culture?

You'll learn how you can light up the night with a beautiful pinpoint design in the next indoor craft.

For more craft activities and indoor fun, check out:

Advertisement

Tin Can Luminaries

Tin can luminaries
Light up a tin can luminary.
©2007 Publications International, Ltd.

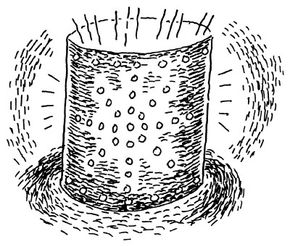
Your lights will twinkle brightly in these luminaries. The designs are made by tapping holes into a tin can with a hammer and a large nail.

What You'll Need:

  • Clean tin cans with labels removed and only one end opened
  • Dark-colored crayon
  • Water
  • Large nail
  • Hammer
  • Metallic copper acrylic paint
  • Paintbrushes
  • Tea candles

Step 1: Decide on a simple outline or drawing to use.

Advertisement

Step 2: Using the crayon, draw the design in the middle of each side of the can. You can also draw a straight line around the bottom and the top for a border.

Step 3: Fill the can with water and set upright in the freezer. Wait for the water to freeze solid.

Step 4: Take the can outside and stand on a concrete stoop or sidewalk. With help from an adult, lay the can on the ground between your feet to hold it in place.

Step 5: Following your crayon pattern on the can, carefully tap holes into the lines of the design by placing the point of the nail along the line and punching it through with the hammer.

Step 6: Continue hammering along outline, and make the holes about 1/4 inch apart. When you are done, dump the ice out.

Step 7: Dry the can, and then let it air dry for an hour or so. Then paint only the outside of the can -- try a metallic copper color. Drop in a tea candle, and admire the glow.

Keep reading to learn a fun way to liven up a fridge with duplicate photos.

For more craft activities and indoor fun, check out:

Advertisement

Magnetic Fridge Faces

Your friends and family will feel mysteriously attracted to the magnetic fridge faces that you make for them.

What You'll Need:

Advertisement

  • Pictures of your family and friends
  • Glue
  • Empty cereal box
  • Scissors
  • Clear adhesive vinyl
  • Small magnet strips

Step 1: Glue photos to the backside of an unfolded, empty cereal box. Let dry.

Step 2: Cut photos or tightly trimmed images of people out of the cardboard. Cover the fronts and backs of the photos with clear adhesive vinyl.

Step 3: Glue magnet strips to the backs of the photos.

Use these steps to make a whole set of your friends or family members, and arrange them in wacky ways. You could make separate, goofy speech balloons for everyone, too. This could make a nice gift for your grandparents.

Keep reading to learn how you can create fantastic creatures from your imagination.

For more craft activities and indoor fun, check out:

Advertisement

Cone Creature Craft

Cone creature craft.
Create a cone creature.
©2007 Publications International, Ltd.

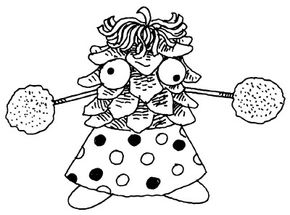
Create a cone creature that's as weird and wonderful as your imagination can make it.

What You'll Need:

  • Table covering
  • Smock
  • Pine cones of various sizes
  • Cotton balls
  • Poster paint
  • Paintbrushes
  • Yarn
  • Chenille stems
  • Fabric scraps
  • White glue
  • Wiggle eyes
  • Glitter glue

Step 1: Cover the table and put on a smock or old shirt.

Advertisement

Step 2: Fill out your pine cone creatures with cotton balls. Paint them any color you like and let dry.

Step 3: Adorn them with yarn for hair, chenille stems for limbs, and fabric scraps for clothes. Don't forget to glue on those wiggle eyes.

Step 4: Top off with touches of glitter glue and let dry. Oh no -- it's the attack of the cone creatures! Better go make some more!

The next indoor craft is a creative way to send your greetings to friends and family.

For more craft activities and indoor fun, check out:

Advertisement

Creative Cards

You'll enjoy making these greeting cards, but you'll feel even more satisfaction sending them to your friends and family. And they make great displays because they stand up on their own!

What You'll Need:

  • Empty cereal box
  • Scissors
  • Old greeting card
  • White paper
  • Pencil
  • Solid-color and coordinating patterned gift wrap that fits the theme of the occasion
  • Glue
  • Scrap paper
  • Markers
  • Glitter glue
  • Ink pads
  • Rubber stamps

Step 1: Cut and unfold an empty cereal box.

Step 2: Open the greeting card and lay it flat on a piece of white paper. Trace around the greeting card, and cut out the shape.

Step 3: Use the tracing as a pattern to cut out one piece each of the cereal box cardboard and the solid-color gift wrap.

Step 4: Fold the cardboard in half, with the printed side on the outside. Glue the solid-color gift wrap to the printed side of the cardboard.

Step 5: Practice writing out the message for the front and the inside on a scrap of paper. Using markers, copy your message onto the front of the card.

Step 6: Fold the white paper in half. Then write the inside message on the inside of the white paper. Glue the white paper to the gray side of the cardboard.

Step 7: Cut out big and small pictures from the patterned gift wrap. Glue them on the front and the inside of the card. Finish decorating the card with glitter glue and rubber stamps and ink pads.

Now admire your handiwork -- then give it away!

Learn how you can decorate important books with your own designs in the next craft.

For more craft activities and indoor fun, check out:

Artful Book Cover

Artful book cover
Make an artful book cover.
©2007 Publications International, Ltd.

Make your history book even more exciting with a little color and your own creativity.

What You'll Need:

  • Textbook
  • Large white paper
  • Pencil
  • Sunday comics, recycled gift wrap, or your own drawing
  • Scissors
  • Clear adhesive vinyl
  • Clear tape

Step 1: Lay the open book on the white paper. Trace around the edges of the book with the pencil, allowing for flaps 2 inches deep all the way around the book.

Step 2: Cut out your pattern. Place the pattern on the gift wrap or other decorative paper. Trace around the pattern and cut out.

Step 3: Peel the backing off a piece of adhesive vinyl that is bigger than the cover. Starting with one end, carefully lay the adhesive vinyl, sticky side down, on the front of the decorative paper. Smooth it out as you go.

Step 4: Cut off the excess adhesive vinyl. Lay the cover face down on the table, and center the book on the cover. Mark, with a black dot, where the corners hit the cover.

Step 5: Cut slits on either side of the spine and tuck those flaps inside the spine. Line up the corners of the front cover of the book with the dots.

Step 6: Fold in the corners first, then fold in the 2-inch side flaps. Repeat for the back cover. Remember to tape the flaps to each other, not the book.

Keep reading to learn how you can store your memories in a snazzy scrapbook.

For more craft activities and indoor fun, check out:

Snazzy Scrapbook

A snazzy scrapbook can showcase awesome vacation souvenirs or share your happy memories with someone.

What You'll Need:

  • 5 x 7-inch autograph book or journal with unlined pages
  • Paper (white as well as solid-color paper)
  • Pencil
  • Scissors
  • Fancy scissors that cut in patterns
  • 1/2 yard of fake fur or other novelty fabric
  • Different colors of felt
  • Markers (regular and glitter markers)
  • Glue (white, multicolored, and glitter glue)
  • Ink pad and stamps

Step 1: Plan a theme for the scrapbook, and choose your supplies accordingly.

Step 2: Open the autograph book, and lay it flat on white paper. Trace around the book (add about 1/4 inch to one side -- you can trim the fabric later if it is too big) and cut out. Use the white paper as a pattern to cut out the novelty fabric.

Step 3: Stand the book up with its pages open. Coat the front and back covers and spine with white glue. Smear a thin coat of white glue on the backside of the fabric.

Step 4: Line up the corners of one side of the book with the backside of the fabric. Press down with a clean hand inside the book. Close the book, press the fabric around the spine and into the grooves, and then press the second side down.

Step 5: Let dry for a day and trim fabric if needed. Meanwhile, using the colored paper, cut out background circles, squares, triangles, etc., for photos or other mementos with the fancy scissors.

Step 6: Decide how you will place the photos inside the book. Cut out other shapes from felt. Play around with the contents of the book until you're satisfied.

Step 7: Glue everything down with white glue. Decorate the inside and cover of the scrapbook with markers, glitter glue, multicolored glue, and ink stamps.

Combine the dots to make a work of art in the next indoor craft.

For more craft activities and indoor fun, check out:

Dot Collage

Dot collage
Design a dot collage.
©2007 Publications International, Ltd.

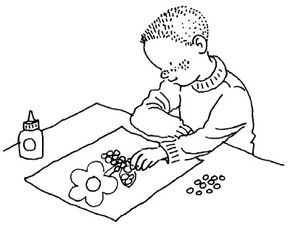
A dot collage will show you a whole new angle on dot-to-dot pictures! Grab a hole punch and some glue and create a dotty work of art with this indoor craft for kids.

What You'll Need:

  • White paper
  • Markers
  • Colored paper
  • Hole punch
  • Glue

Step 1: Draw a picture on a plain sheet of white paper.

Step 2: Punch tiny round dots from sheets of colored paper, using a hole punch. When you punch, hold the colored paper over a different sheet of white paper to catch the dots as they fall.

Step 3: Glue the colorful dots in place on your drawing, leaving as little white as possible without letting the dots overlap. Your finished work will have a bright, unusual look.

Read on to learn how your own decorations can accent the beauty of a plant's leaves and petals.

For more craft activities and indoor fun, check out:

Stick-in Plant Decorations

Stick-in plant decorations
Decorate your plants with this indoor craft for kids.
©2007 Publications International, Ltd.

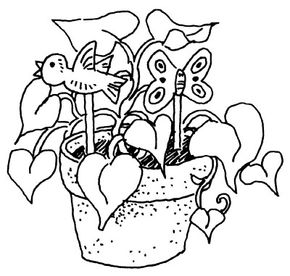
Dress up your plants with stick-in plant decorations. They're an ornamental addition to your own arbor, and they add a touch of whimsy to plants that you're giving to friends or relatives.

What You'll Need:

  • Colored paper
  • Scissors
  • Markers or crayons
  • Glue
  • Craft sticks

Step 1: On colored paper, draw and cut out a butterfly, a ladybug, a bird, or any other design you like. Decorate your designs so they are really special.

Step 2: Glue your paper design to the end of a craft stick (or a clean ice cream stick). The other end of the stick will anchor the paper design in the potting soil.

Step 3: Find a plant in your house that looks like it could use a little decoration, or share these cheerful stick-ins with people who might not be able to get out and enjoy the great outdoors.

For more craft activities and indoor fun, check out:

Advertisement

Loading...