Christmas Activities

Christmas activities for kids, like decorating the Christmas tree, wrapping gifts, and preparing a feast, are just a few of the things that make this holiday season so special. If you want to add a special touch to your gifts, and even to your home this holiday season, why not make your own gifts, games, and decorations from scratch?

In this Christmas activities article you'll learn how to create special Christmas arts and crafts with our simple instructions. Check out the following pages for more on fun Christmas activities and crafts!

Advertisement

Christmas Card Mobile

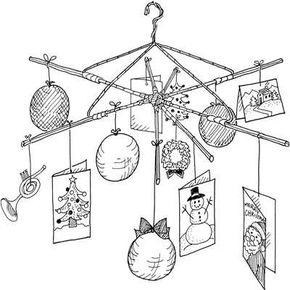
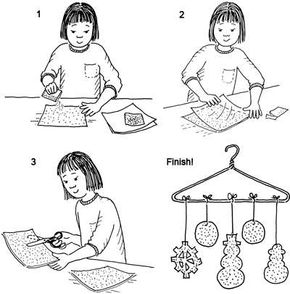
Adults and kids will have to join forces to create the perfect Christmas card mobile that just may be the main attraction this Christmas. Go to this page to learn how to make this home decoration.

Peanutty Pine Cones

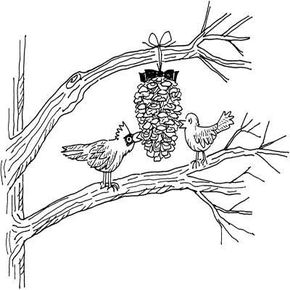
Have fun making these edible Christmas treats and help feed the birds at the same time.

Rainbow in the Snow

In this section, kids will learn how to transform a white yard into an eye-popping colorful yard. All it takes are a few average art supplies and a few items from the kitchen. Learn more now!

Snow Mobile

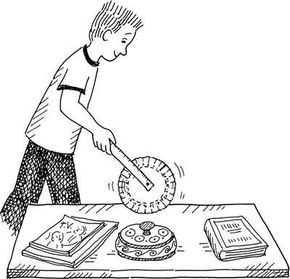
Kids can have their cake and eat it too. Learn how to make a snow mobile and have winter indoors and out!

Christmas Seals

This Christmas activity will help bring families closer together. With mom and dad's help, kids can create their very own homemade Christmas stickers.

Santa's Bag Game

This Christmas activity will keep kids busy as they create their very own homemade Christmas seals.

Santa Salad

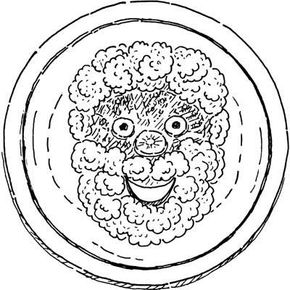
This Santa salad creation will fill the belly and warm the heart. Ask mom for help with this one!

Keepsake Quilts

After making these keepsake quilts, kids can hang them on the door or on the wall and watch them grow year after year.

Puzzle Wreath

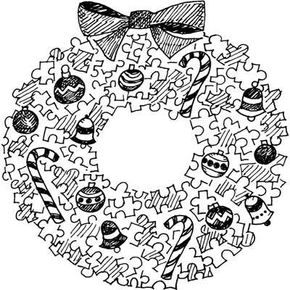
There's something quite puzzling about this Christmas activity. This crafty little wreath is made out of (what else?) -- puzzle pieces!

Soda Straw Loom Bookmark

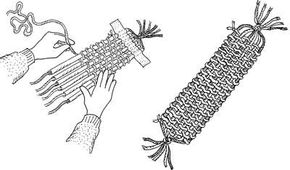
This Christmas activity will teach kids how to make a soda straw loom bookmark for that special reader in their life. Go to this section to get started.

Christmas Card Puzzles

This Christmas activity will keep them guessing. Learn how to make Christmas card puzzles that every family member will enjoy!

Snowy Christmas Cake House

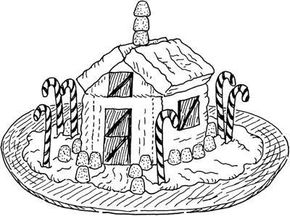
Kids will have a heck of a time making this sweet treat -- and even more fun eating it. Be sure to take a picture before this cake house disappears!

Walnut Brittle

The smell of vanilla and toasty walnuts will fill the air during this delightful Christmas activity. Read this section to learn how to make warm walnut brittle.

Party Mints

Ever wonder how they make those tiny party mints? This Christmas activity will show you how. Go to this page to get started!

Santa Light

Learn how to make a Santa light and brighten up just about any space -- or object -- in the house this Christmas.

Wheel of Measure

This Christmas activity will involve the entire family. Quiz mom and dad about odd facts about the home!

Secret Santa

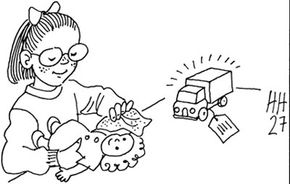
Gather up those old toys and make them new again for your special Secret Santa mission. Read this page to find out how to get started.

"Lighten Up" Nail Decorations

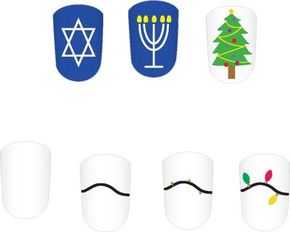
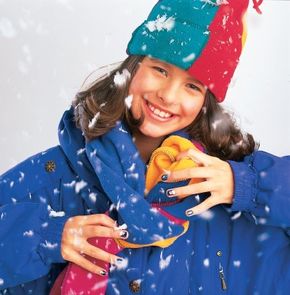
It takes skill and a steady hand to create these nail decorations. Read this page to learn how to paint your nails -- with toothpicks!

"Cool Dude" Nail Decorations

These nail decorations will be a hit with tweens and teens this Christmas. Go to this page to learn how to make the coolest of the cool nail decorations!

Holiday Place Settings

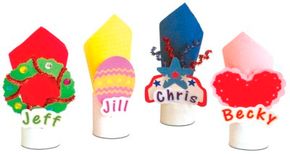
Decorate your holiday table with these festive and easy-to-make holiday place settings.

Caroling Party

Nothing shows Christmas spirit like some good old-fashioned caroling. Host a party centered around singing holiday tunes.

For more fun activities and crafts for kids, see:

Advertisement

Christmas Card Mobile

Christmas Card Mobile Christmas Activity

Don't be afraid to display your Christmas card mobile high above the crowd!

What You'll Need:

Advertisement

2 wire hangers

Red or green colored tape

Plastic drinking straws

Hole punch

Christmas cards

Red or green colored string

Artificial mistletoe

Streamers

Ribbons

Ornaments

Scissors

Ask an adult to help you make the base of this mobile. Insert one hanger into the open part of another hanger so that they form a cross shape. Twist the tops together so that they form one hook. Wind colored tape around the base and the rest of the hangers, if you like.

Tape the straws to the base, so they jut out from the base. Cover the straws with the colored tape. These will be the arms of the mobile from which you hang your decorations.

Punch holes at the tops of your Christmas cards. Thread string through the holes and tie them onto the arms of the mobile.

You can also tie on mistletoe, small ornaments, ribbons -- use your imagination! Vary the lengths of the string, and alternate cards with other decorations. Ask an adult to help you hang your mobile.

In the next section, learn how to put together peanutty pine cones for those brave birds that stayed behind this winter season.

For more fun activities and crafts for kids, see:

Advertisement

Peanutty Pine Cones

Peanutty Pine Cones Christmas Activity

Help feed the birds this Christmas with these peanutty pine cone decorations!

What You'll Need:

Advertisement

Pine cone

String

Scissors

Waxed paper

Peanut butter

Butter knife

Birdseed

Ribbon

Not all birds fly south for the winter! You can help feed them when they might be having a hard time finding anything to eat. This project will not only feed the birds, it makes a pretty decoration hanging from a tree.

Cut a length of string 1 to 2 feet long. Tie the string around the base of the pine cone so that the narrower end hangs down. Place the cone on a sheet of waxed paper. Hold the cone down while you use a butter knife to spread peanut butter over it. Try to cover the whole cone but not the string!

Sprinkle birdseed on top of the peanut butter. Roll the cone around on the waxed paper to get all the birdseed. Tie the ribbon into a bow where the string meets the pine cone. (Try not to get peanut butter on the ribbon.) Holding the pine cone by the string, take it outdoors and tie it to a tree branch.

Once your birds are nice and full, head to the next section to learn how to brighten up a cold winter day. Find out how easy it is make a rainbow in the snow!

For more fun activities and crafts for kids, see:

Advertisement

Rainbow in the Snow

This Christmas season, you can spray paint a colorful rainbow in the snow!

What You'll Need:

Advertisement

Spray bottles

Water

Food coloring

Bucket

Brushes

Are you tired of everything in your yard looking colorless and white? Put some life back into your yard! Fill up empty spray bottles with water. Add a tablespoon of food coloring to each bottle, and shake well.

Make at least 4 or 5 colors. Then dress warmly, and spray paint a nice, big arch in the snow. Add a second arch next to the first one, and keep adding colored arches until you have a giant rainbow. You can also use paintbrushes to paint other things around your rainbow.

Go to the next section to learn how to create a piece of art that will brighten up any home this holiday season. Find out how to make an indoor snow mobile.

For more fun activities and crafts for kids, see:

Advertisement

Snow Mobile

Snow Mobile Christmas Activity

Bring a little winter inside the house this Christmas with a sparkling snow mobile.

What You'll Need:

Advertisement

Silver or white glitter

Clear adhesive vinyl

Scissors

Hole punch

White string or fishing line

White plastic-coated hanger

Tape

Flashlight (optional)

Step 1: Spread silver or white glitter onto the sticky side of a piece

of clear adhesive vinyl paper.

Step 2: Smooth another piece of paper over the top, and press out the air bubbles.

Step 3: Cut the glittered adhesive paper into snowballs, snowpeople, and snowflakes.

Step 4: Punch a hole near the top of each shape, and thread different lengths of fishing line or white string through each. If you use fishing line, your shapes will look like they are floating mysteriously in the air.

Step 5: Tie the other end of the fishing line or string to the coat hanger. Make sure some shapes hang lower than others to make your snow mobile more interesting. To hold the shapes firmly in place, tape the tied ends of the string to the hanger. Hang your mobile in a dark room, and shine a flashlight for some sparkling fun.

Now that your snow mobile is complete, it's time to create some sticky little creations for your Christmas cards. Go to the next page to learn how to make Christmas seals.

For more fun activities and crafts for kids, see:

Advertisement

Christmas Seals

Decorate your Christmas cards with these homemade Christmas stickers.

What You'll Need:

Advertisement

Markers

White paper

Scissors

Mixing bowl

2 tablespoons cold water

1 packet plain gelatin

Fork

3 tablespoons boiling water

1/2 teaspoon corn syrup

Flavored extract (mint, vanilla, or lemon)

Small paintbrush

Draw small Christmas pictures, such as Santa, Christmas trees, elves, snowpeople, candy canes, angels, wrapped presents, and bright stars. Cut out your drawings carefully, getting as close to the edges as you can. When you have finished making your cutouts, pour the cold water into a bowl. Sprinkle the gelatin over it.

With an adult's help, use a fork to mix in the boiling water until the gelatin dissolves. Add the corn syrup and a few drops of extract. With a small brush, paint a thin layer of the gelatin mixture onto the back of each sticker. If you have left over gelatin mixture, place it in a jar in the refrigerator.

When you are ready to use it again, place the jar into a bowl of hot water. (Use mixture within two weeks.) Let the stickers dry. When you are ready to use them, lick the back and press onto the surface you are decorating -- use them to decorate envelopes, cards, wrapping paper, and presents!

You might have to put your thinking cap on for the next Christmas activity. Learn how to make Santa's bag game, and then dive right into the guessing game!

For more fun activities and crafts for kids, see:

Advertisement

The Santa Bag Game

Have tons of fun this Christmas when you make up skits about the objects in Santa's bags -- play Santa's bag game!

What You'll Need:

Advertisement

Assorted small objects

3x5 Cards

Pen

Box that closes

White paper bags

Crayons

Gather an assortment of small objects, such as toy soldiers, small Christmas ornaments, candy canes, and other tiny toys. Make word cards with Christmas words printed on them. Put the objects and word cards in a closed box. Then have everyone decorate a white paper bag. Each person can secretly fill their bag with 3 objects and word cards from the box.

Then close up the decorated bags, and put them in a pile. Divide players into small groups. Each group is given a bag. (Make sure that no one in that group made that bag.) Using the objects and word cards in the bags, the groups must create a skit. They must refer to their object or word by saying it aloud at least twice. Audience members then try to guess which 3 objects and words were in the bag.

After creating so many exciting crafts for Christmas, we're sure you've worked up an appetite by now. Continue to the next page to learn how to make a delicious Santa salad!

For more fun activities and crafts for kids, see:

Advertisement

Santa Salad

Santa Salad Christmas Activity

This cheery vegetable Santa salad will brighten up your Christmas feast!

What You'll Need:

Advertisement

Large tomato slices

Green olives with pimentos

Radishes

Cottage cheese

Plates

Knife

It's easy to put a Santa on every plate at Christmas dinner! Wash all vegetables. Cut tomatoes into 1/2-inch-thick slices, one for each Santa. Have an adult help you with the sharp knife! Slice a few green olives. Lay the tomato slice on a plate and add the green olives for Santa's eyes.

Use a radish slice for his nose, and cut a radish half moon for his mouth.

Carefully spoon cottage cheese on and around the tomato for Santa's hair and beard. You can broil the tomato slices in a toaster oven before you begin. Hot or cold, these Santas are delicious!

Was your Santa Salad tasty? Great! Now it's time to get down to making some good old fashioned arts & crafts. In the next section, learn how to make keepsake quilts.

For more fun activities and crafts for kids, see:

Advertisement

Keepsake Quilts

You can hang up these sentimental keepsake quilts for many Christmases to come.

What You'll Need:

Advertisement

White cardboard

Ruler

Pencil

Scissors

Hole punch

Yarn

Large needle

Markers

Traditional quilts are made by sewing together squares of fabric in a special pattern. Often, the fabric was cut from old clothes and blankets used by family and friends. That way, the person who owned the quilt could sleep surrounded by happy memories of loved ones. You can make a cardboard quilt full of memories by measuring 6x6-inch squares of cardboard and cutting them out.

With a hole punch, punch 3 evenly spaced holes on each side inside the borders of each square. Give a square to family and friends. Have them write holiday messages, draw holiday events, or draw portraits of themselves on the squares. Collect the squares. Thread the needle with yarn, and sew the squares together through the holes you punched.

You might need an adult to help you get started with the sewing. When the quilt is all sewn, hang it in the family room or on the front door of your house. Bring it out each Christmas and add more squares for new family memories.

Continue to the next page to learn how to make a special wreath -- out of puzzle pieces!

For more fun activities and crafts for kids, see:

Advertisement

Puzzle Wreath

Puzzle Wreath Christmas Activity

I'll bet you've never seen a Christmas wreath like this before! When someone asks you what your puzzle wreath is made of, you can say, well ... that's the puzzle!

What You'll Need:

Advertisement

Sturdy 9-inch paper plate

Scissors

Hole punch

Yarn

1 cup white glue

Large bowl

Green food coloring

4 cups old jigsaw puzzle pieces

Mixing spoon

Waxed paper

Small Christmas balls

Small candy canes

Other small Christmas objects

Cut the middle out of the paper plate so that it looks like a wreath. Punch a hole through the top and tie a loop of yarn through it for a hanger. Put 1 cup of white glue in a big mixing bowl. Mix in five drops of green food coloring; mix. Pour in the puzzle pieces, and stir until they are completely covered with green glue. Lay the paper plate on some wax paper.

Put spoonfuls of puzzle pieces on the plate. Arrange them so they look nice. Allow wreath to dry for several days. When the wreath has dried, glue on small Christmas ornaments, candy canes, and other Christmas objects! Hang the wreath on the door to your room, or give it to someone special -- like grandma.

In the next section, we'll show you how to make a neat little bookmark for all of the special readers in your life. Continue to the next page to learn how to make a soda straw loom bookmark.

For more fun activities and crafts for kids, see:

Advertisement

Soda Straw Loom Bookmark

Soda Straw Loom Bookmark Christmas Activity

This Christmas, you can make the perfect gift. Weave a soda straw loom bookmark for that special reader in your life!

What You'll Need:

Variegated (multicolored) yarn

Scissors

6 milkshake straws (the big kind)

Large needle

Masking tape

Cut 6 pieces of yarn. Each piece should be about 5 inches longer than your straws. Use the needle to thread one piece of yarn through each straw. When all the straws have been threaded, tie the tops of all the yarn pieces together. Push the straws up until they touch the knot. Lay the straws on the table, side by side.

Put a piece of tape across the tops of the straws, just under the knot, to hold them in place. Turn the straws over; tape the other side in the same place. Cut another piece of yarn about 6 feet long. Tie one end of the yarn onto a straw, just below the tape. Weave the yarn over one straw and under the next; when you reach the last straw, go back again.

Keep weaving until the whole length of the straws is wrapped in yarn. Tie off the yarn and trim the end. Take off the masking tape. Slide the straws out of the weaving one by one. Push the weaving up to the knot. Tie an overhand knot in the yarn that was in the straws, just below the weaving.

For hours of fun for both kids and adults, continue to the next Christmas activity to learn how to make Christmas card puzzles.

For more fun activities and crafts for kids, see:

Christmas Card Puzzles

This is a great Christmas card puzzle you can make for a little brother, sister, or cousin.

What You'll Need:

Nine 2x2x2-inch wooden blocks

6 large Christmas cards at least 6x6 inches (each must have a different picture)

Glue

Scissors

Sharp craft knife

If your cards are bigger than 6x6 inches, decide which part of the picture you want to be in the puzzle and trim it to a 6-inch square. Lay the blocks together, 3 across and 3 down. Smooth glue across the back of a picture. Make sure it is completely covered. Press it, glue-side down, onto the blocks. Let the glue dry for a few minutes.

Ask an adult to help you use the craft knife to cut the blocks apart. Trim the paper along the edges of the blocks. Turn up 6 blank sides of the blocks, and repeat with a different card. Repeat with the other cards. When you are finished, each side of the blocks will have a Christmas picture on it, and you will have a 6-picture block puzzle!

Did all the puzzle-creating make you hungry? In the next section, learn how to make a snowy Christmas cake house. And yes, you can eat it when you're done!

For more fun activities and crafts for kids, see:

Snowy Christmas Cake House

Snowy Christmas Cake House Christmas Activity

This snowy Christmas cake house is as much fun to make as it will be to eat!

What You'll Need:

Refrigerated pound cake

Knife

Plate

White frosting

Tiny candy canes

Red and green gumdrops

Small thin squares of chocolate

Toothpicks

Ask an adult to help you cut four 2-inch squares of pound cake. Using a plate as the base, put the squares together in a box shape to make the 4 walls of the house. Use the frosting as mortar. Cut 2 more squares to use as the sides of the roof, using more frosting as mortar.

Cut another square in half, and use each half to carefully close up the front and back of the roof. Frost the house with white frosting so it looks snowy. You can make a chimney of three gumdrops on a toothpick, doors and window of chocolate squares, and then add snow (frosting) all around the house. Stick candy canes around the house.

You might want to ask mom and dad to stick around for this next Christmas activity. Go to the next page to learn how to make crunchy walnut brittle.

For more fun activities and crafts for kids, see:

Walnut Brittle

Everyone will want a piece of this delicious walnut brittle candy this Christmas -- so be sure to make a great big batch!

What You'll Need:

1 tablespoon margarine

2 cups chopped walnuts

2 cups sugar

1 teaspoon vanilla

Cookie sheet

Paper towel

Saucepan

Mixing spoon

Hot pad

Grease a cookie sheet with a tablespoon of margarine and a paper towel (or use the margarine wrapper). Evenly spread the nuts over the cookie sheet. Ask an adult to help you melt the sugar in a saucepan over low heat. Stir the sugar until it turns into a light brown syrup.

Remove melted sugar from the stove, and add the vanilla. Stir well. With an adult's help, slowly and evenly pour the mixture over the nuts on the cookie sheet. Let the candy cool until it is hard. Break candy into small pieces before serving.

Ready for more sweet treats? On the next page, we will teach you how to make those colorful party mints that everyone is so fond of!

For more fun activities and crafts for kids, see:

Party Mints

These colorful Christmas party mints are almost too pretty to eat -- we said almost!

What You'll Need:

3 egg whites

7 cups confectioners' sugar

Red and green food coloring

Mint extract

Electric mixer

2 bowls

Waxed paper

Rolling pin

Doll's teacup or thimble

Spatula

Tray

Ask an adult to help you separate the egg whites from the yolks. Put the egg whites into a bowl, and beat them at high speed with an electric mixer. Slowly add the confectioners' sugar as you beat, until the mixture is very stiff.

Divide the mixture into 2 bowls. Use a few drops of food coloring to make the contents of one bowl red and the other green. Stir each well so that the color is even.

Add 3 or 4 drops of mint extract to each bowl, and stir well. Lay a piece of waxed paper on a counter, and put the red mint dough on it. Cover it with another piece of waxed paper; roll it with the rolling pin until it is about 1/4 inch thick.

Take off the top layer of waxed paper, and use a doll's teacup or a thimble to cut out small circles. Use a spatula to lift the circles off the waxed paper. Put them on a tray to dry.

Repeat the process with the green mixture. Let all your mint candies dry overnight. Serve them at your holiday party, and watch them disappear! (Caution: Use only clean, uncracked eggs. If any egg yolk gets into the egg whites, discard and start with new eggs.)

Your Christmas decorations collection wouldn't be complete without a few Santa accessories. In the next section, learn how to make a bright Santa light.

For more fun activities and crafts for kids, see:

Santa Light

Santa Light Christmas Activity

This Christmas, light up the holiday table or a window with this electric Santa light!

What You'll Need:

Paper bag

Pencil

Scissors

Markers

Cotton balls

Glue

Flashlight

Clay

Saucer

Santa hat

Tape

Flatten the bag along its creases and turn it so the opening faces you as you draw the face. Draw the outlines of Santa's eyes, nose, and mouth. Cut them out. Use markers to draw on his eyebrows, eyelashes, lips, and cheeks.

Glue cotton balls on for hair, mustache, and beard. Stand the flashlight (beam facing up) in clay on a saucer. Put the bag over the flashlight, and add a Santa hat to the bag. When the light is turned on, Santa glows.

It's time to put your thinking cap on -- again! The next activity involves some serious measuring and pop quizzes for the entire family. Continue to the next page to learn how to make a wheel of measure.

For more fun activities and crafts for kids, see:

Wheel of Measure

Wheel of Measure Christmas Activity

This Christmas season, get ready to discover some little-known facts about your home. The wheel of measure tells all!

What You'll Need:

Cloth measuring tape

Marker

Stiff paper plate

Ruler with hole at one end

Paper fastener (also called a brad)

Use a cloth measuring tape to mark off the inches around the paper plate. Attach the middle of the paper plate to the ruler with a paper fastener. Run your measuring wheel along any surface to see how long the surface is in inches. Count how many times the wheel goes around from one end of a surface to the other, and multiply by the number of inches you marked on the wheel.

For example, did you mark off 12 inches on your wheel? If a 12-inch wheel goes around 4 times from one end of a table to the other, then the table is 48 inches long. Find out how long or wide things are, and quiz your family and friends.

This next Christmas activity will greatly benefit those in need. Continue to the next page to find out how to prepare your old toys for your very special secret Santa mission.

For more fun activities and crafts for kids, see:

Secret Santa

Secret Santa Christmas Activity

This Christmas, you can become a Secret Santa. Your old toys could be new treasures for someone special!

What You'll Need:

Old toys

Tape

Glue

Cleaning supplies

Ribbon

Construction or notebook paper

Is your room overflowing with toys and stuffed animals you've outgrown? Why not clean them up and give them to children less fortunate? Tape and glue torn game pieces, wash and disinfect soiled action figures, wash older stuffed animals inside a pillowcase in a washing machine.

Attach a friendly little note with ribbon to each toy, and donate them to your local homeless shelter or YMCA. Also, don't forget well-known drives for new toys, such as Toys for Tots, when it comes time to share your spirit of giving!

Know anyone who loves to do crazy things with their nails? In the next section, find out how to "lighten up" nail decorations.

For more fun activities and crafts for kids, see:

Lighten Up Nail Decorations

It takes a very steady hand to paint these 'lighten up' nail decorations!

Let these "lighten up" nail decorations brighten your Christmas holiday. Your nails will sparkle with holiday cheer when you add these flashy lights.

Step 1: Paint nails white, or choose your favorite holiday color. Let dry.

Step 2: Using black paint and a toothpick or the tip of a tiny brush, paint a line curving from nail to nail. Let dry.

Step 3: Using gold metallic paint, paint several small dots touching the line. Make sure to space them evenly so the lights look balanced. Let dry.

Step 4: Using a variety of your favorite bright colors, paint an oval-shaped light bulb on the end of each gold dot.

For more fun ways to paint your nails, continue to the next page to learn how to make "cool dude" nail decorations.

For more fun activities and crafts for kids, see:

Cool Dude Nail Decorations

Your friends will love these creative "cool dude" nail decorations.

These snowy "cool dude" nail decorations give new meaning to the term "frosted nails." This Christmas, let it snow, let it snow, let it snow!

Step 1: Paint nails blue. Let dry.

Step 2: Using white paint to create the snowman's body, paint a large circle that appears to be extending off the bottom edge of the nail.

Step 3: Using white paint, paint a smaller circle (the snowman's head) resting on top of the bottom circle. Let dry. (Repeat steps 2 and 3 if white paint looks streaky.)

Step 4: Using black paint, paint a small square at an angle on the snowman's head. Add a thin line of black paint under the square.

Step 5: Using black paint and a tooth­pick, add 2 small dots for eyes and 4 or 5 dots in a curved line for a smile. (Make sure you leave room for the snowman's nose!)

Step 6: Using orange paint, paint a long, thin triangle that starts just under and between the 2 eyes and comes to a point just beyond the right edge of the white circle.

Step 7: Using red paint, paint a thin red line separating the snow­man's head and body and a slightly thicker line cascading down the left side.

Step 8: Using green paint and a toothpick, add 3 small dots of holly to the hat.

Step 9: Using white paint and a tooth­pick, add several tiny white dots to the blue back­ground to represent snowflakes.

Keep reading to learn how to make your dinner table extra Christmas-y this holiday season.

For more fun activities and crafts for kids, see:

Holiday Place Settings

Holiday Place Settings

Just change the front piece and names on these holiday place settings, and use them again and again.

What You'll Need:

Toilet paper tube (1 or more)

White craft foam or card stock

Card stock: assorted colors

Decorative items: chenille stems, faux gems, stickers

Tools:

Ruler

Craft knife

Scissors

Craft glue

Clothespins

Decorative-edge scissors

Decorative paper punches

Step 1: Help your child cut the tube into several two-inch pieces with a craft knife. Cut as many pieces as you want to make, using more than one tube if necessary.

Step 2: Wrap white craft foam or card stock around each tube section and cut to fit, leaving about 1/4 inch more width than the tube. Cut two slits in the center top of the foam to create a tab about 1/2 inch deep. Below this tab, cut a horizontal 1/2-inch slit.

Step 3: Glue this piece around the tube without gluing the tab or the slit. Hold in place with clothespins until the glue sets.

Step 4: With card stock, decorative-edge scissors, paper punches, stickers, chenille stems, and gems, use your imagination and creativity to design place markers for every season to insert into the top tab.

Step 5: Make name tags on your computer or use markers. Cut around the name, leaving a 1/2-inch tab on the bottom to fit into the horizontal tab.

Everyone will get into the Christmas spirit with the caroling activity you'll learn about next.

For more fun activities and crafts for kids, see:

­

Caroling Party

A musical invitation to a Caroling Party.

Put a little fa-la-la-la-la into your holidays by hosting a children's caroling party.

Invitation

To make a musical invitation, photocopy sheet music (preferably a Christmas carol) on white, green, or red paper. Trim and fold in half, making a card that will fit into a standard envelope.

Add a strip of metallic tape (available at craft and hardware stores) to the outside top and bottom of the card. Include a request for children to bring a grab-bag gift no larger than three inches, costing under $1.

Since your home is already dressed for the holidays, additional decorations are not required. You might consider having the guests trim a small children's tree in the party room while waiting for everyone to arrive.

Purchasing ornaments is not necessary. Cookie cutters, paper cutouts, tissue paper bows, ribbons, cookies, and other items lying around the house make wonderful tree decorations. Tie the ornaments to the tree with ribbon, yarn, or pipe cleaners for a special touch.

Cookie Houses: Beautiful, sturdy little cookie houses can be made using purchased butter cookies, icing (see below for instructions), foil-covered cardboard, and holiday candies. Have whole cookies on hand for the foundations, roofs, and the long sides of the houses.

Cut two square house end pieces from whole cookies for every house you plan to make at the party. Just before the party begins, make the icing by beating two egg whites until stiff. Gradually add three cups sifted confectioners' sugar until the icing is of thick spreading consistency.Cover the bowl with a damp cloth to keep the icing from becoming hard.

To construct the houses, children apply icing wherever the cookies meet, and on the sides and roof to attach candies.

Holiday Calendars: Have children put the finishing touches on their own holiday calendars. The materials for this project include white poster board or heavy drawing paper, a craft knife, a second colored paper, and small or tiny stickers for inside the windows.

Choose a shape for the calendar. Cut a calendar front from white poster board and matching backing from colored paper. Determine the number of windows you will need for the calendar and their size.

Cut along three sides of each window with a craft knife on the calendar front piece. Match the calendar front to its backing and trace the window placement onto the backing. Have the calendars finished to this point before the party.

Using art materials you provide (glitter pens, markers, sequins, and stickers), children decorate the front and inside of their holiday calendars. (Remind the children not to stick their windows closed.)

Carefully match the front to the backing and staple together along the edges for a finished project.

Clothespin Ornaments: Paint clothespins white with acrylic or poster paint before the party. Children transform the clothespins into Santas with basic art supplies (markers, white glitter, cotton balls, red felt dots for noses, and glue). The knob on the clothespin becomes the top of Santa's hat, and the side of the clothespin his face.

Caroling: Since caroling is the centerpiece of the party, make an effort to provide a book containing the words of popular Christmas songs. A simple cover illustration, a bell tied to the book with a ribbon, or fancy lettering make the book of carols an item your guests will want to keep. Sing Christmas carols to instrumental accompaniment, to the tunes on a holiday tape or CD, or a cappella.

Surprise Snowballs: After the guests arrive, take their grab-bag gifts into another room and wrap them into surprise balls/snowballs using rolls of white crepe-paper streamers. Pass the surprise snowballs around the circle of guests toward the end of the party.

Donut Chomp Game: A game of donut chomp will liven the mood of any group. To set up this game, hang donuts on strings or ribbons from a clothesline. The donuts should be hanging at the children's face level. The challenge for partygoers is to eat their own donut off the ribbon with no hands!

Mitten Pairs Game: Mitten pairs is a competitive scored hunt, involves the children searching out hidden pairs of mittens and gloves. The game rule is that once you pick up a glove or mitten you cannot pick up another unless it is the match to the one you are holding. Don't forget to check out the other guests' selection.

Seasonal cookies, drinks (hot cider, hot chocolate, holiday punch), and popcorn balls are great snack foods to serve at this party.

What You'll Need:

2-1/2 quarts popped popcorn

1/2 cup corn syrup

1/3 cup water

1 cup sugar

1/2 teaspoon salt

1/4 cup butter or margarine, cut into pieces

1 teaspoon vanilla food coloring

Candy Thermometer

Step 1: Pour popcorn into large heat-proof bowl; set aside.

Step 2: Combine corn syrup, water, sugar, and salt in medium saucepan. Cook over medium heat, stirring constantly, until sugar dissolves and mixture comes to a boil. Wash down side of pan with pastry brush to remove sugar crystals, frequently dipping brush in hot water.

Step 3: Add candy thermometer. Continue to cook until mixture reaches the hardball stage (255°F). Remove from heat.

Step 4: Whisk in butter and vanilla. Add food coloring, a few drops at a time, until desired color is obtained. Immediately pour sugar mixture over popcorn, stirring until completely coated. Spread popcorn on two large baking sheets.

Step 5: Cool slightly and shape in balls or leave as clusters. Makes about three quarts.

Hint: Remove any unpopped kernels before measuring the popped popcorn.

The Christmas carol book, craft project and grab-bag gift are holiday treasures for every guest. Other favor suggestions include a tape of Christmas carols, cool socks, mittens, hats, and other theme products.

For more fun activities and crafts for kids, see:

ABOUT THE CRAFT DESIGNERSChristmas Card Mobile by Lisa Lerner and Kersten HamiltonPeanutty Pinecones by Lisa Lerner and Kersten HamiltonRainbow in the Snow by Lisa Lerner and Kersten HamiltonSnow Mobile by Lisa Lerner and Kersten HamiltonChristmas Seals by Lisa Lerner and Kersten HamiltonSanta's Bag Game by Lisa Lerner and Kersten HamiltonSanta Salad by Lisa Lerner and Kersten HamiltonKeepsake Quilts by Lisa Lerner and Kersten HamiltonPuzzle Wreath by Lisa Lerner and Kersten HamiltonSoda Straw Loom Bookmark by Lisa Lerner and Kersten HamiltonChristmas Card Puzzles by Lisa Lerner and Kersten HamiltonSnowy Christmas Cake House by Lisa Lerner and Kersten HamiltonWalnut Brittle by Lisa Lerner and Kersten HamiltonParty Mints by Lisa Lerner and Kersten Hamilton

Santa Light by Lisa Lerner and Kersten Hamilton

Wheel of Measure by Lisa Lerner and Kersten Hamilton

"Lighten Up" Nail Decorations by Shari Finger and Susan Tumblety

"Cool Dude" Nail Decorations by Shari Finger and Susan Tumblety

Caroling Party by Michaeline Bresnahan and Joan MacFarlane

Advertisement

Loading...