How to Draw Boats

Drawing boats like speedboats and pirate ships can be easy and fun. Learn to draw all sorts of boats with these simple step-by-step instructions.
Publications International, Ltd.

­­

Drawing can be fun -- and it's not as hard as you may think. One of the secrets of drawing is that any object can be broken down into its smaller parts.

Advertisement

By following these step-by-step instructions, you can use this secret to learn to draw many different kinds of boats. By copying these pictures, you will learn basic drawing skills. You will be able to use those skills to draw other boats ... or even other objects!­

Before you start drawing, there are some basic tools you need. Make sure you have a pencil, a pencil sharpener, an eraser, a felt-tip pen, and, of course, the grid paper where you'll make your drawings.

­Throughout this article, the sketches start with larger basic shapes. Draw the full shape, even if all of it will not be seen in the final drawing. You can erase the part you don't need later.

Each consecutive step adds more detail until you have the finished drawing. The steps are colored to show exactly what to draw when: The drawings for each new step are shown with red lines, while the lines from previous steps are shown in gray.

After all the steps are drawn, use a felt-tip pen to trace the pencil lines. Go over only the lines you need in the final drawing. After giving the felt-tip ink some time to dry so it won't smear, use an eraser to erase the extra pencil lines.

And there's your completed picture! The next step is learning to color the boat.

Start off by using coloring tools that are familiar to you. For example, if you enjoy coloring with crayons, use them. When you get more comfortable with coloring, you can try other methods like colored pencils, watercolor paints, markers, or even colored chalk. Try different techniques on the drawings to see what looks best.

When you are ready to start coloring, pick colors that seem to fit the drawing best. Start by lightly adding the main color to the drawing. Remember to keep the colors light at first -- it is much easier to make a color darker than it is to make it lighter.

After the main color is finished, gently add darker colors to areas on the boat that would be in shadows or less light. Adding colors this way is called shading, and it helps the drawing to look more realistic.

After shading the drawing, add lighter colors where more light would be. This is called highlighting, and it is usually done on the top areas of the shapes in the drawing. Think of sunlight coming down and lighting the boat from above.

Look at the color pictures in the article and try to copy the light and dark shading of the colors. Once you fill in all the colors, your illustration is complete!

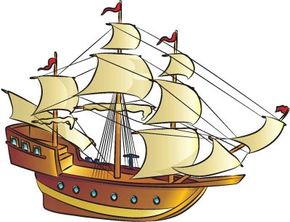
In this article, you'll learn how to draw several different kinds of boats, from submarines to pirate ships. Here's a preview:

See all How to Draw articles.

How to Draw Sailboats

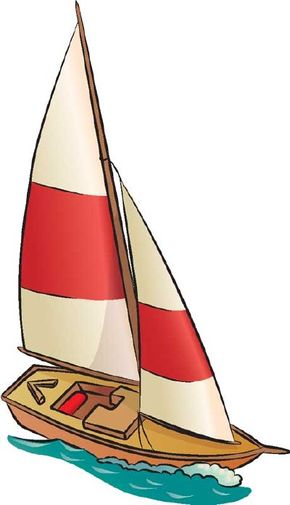
Draw this sailboat using the easy directions on this page.

Sailboats travel far and wide, exploring the ocean and seeking out tropical locales. Use our step-by-step instructions to create your own sailboat scenes.
In this section, we'll show you how to draw the above sailboat. Either draw it freehand while looking at your computer monitor or print out this page to get a closer look at each step.

Advertisement

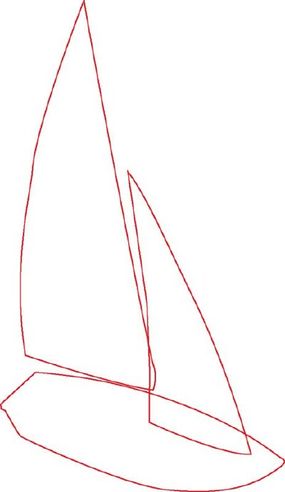
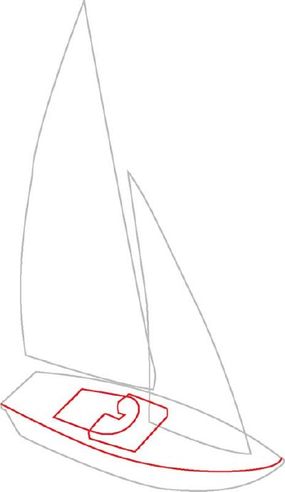
Follow the red lines in each illustration to learn exactly what to draw in that step. The lines drawn in previous steps are shown in gray. Here, we'll show you an illustration of each step and then give you a description of how to draw it.

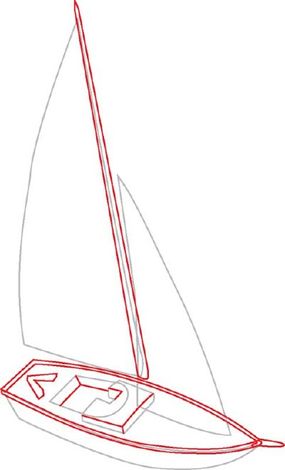
Step 1: Start the sailboat with two big curved triangles for the sails. Add a pointed shape for the hull.
Step 2: Draw a curved line to form the side of the hull. Sketch a rectangle with a rounded end for the seating area. Add a fat bracket shape on top of it.

Step 3: Draw the mast between the sails. Add edge lines following the hull. Sketch a V-shape bar to create deck detail, and add lines for depth in the seating area. Draw a small post on the front of the boat.

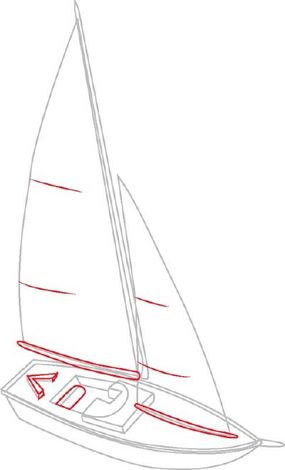
Step 4: Add rectangular crossbars at the bottom of both sails. Draw detail lines on the V shape and in the seating space. Add detail lines to each sail.

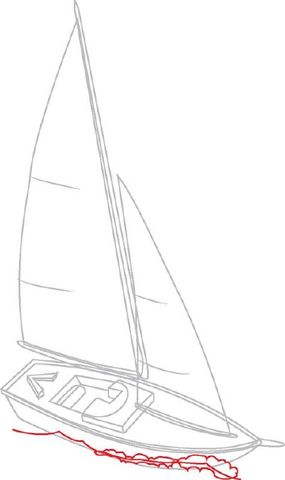
Step 5: Draw wavy lines under the boat for the water.

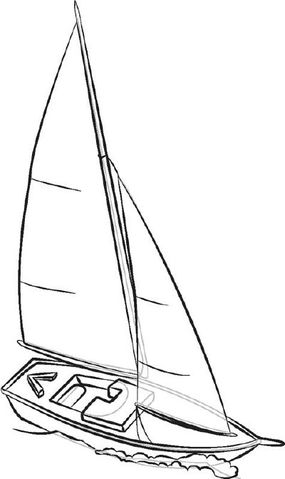
Step 6: Use a felt-tip pen to trace the lines you want to keep. Erase any extra pencil lines.

Explore the ocean's depths with our next drawing project. On the following page, learn to draw a submarine.

Want more help learning to draw? See:

How to Draw Submarines

Draw this submarine with the step-by-step instructions on this page.

Submarines explore the ocean from top to bottom. You can draw these amazing boats with the easy-to-follow directions below.

In this section, we'll show you how to draw the above submarine. Either draw it freehand while looking at your computer monitor or print out this page to get a closer look at each step.

Advertisement

Follow the red lines in each illustration to learn exactly what to draw in that step. The lines drawn in previous steps are shown in gray. Here, we'll show you an illustration of each step and then give you a description of how to draw it.

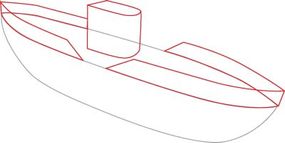
Step 1: Draw a long football-like shape for the main body of the submarine. Add a curved line from one point to the other to create the side of the boat.

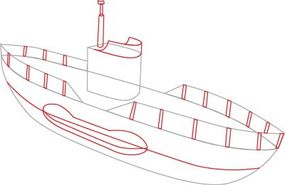
Step 2: Draw a rectangular shape with two curved edges in the center of the deck. Add a curved line toward the top of the shape to create a U-shape block. Sketch four rectangular shapes to create the rails on the edge of the deck.

Step 3: Draw a railing on top of the U-shape block. Add a couple thin cylinders to make the periscope tower on top. Sketch some short bars on the side railings. Use a curved line to split the side of the sub. Add an oblong oval shape on the side, and divide it with a curved line.

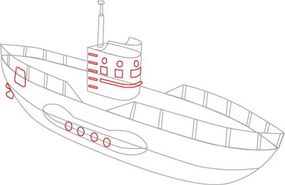
Step 4: Draw circular windows on the sub's side as well as near the top of the U-shape block. Also, add rectangular windows to the block and some thin rectangles for details. Sketch the wedge shapes of the propeller at the back of the sub. Add a hatch rectangle toward the back end of the sub.

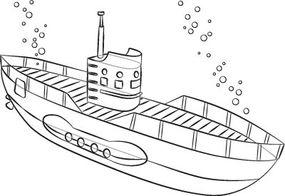
Step 5: Sketch lines cutting across the deck. Add bubbles floating up from the sub.

Step 6: Use a felt-tip pen to trace the lines you want to keep. Erase any extra pencil lines.

What's the next best thing to finding pirate treasure? Drawing the pirate boat, of course! Continue to the next page to learn to draw a pirate ship.

Want more help learning to draw? See:

How to Draw Pirate Ships

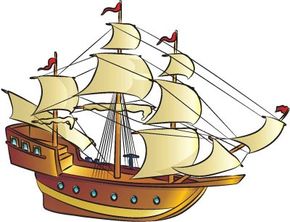
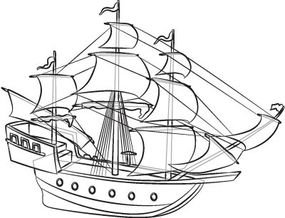
Use the instructions below to draw this pirate ship.

Ahoy, mateys! Use the easy instructions on this page to draw your own pirate ship, in the Caribbean or elsewhere.

In this section, we'll show you how to draw the above pirate ship. Either draw it freehand while looking at your computer monitor or print out this page to get a closer look at each step.

Advertisement

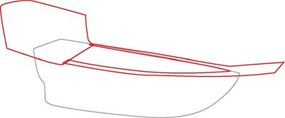
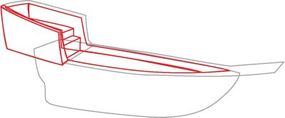
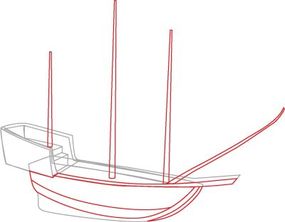
Follow the red lines in each illustration to learn exactly what to draw in that step. The lines drawn in previous steps are shown in gray. Here, we'll show you an illustration of each step and then give you a description of how to draw it.

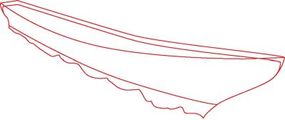
Step 1: Draw the long, triangular main form for the boat.

Step 2: Add an angled shape on the back end of the boat. Draw a line along the side of the boat, and continue it on to form a post coming off the front end of the ship. Bring the line back along the far side of the hull.

Step 3: Outline the back shape and the top of the boat's hull to add depth and create the ship's deck. Use stacked rectangles to add details to the back deck and deck steps.

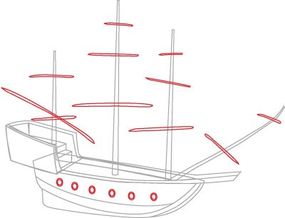
Step 4: Draw three tall masts rising from the deck. Add a fourth mast angling forward from the deck. Draw a long, curved bar that extends to the end of the post on the boat's tip. Use lines to sketch some side beam details on the hull.

Step 5: Sketch long, thin sticks on the masts to create the crossbars. Add six circular porthole windows on the boat's side.

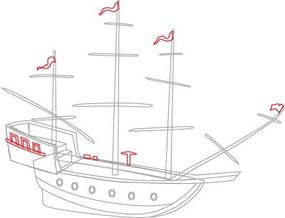
Step 6: Draw three rectangular windows on the back of the ship. Add a long, thin rectangle underneath them to create detail. Sketch flags on each mast. Draw two small wedges and a shape like a pickax on the far side of the deck.

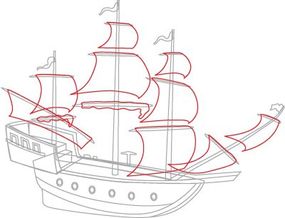
Step 7: Draw sails using the crossbars and masts as guides. The lowest sails on the back two masts are rolled up on the crossbars. To create this look, draw a squiggly-lined rectangular shape.

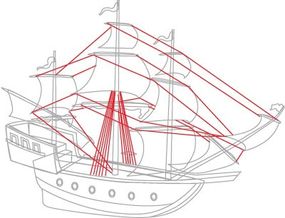
Step 8: Draw lines going from one crossbar to another. Add several lines angling down from the center mast.

Step 9: Trace the pencil lines you want to keep with a felt-tip pen. Erase any extra lines.

Draw a day at the lake with water skiing or maybe a swift race around an aquatic track with our next drawing project. On the next page, learn to draw speedboats.

Want more help learning to draw? See:

How to Draw Speedboats

Use the step-by-step instructions below to draw this speedboat.

Zip through the waters and across the page with our easy-to-draw speedboat. Use the directions on this page to get started.

In this section, we'll show you how to draw the above speedboat. Either draw it freehand while looking at your computer monitor or print out this page to get a closer look at each step.

Advertisement

Follow the red lines in each illustration to learn exactly what to draw in that step. The lines drawn in previous steps are shown in gray. Here, we'll show you an illustration of each step and then give you a description of how to draw it.

Step 1: Start by drawing the pointed main shape of the boat. Add a wedge for the windshield.

Step 2: Draw three long rectangles going from front to back on the boat's side.

Step 3: Sketch a triangle and two rectangles for windows inside the wedge shape. At the back of the boat, add curved shapes for the top of the outboard motor.

Step 4: Draw wavy lines for the water and foamy wake ­coming off the boat.

Step 5: Use a felt-tip pen to trace the lines you want to keep. Erase any extra pencil lines.

With our next project, you can patrol the seas and keep the waters safe. Keep reading to learn how to draw a navy ship.

Want more help learning to draw? See:

How to Draw Navy Ships

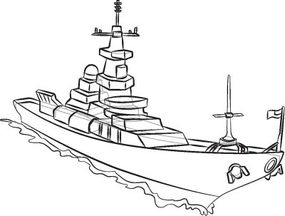
Draw this navy ship with the easy directions below.

Whether your navy ship is patrolling the Pacific or pulling in to the dock, it will be easy to draw with these step-by-step instructions.

In this section, we'll show you how to draw the above navy ship. Either draw it freehand while looking at your computer monitor or print out this page to get a closer look at each step.

Advertisement

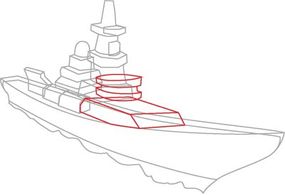
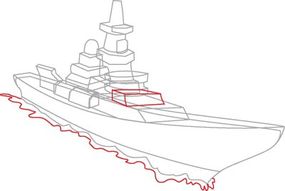
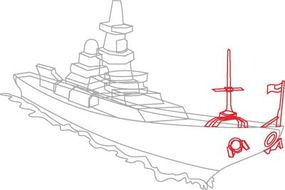
Follow the red lines in each illustration to learn exactly what to draw in that step. The lines drawn in previous steps are shown in gray. Here, we'll show you an illustration of each step and then give you a description of how to draw it.

Step 1: Start with a long banana shape to make the hull of the ship. Outline the lines of the hull to add depth and create the deck. Sketch a wavy line across the side of the boat to create the water level.

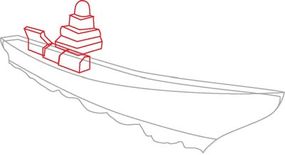
Step 2: Draw stacked geometric shapes toward the back of the boat. Draw a half-oval at the top of the stack. This forms part of the ship's upper structure. (This can be difficult, but just follow the lines shown.) Add a shape jutting up at the back of the deck. Draw lines in it to create dimension.

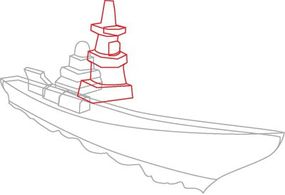
Step 3: Just in front of your first structure, draw some cubes and cylinders on top of each other. (Again, just follow the lines as you see them.) This creates the ship's center structure.

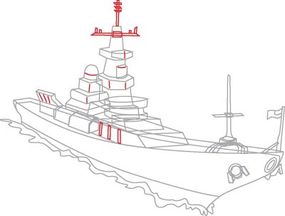
Step 4: Add a long, flat box toward the front of the boat. Sketch a couple of short, fat cylinders on top of it.

Step 5: Draw a smaller box on top of the first flat box. Sketch in some wavy lines to form the waves under the ship.

Step 6: Sketch an antenna at the front of the ship. Add a flagpole next to it. Draw two circles within circles on the boat's sides for windows. Draw small rectangles next to the nearest window to create the anchor detail. Add small rectangles and a wedge shape to the far side of the boat's tip to create an anchor detail there.

Step 7: Finish with some detail lines on the upper structures. Add a crossbar and antenna to the tallest structure.

Step 8: Trace the pencil lines you want to keep with a felt-tip pen. Erase any extra lines.

And you're done! Now that you've mastered our seagoing vessels, you can draw countless scenes of marine exploration.

Want more help learning to draw? See: