How to Draw Planes

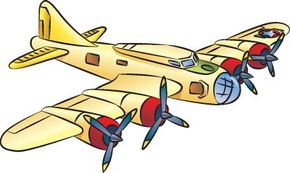
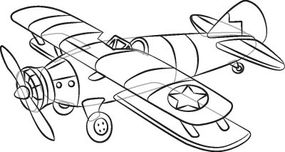
Learn how to draw this World War II plane and other aircraft in this article.

Drawing can be fun -- and it's not as hard as you may think. One of the secrets of drawing is that any object can be broken down into its smaller parts.

By following these step-by-step instructions, you can use this secret to learn to draw many different kinds of planes. By copying these pictures, you will learn basic drawing skills. You will be able to use those skills to draw other planes ... or even other objects!

Advertisement

Before you start drawing, there are some basic tools you need. Make sure you have a pencil, a pencil sharpener, an eraser, a felt-tip pen, and grid paper where you'll make your drawings.

Throughout this article, the sketches start with larger basic shapes. Draw the full shape, even if all of it will not be seen in the final drawing. You can erase the part you don't need later.

Each consecutive step adds more detail until you have the finished drawing. The steps are colored to show exactly what to draw when: The drawings for each new step are shown with red lines, while the lines from previous steps are shown in gray.

After all the steps are drawn, use a felt-tip pen to trace the pencil lines. Go over only the lines you need in the final drawing. After giving the felt-tip ink some time to dry so it won't smear, use an eraser to erase the extra pencil lines.

And there's your completed picture! The next step is learning to color the plane.

Start off by using coloring tools that are familiar to you. For example, if you enjoy coloring with crayons, use them. When you get more comfortable with coloring, you can try other methods like colored pencils, watercolor paints, markers, or even colored chalk. Try different techniques on the drawings to see what looks best.

When you are ready to start coloring, pick colors that seem to fit the drawing best. Start by lightly adding the main color to the drawing. Remember to keep the colors light at first -- it is much easier to make a color darker than it is to make it lighter.

After the main color is finished, gently add darker colors to areas on the plane that would be in shadows or less light. Adding colors this way is called shading, and it helps the drawing to look more realistic.

After shading the drawing, add lighter colors where more light would be. This is called highlighting, and it is usually done on the top areas of the shapes in the drawing. Think of sunlight coming down and lighting the plane from above.

Look at the color pictures in the article and try to copy the light and dark shading of the colors. Once you fill in all the colors, your illustration is complete!

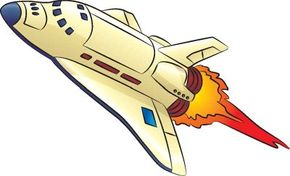
In this article, you'll learn how to draw several different kinds of planes, from biplanes to space shuttles. Here's a preview:

Let's get started! If you'd like to learn how to draw one of the earliest plane types, our first plane is for you. ­

See all How to Draw articles.

­

Advertisement

How to Draw Biplanes

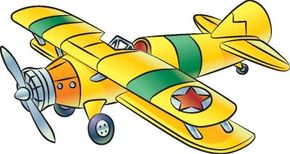
Use step-by-step instructions to draw this biplane.

This easy-to-draw biplane has realistic details that make your drawing authentic. When you've perfected this technique, you can fill the skies with your own air show.

In this section, we'll show you how to draw the above biplane. Either draw it freehand while looking at your computer monitor or print out this page to get a closer look at each step.

Advertisement
Follow the red lines in each illustration to learn exactly what to draw in that step. The lines drawn in previous steps are shown in gray. Here, we'll show you an illustration of each step and then give you a description of how to draw it.

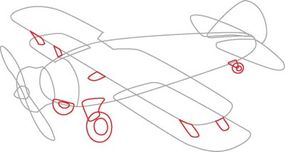
Step 1: Start drawing the plane with a long oval for the main body. Put a short, rounded-off rectangle on both sides of the body to create the lower wings. Add a longer, rounded-off rectangle with a notch in the middle to form the top wings.

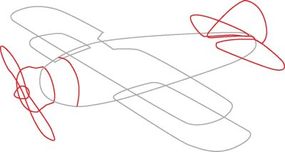
Step 2: Sketch three rounded triangles for the tail. Draw a curved line near the tip of the plane to form the nose. Sketch a doorknob shape at the plane's tip. Add a cone and two long, thin ovals to form the propeller.

Step 3: Sketch a wedge shape at the front and back of the plane to create the wheel supports. Draw three wheels -- one small one under the tail and two larger ones under the wings. Add rectangular support beams from the bottom wings to the top wings and two from the body to the top wings.

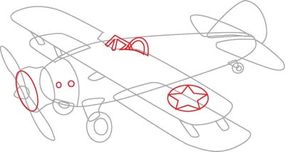
Step 4: Sketch the lines for the windshield at the indented part of the top wing. Just behind that, draw two half-ovals to create the seat. Sketch an oval and some small circles to add detail to the nose. Draw a star inside of a circle on the tip of the top wing.

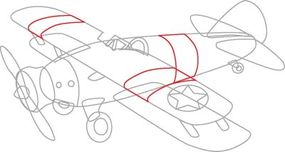
Step 5: Draw wide stripes on the upper wings and midway on the body.

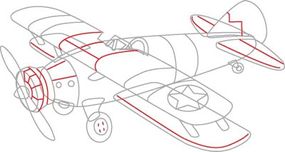
Step 6: Add detail lines on the front wheel, nose, wings, and tail.

Step 7: Use a felt-tip pen to trace the lines you want to keep. Erase the extra pencil lines.

Our next aircraft will take you straight to the moon. Continue to the next page to learn how to draw a space shuttle.

Want more help learning to draw? See:

Advertisement

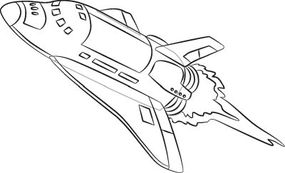
How to Draw the Space Shuttle

Follow the instructions on this page to learn to draw the space shuttle.

Your space shuttle can travel to the stars and visit distant worlds. Use these step-by-step instructions to create your own space-exploration scenes.

In this section, we'll show you how to draw the above space shuttle. Either draw it freehand while looking at your computer monitor or print out this page to get a closer look at each step.

Advertisement

Follow the red lines in each illustration to learn exactly what to draw in that step. The lines drawn in previous steps are shown in gray. Here, we'll show you an illustration of each step and then give you a description of how to draw it.

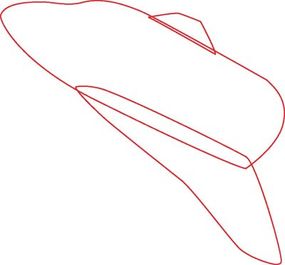
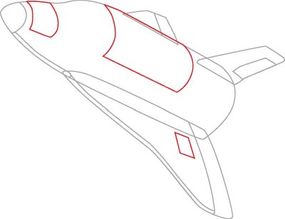
Step 1: Draw the curved shape of the main shuttle body. Add a curved triangle for the forward wing and a wedge shape for the back wing.

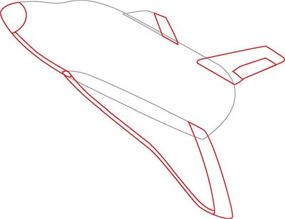
Step 2: Draw a tall wedge shape at the back of the shuttle for the tail fin. Add rectangles on both wings and the tail fin. Outline the closest wing and the closest tip of the nose to add depth. Add a rounded nose cone.

Step 3: Draw two curved rectangles to create the cargo bay doors and a hatch on the nose of the shuttle. Add a rectangle for a hatch detail on the closest wing.

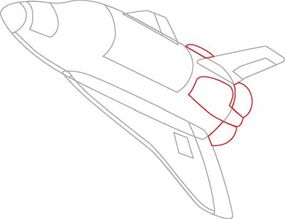
Step 4: Sketch four rounded shapes toward the back of the shuttle for the engine pods.

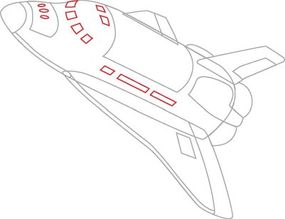
Step 5: Draw rectangles for the cockpit windows as well as hatch details on the body. Add three narrow ovals to the hatch on the nose.

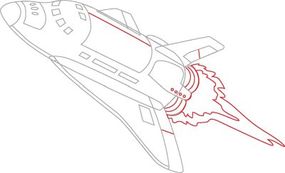
Step 6: Draw line details on the wings, bay door, and fin. Sketch curved lines just beyond the shuttle for the engines. Add some small circles on the engine pod. Draw wavy lines for fire coming out of the engines.

Step 7: Trace the lines you want to keep with a felt-tip pen. Erase any extra pencil lines.

And there's your space shuttle. Keep practicing doing the same drawings -- your new sketches will get easier and easier!

Travel back in time with our next aircraft -- on the next page, learn to draw a World War II plane.

Want more help learning to draw? See:

Advertisement
How to Draw World War II Planes

It's easy to draw this World War II plane.

Draw dogfights in the skies with our World War II plane. The step-by-step instructions below make it easy.

In this section, we'll show you how to draw the above World War II plane. Either draw it freehand while looking at your computer monitor or print out this page to get a closer look at each step.

Advertisement
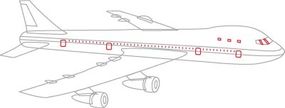
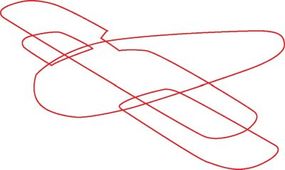
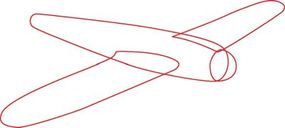
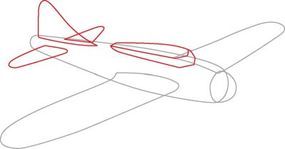
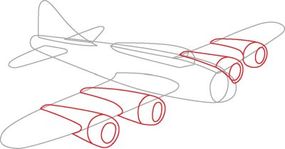
Follow the red lines in each illustration to learn exactly what to draw in that step. The lines drawn in previous steps are shown in gray. Here, we'll show you an illustration of each step and then give you a description of how to draw it.

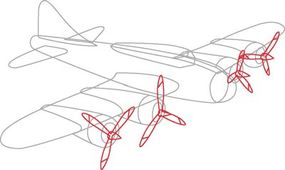
Step 1: Draw a long oval for the body of the plane. Add an oval at the front to make the forward bubble window. Sketch the two long wing shapes.

Step 2: Draw three rounded triangles for the tail. Add a long wedge shape on top of the body for the cockpit.

Step 3: Sketch two cylinders on each wing to make the engines. Add a circle at the tip of each cylinder. Draw a curved line near the front of each engine to add detail.

Step 4: Draw a cone in the center of each engine, and add three long, thin ovals coming from each cone to form the propellers. Add a slanted detail line to the tip of each propeller.

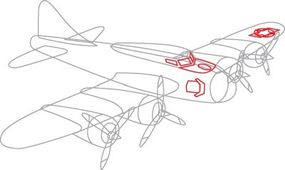
Step 5: Draw windows on the cockpit. Sketch body details in front of the windows. Finish with a long rectangle, circle, and star emblem on the far wing.

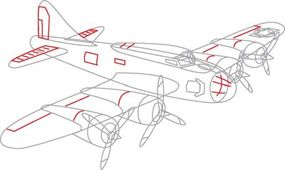
Step 6: Add rectangles to the bottom two tail sections. Fill the rectangles in with lines. Draw a rectangle with a corner missing on the top tail section, and add a smaller rectangle inside it. Sketch line details on the wings, engines, and cockpit. Finish with a couple rectangles for hatches on the body side and some details on the front bubble window.

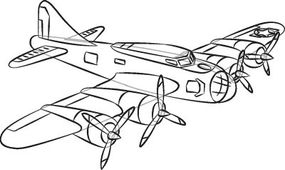
Step 7: Trace the pencil lines you want to keep with a felt-tip pen. Erase any extra lines.

And your World War II plan is finished. You can add more elements -- such as clouds -- to your drawings to make them more exciting.

Our next project is the kind of aircraft we're all most familiar with. On the next page, learn how to draw a passenger plane.

Want more help learning to draw? See:

Advertisement
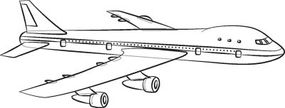
How to Draw Passenger Planes

Follow the easy directions below to draw this passenger plane.

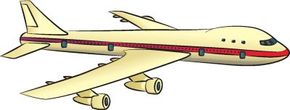
Travel the world in your imagination with this drawing project. Easy step-by-step instructions show you how to draw passenger planes.

In this section, we'll show you how to draw the above passenger plane. Either draw it freehand while looking at your computer monitor or print out this page to get a closer look at each step.

Advertisement

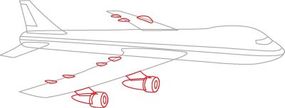
Follow the red lines in each illustration to learn exactly what to draw in that step. The lines drawn in previous steps are shown in gray. Here, we'll show you an illustration of each step and then give you a description of how to draw it.

Step 1: For the main body, draw a long, cylindrical shape with a bump at the top of one end. Add two wings coming off the body at an angle.

Step 2: Draw triangular shapes for the tail section. Add a wedge shape in the top tail fin to create more detail. Draw two lines along the length of the body (curve the lines up a bit at the plane's nose). Add the curved cockpit window.

Step 3: Draw two wedges below the nearest wing. Add bullet shapes and cylinders underneath the wedges. Draw small, rounded cones on the back side of the wing. These are the jet engines. Add two small cones and a half-circle on the far wing to indicate the engines there.

Step 4: Draw four square-shape doors along the side of the plane. Add cockpit windows and small windows along the plane's side.

Step 5: Trace the pencil lines you want to keep with a felt-tip pen. Erase any extra lines.

Hone your drawing skills at Mach 1 with our next project. On the next page, learn to draw a jet.

Want more help learning to draw? See:

Advertisement
How to Draw a Jet

Follow the directions on this page to draw this speedy jet.

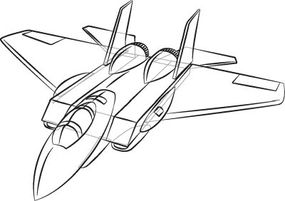
You'll be a real quick draw when you master this drawing project. Follow the easy step-by-step instruction below to draw jets, the fastest of all aircraft.

In this section, we'll show you how to draw the above jet. Either draw it freehand while looking at your computer monitor or print out this page to get a closer look at each step.

Advertisement
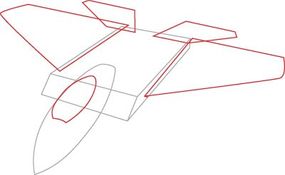
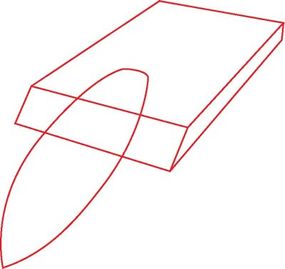
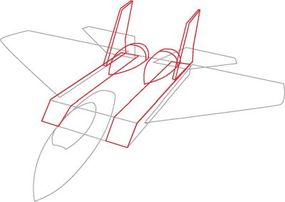
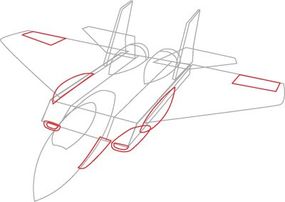
Follow the red lines in each illustration to learn exactly what to draw in that step. The lines drawn in previous steps are shown in gray. Here, we'll show you an illustration of each step and then give you a description of how to draw it.

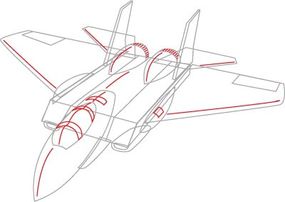
Step 1: Draw a long, flat box form for the body of the plane. Add a long football shape for the cockpit.

Step 2: Sketch the window of the cockpit. Draw two large wedges and two small wedges for the wings and tail.

Step 3: Draw a long rectangle on each side of the plane's body. The rectangles should stretch the entire length of the body. Add two fat bullet shapes at the back to make the engines. Sketch two curved lines for detail. Draw two tall tail fins at the back of the plane. Outline the fins to create depth.

Step 4: Draw two long half-circles on each side of the jet body. Add an air intake on both sides of the cockpit, just under the body. Sketch narrow rectangles on the wings and a curved shape under the cockpit.

Step 5: Draw detail lines on the wings, body, engines, and cockpit. Add some small hatches on the cockpit and on the body near the wing.

Step 6: Use a felt-tip pen to trace the lines you want to keep. Erase any extra pencil lines.

Up, up, and away! Now that you've tried to draw all of our planes, you'll be filling the wild blue yonder with your own works of art.

Want more help learning to draw? See:

Advertisement
Advertisement
Loading...