Christmas Ornaments and Decoration Crafts

Making your own Christmas ornaments and decoration crafts is an excellent way to celebrate the joy of the holidays. Not only is creating your own holiday crafts inexpensive, but it's a great way to personalize the holiday with unique, heartwarming objects you'll treasure for years to come.

Crafting your own holiday decorations is an activity that can be enjoyed by all ages and generations. They are perfect gifts to show the special people in your life how much you care and are sure to be in your family for generations to come.

Advertisement

In this article you'll learn about a variety of craft projects that the whole family can do together to celebrate the Christmas season.

Clove and Citrus Pomanders

These fragrant holiday decorations evoke memories of Christmases past.

Silver Bell Ornaments

It's Christmastime in the city, so get into the spirit by crafting charming sliver bell ornaments.

Stringy Snowperson Sculpture

Not only will you stay warm and cozy while making this adorable snowman, but he'll be around for years to come.

Super Snowman Magnet

Kids will love creating super snowman magnets as they get into the holiday spirit.

International Christmas Ornaments

Add sparkle -- and a charming touch -- to your Christmas tree with international Christmas ornaments.

Pom Reindeer Magnet

Pom reindeer magnets are adorable and easy to make.

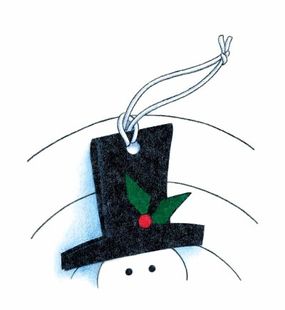
Sensational Spiral Ornament

Add a whimsical touch to your Christmas tree with a sensational spiral ornament.

Stick Wreath

This lovely wreath makes a perfect holiday hostess gift.

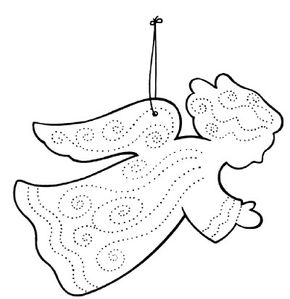
Punch-Out Angels

Create beautiful symbols of the holiday season in just a few easy steps.

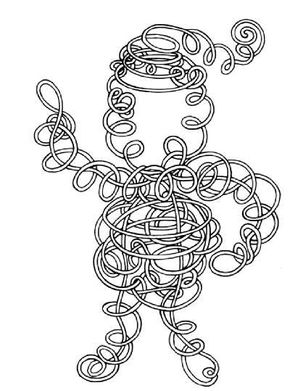
Wire Santa

Spread some Christmas cheer with a jolly old soul.

Pomander Balls

Pomander apple- and spice-scented decorations simply smell like Christmas.

Willow Wreaths

Welcome holiday guests with a beautiful willow wreath on your front door.

Straw Star

Use ordinary drinking straws to create dazzling holiday decorations.

Christmas Pomander

The wonderful scent of this pomander will put you in the holiday mood in no time.

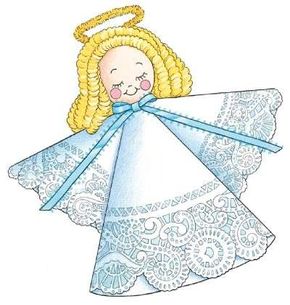
Doily Angel

A doily angel makes a precious tree-topper to be treasured for years to come.

Milk Bottle Snowman

Parents and children can create special holiday memories by making a lovable milk bottle snowman together.

Wintertime Trivets

These trivets will look festive on your holiday table this winter.

Christmas Wreath

Christmas Tree

Put a Christmas tree in every room of your house this winter with this fun and easy craft.

Angel Doll

Bless your house by making and displaying these pretty angel dolls.

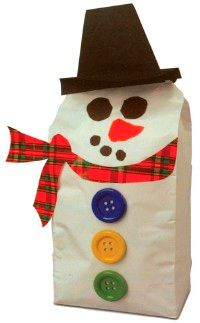
Sassy Snowman

No snow this winter? Don't worry -- with this craft you can still make a snowman.

Christmas Wreath Wall Basket

This wall basket is the perfect place to store your holiday greeting cards.

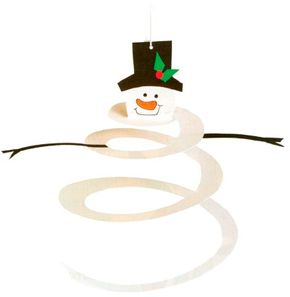
Sensational Spiral Snowman

Here's a whimsical snowman that will surely bring cheer to your house this holiday season.

Pine Cone Wreath

Mother Nature can help you celebrate holidays with this holiday craft.

Christmas Window Decorations

Show your whole neighborhood your Christmas spirit with these window decorations.

Get your holiday crafting off to a sweet-smelling start -- see our easy instructions for making fruity clove and citrus pomanders.

For more fun holiday craft ideas and activities for kids, see:

Advertisement

Clove and Citrus Pomanders

Make clove and citrus pomanders to fill your house with the scent of Christmas.

Clove and citrus pomanders are sweet-smelling, fruity decorations that also make cheery Christmas gifts.

­

Advertisement

What You'll Need:

Oranges or lemons

Thin nail

Cloves

Thin string

Ribbon

Scissors

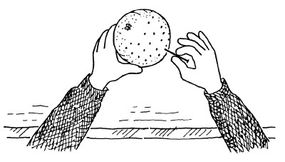
Make small holes in the orange skin with the thin nail, covering the entire orange with holes.

Poking small holes in the orange skin is the first step in making your clove and citrus pomander.

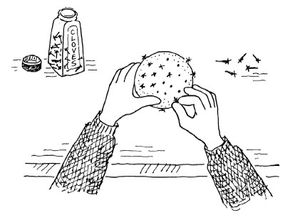
Stick a clove in each hole. If you don't want to cover the whole orange, you can make striped or heart designs on the orange.

Cloves are placed in the holes of the orange.

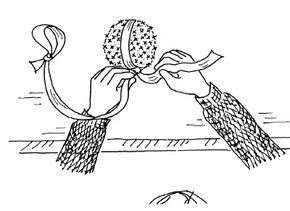
When you have finished your design, temporarily tie a string around the orange, from the bottom to the top, with a loop at the top for hanging. Hang the pomander in a cool, dry place until the orange begins to shrink a bit.

Remove the string when the orange is dry; replace it with a colored ribbon, tied in the same way, with a loop at the top for hanging.

For a variation, use a lemon instead of an orange. Make a whole grove of fragrant pomanders for your family and friends!

Now it's time to ring in the holiday season with silver bell ornaments! With our step-by-step instructions, they're a cinch to make.

For more fun holiday craft ideas and activities for kids, see:

­

Advertisement

Silver Bell Ornaments

Homemade silver bell ornaments make a beautiful tree decoration.

Make your own silver bell ornaments to hang from the Christmas tree.

What You'll Need:

Cardboard egg carton

Advertisement

Scissors

Colored string

Pea-sized wooden beads

Needle

Silver paint

Paintbrush

Ribbon

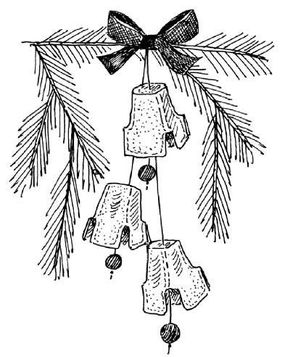
Cut a single egg carton cup for each bell. String a bead on a string, and

secure it with a knot.

Use a needle to poke the free end of the string through the egg carton cup. Knot the end of the string, making sure the bead swings freely inside the egg cup.

When you have made three bells, tie them to a longer string. Paint the bells silver.

Tie a ribbon in a bow around the long string. Hang the ornament on your Christmas tree, and gather the family around to sing "Jingle Bells."

Next, create a snowman without having to go out into the cold. Read our article on making a stringy snowperson sculpture!

For more fun holiday craft ideas and activities for kids, see:

Advertisement

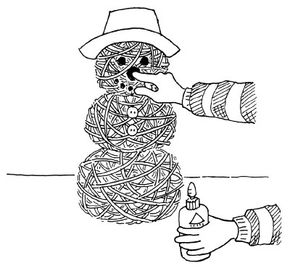
Stringy Snowperson Sculpture

A stringy snowperson sculpture is fun to decorate.

You can actually see through this stringy snowperson sculpture!

What You'll Need:

3 balloons

Advertisement

White string

Scissors

Yardstick

Petroleum jelly

White glue

Paper plate

Waxed paper

Pin

Construction paper

Paper party hat

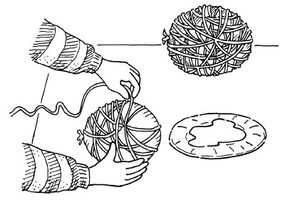
Blow up three balloons. For each balloon, cut 30 pieces of white string between 12 and 15 inches long.

Rub a thin layer of petroleum jelly on each balloon. Pour a little glue onto a paper plate. Dip a string into the glue, and paste it on a balloon.

Continue dipping and pasting the strings in overlapping designs on a balloon. Place on waxed paper to dry. Let glue dry completely, at least overnight. Do the same for the other balloons.

Strings should be glued on the balloon in an overlapping design to create a stringy snowperson sculpture.

When the glue has dried, use a pin to pop the balloons. Cover your ears! Carefully pull out the balloons through a space between the hardened strings. (Promptly discard balloon pieces -- they are choking hazards for small children!)

Tie the three balloons together with more string to make a snowperson shape. Glue on construction paper eyes, nose, mouth, and buttons.

Poke a hole through the top of a party hat, and thread string through it. Tie one end to the top of the snowperson's head before you put the hat on it, and use the other end to hang your snowperson.

Now give the kids their very own project -- a super snowman magnet! See our easy step-by-step instructions in the next article.

For more fun holiday craft ideas and activities for kids, see:

Advertisement

Super Snowman Magnet

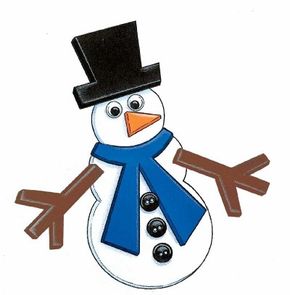
Creating this super snowman magnet is fun and easy!

Create an indoor winter wonderland with whimsical super snowman magnets.

What You'll Need:

Tracing paper

Advertisement

Pencil

Scissors

Craft foam: white, blue, brown, orange, black

Craft glue

2 wiggle eyes, 7mm each

Tweezers

3 black buttons, 7/16 inch each

5-1/2-inch strip adhesive-back magnet

Download the scarf, body, nose, arm, and hat patterns. Trace and cut out the body.

Using the patterns, trace the shapes on the following colors of foam: snowman body on white, scarf on blue, twig arms on brown (make two), carrot nose on orange, and hat on black. Cut out the pieces.

With the craft glue, attach the hat to the snowman's head, the scarf around the neck, the twig arms on both sides of the snowman's upper body, and the nose to the middle of the face.

Use tweezers to help you glue the wiggle eyes above the nose. Glue the buttons down the center of the body.

Peel the backing off the magnet strip, and attach the magnet to the back of the snowman.

In the next article, learn how to create international Christmas ornaments!

For more fun holiday craft ideas and activities for kids, see:

Advertisement

International Christmas Ornaments

Crafting international Christmas ornaments is a fun project the whole family can enjoy doing together.

What You'll Need:

Tracing paper

Advertisement

Pencil

Scissors

Green poster board

Craft knife

Red plastic tape, 3/4 inch wide

Ruler

Hole punch

Craft glue

Glitter

8-1/2X11-inch sheet white paper

Red construction paper

Shiny red and white gift wrap

Download the pattern and trace and cut out the triangle shape. Trace the triangle onto the green poster board four times, repositioning it as shown. Cut out the shape along the outer lines only.

Score the three interior lines with the craft knife. Bend the poster board along the scored lines.

Cut three 6-1/2-inch pieces of plastic tape. Use the ruler and craft knife to cut the pieces in half lengthwise (making six 3/8-inch-wide strips).

Tape the two cut edges of the poster board together, taking care to center the tape along the edge. Trim the excess tape at the bottom and top edges of the cone. Tape the other three edges of the cone. Use the remaining strips to tape around the edge of the cone.

Punch a hole in opposite sides of the cone. Fold a 12-inch length of plastic tape lengthwise, sticky sides together, to make a hanging ribbon. Insert one end of the ribbon in each of the holes and tie an overhand knot on each end inside the cone.

Make a long squiggle of craft glue on one side of the cone. Sprinkle glitter on the glue, then gently knock off the excess glitter. Let dry completely.

Looking for a fun, easy project for the kids? See our instructions for a pom reindeer magnet in the next article!

For more fun holiday craft ideas and activities for kids, see:

Advertisement

Pom Reindeer Magnet

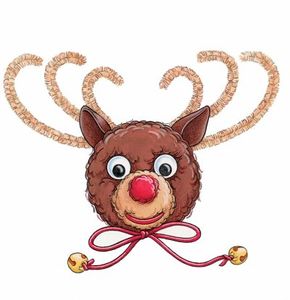
Not only are pom reindeer magnets cute, they're fun to make!

Making pom reindeer magnets is a fun way for kids and parents to get into the spirit of the Christmas season.

What You'll Need:

Poms: 1-inch beige, 2-inch brown, 1/4-inch red

Advertisement

Glue

Felt: 1x1 inches red, 2x2 inches brown

Scissors

2 wiggle eyes, 10mm each

Tweezers

2 beige chenille stems

Ruler

Tracing paper

Pencil

12-inch-length red rattail cord

2 gold jingle bells, 8mm each

3/4-inch strip adhesive-back magnet, 1/2 inch wide

To make the reindeer's head and the muzzle, glue the beige pom to the lower front part of the brown pom. For the nose, glue the red pom to the upper front part of the muzzle.

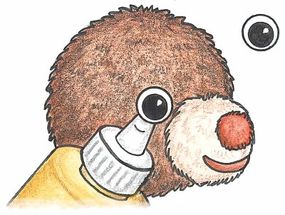
Cut a smiling mouth shape from the red felt, and glue it below the nose. Glue the wiggle eyes to the head so the bottom edges of the eyes touch the top of the muzzle (you may want to use tweezers to help you glue on the eyes).

Wiggle eyes are glued to the brown pom to create the face of the pom reindeer magnet.

Measure and cut one chenille stem into a 5-inch length and a 7-inch length. Cut the other chenille stem in half; you will use only one of the 6-inch lengths, so set the other length aside.

To make the antlers, line up the middles of the three lengths of chenille stem. Twist the stems in the middle to join them together. Arrange the stems so the 7-inch length is on the bottom, the 6-inch length is in between, and the 5-inch length is on top.

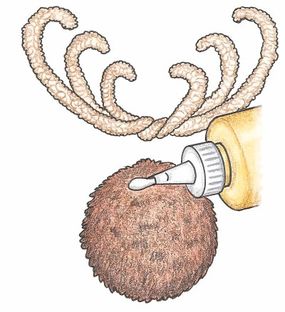
Pinch and curl each of the six ends up to form the antlers. Glue the middle of the antlers to the back of the head.

Chenille stems are curled and glued to create the antlers of the reindeer.

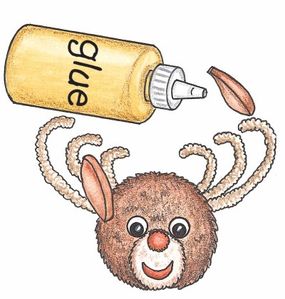
Cut two ears from the brown felt. Apply a dot of glue to the bottom of one ear; pinch the bottom together and hold it for a moment. Repeat this gluing process to make the other ear. Glue the ears to the head just in front of the antlers.

Two small felt ears are glued in front of the antlers.

Tie a bow in the rattail cord. Glue the bow beneath the muzzle. Tie a jingle bell to each end of the rattail cord. Attach the magnet strip to the back of the head.

Ready for another craft project to share with the kids? In the next article, get information on making a sensational spiral ornament!

For more fun holiday craft ideas and activities for kids, see:

Advertisement

Sensational Spiral Ornament

This sensational spiral ornament will surely spread Christmas cheer!

You'll love trimming the Christmas tree with this sensational spiral ornament shaped like a snowman!

What You'll Need:

Tracing paper

Advertisement

Pencil

5x5 inches white card-stock

Tape

Scissors

Black fine-point felt pen

Orange felt pen

Construction paper: 4x4 inches black, 1x1 inch each green and red

Craft glue

1/8-inch hole punch

8-inch length cord

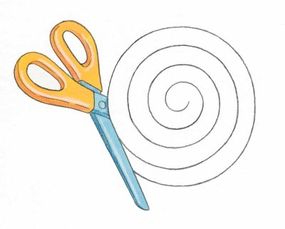
Make a spiral pattern. Tape the spiral pattern to the card-stock, and cut along the lines of the pattern. Remove the pattern.

Cut along the lines of the spiral pattern.

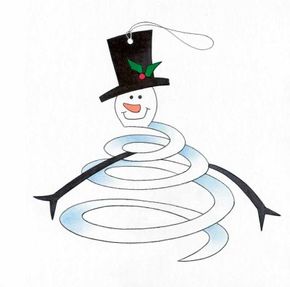
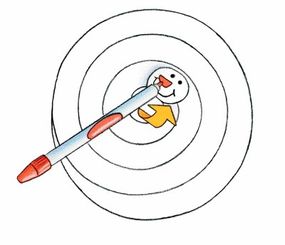
Draw the eyes, nose, and mouth on the head (the center of the spiral) using the black felt pen. Color the nose orange. Fold the head upward.

The face of the snowman is drawn in the center of the spiral and folded upwards.

Create patterns for the hat and arms.

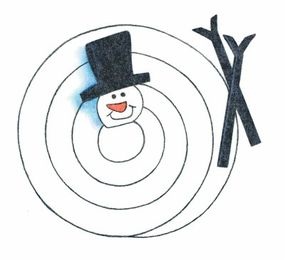
Cut out the patterns for the arm and the hat. Trace around the arm pattern twice on the black paper and cut out. Fold the remaining piece of black paper in half, and place the top edge of the hat pattern along the fold. Trace around the pattern, and cut it out without cutting the fold.

Apply glue to the inside of the hat, and slip it over the snowman's head. Press the hat pieces together, sandwiching the top of the head between. Glue an arm to each side of the first spiral below the head.

After the snowman's hat is glued on, glue on the arms to each side of the spiral below the head.

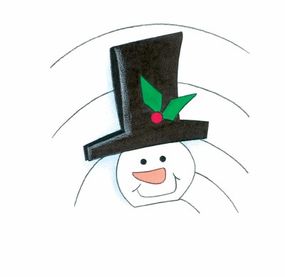
From the green paper, cut out two holly leaves. Use the hole punch to make a red berry from the red paper. Glue the holly leaves and the berry to the hat.

Give the snowman's hat a festive touch with some holly!

Punch a hole in the top of the hat. Fold the cord in half and tie the ends of the cord together. Push the cord loop through the hole, and thread the tied ends of the cord through the loop of the cord. Hang your spiral friend on a Christmas tree or wherever you like!

Punch a hole in the hat and attach a cord to hang your snowman on the tree!

Ready for something a little different? In the next article, learn how to craft a lovely stick wreath!

For more fun holiday craft ideas and activities for kids, see:

Advertisement

Stick Wreath

Hang your natural stick wreath on the front door. It will be a welcome symbol to all who visit your home.

What You'll Need:

10 long, thin branches

Advertisement

Large tub or bucket (to soak sticks)

Silver cord

Dried flowers

Find about ten long, thin branches in your yard. Soak them in warm water overnight. The branches will become soft so that you can bend them.

The next day, twist and braid the branches together in a circle. Overlap several branches around the circle of sticks to secure it. Bring the branch ends together, and overlap them.

Tie a piece of silver cord around the ends to hold the wreath in place. Tie more silver cord in a few spots around the wreath. Tuck dried flowers into the branches.

On the next page, learn how to create a beautiful punch-out angel to hang on your Christmas tree.

For more fun holiday craft ideas and activities for kids, see:

Advertisement
Punch-Out Angels

Brighten up your Christmas tree by crafting a punch-out angel.

When you place your punch-out angel carefully over a Christmas tree light, the magical effect will knock you out.

What You'll Need:

Pencil

Advertisement
Gold or silver craft foil

Blunt scissors

Foam sheet

Push pin

Thread

Draw an angel pattern like the one above on a piece of gold or silver craft foil. Cut the angel shape out. Place the foil angel over a foam sheet.

Use a push pin to punch out lines of swirls in the angel's skirt, feather lines in her wings, a border on her gown, and hair on her head.

Punch a hole in the foil for the hanger. String a piece of thread through the hole and knot the ends to make the hanger loop. Hang the foil angel on your tree near a light for a pretty, shimmery decoration.

Since craft foil comes in many different colors, you can combine the colors in a picture or make punch-out decorations for other holidays as well. Or instead of foil, punch decorations in greeting cards and paper sculptures, too.

Santa Claus is comin' to town! Use your creativity to sculpt our next holiday craft, a wire Santa!

For more fun holiday craft ideas and activities for kids, see:

Advertisement
Wire Santa

It's fun to shape and twist this adorable Christmas decoration.

Twist, wrap, and shape your way into the Christmas spirit by creating a fun wire Santa.

What You'll Need:

Plastic coated wire or green floral wire (both available at craft stores)

Stapler and staples

Cardboard

Start by twisting the wire to make a face and a beard. Remember this sculpture is a bit abstract so you don't need to add a lot of detail.

Next move down to make the neck, arms, and body. First make the line of the body part, such as the arm, then make loopy twists of wire around it.

Continue with the rest of the figure, twisting the wire around to make the legs and boots. Keep looping the wire back and forth, around and around, until the figure has the shape you like.

When you're finished, bend the arms and legs to make an interesting position. To display the wire Santa, staple the figure to a piece of cardboard.

In the next article, learn to turn a plain piece of fruit into a wonderful Christmas decoration. See our instructions for creating fragrant pomander balls!

For more fun holiday craft ideas and activities for kids, see:

Pomander Balls

These traditional spicy-smelling pomander balls make great Christmas decorations or gifts.

What You'll Need:

Small oranges or apples

Marking pen

Nut pick or toothpick

Whole cloves

Ground spices

Saucer

Ribbon

Select a small, firm apple or orange without bruises. Be sure it is a small one, no more than three inches across. (Larger pomanders take a very long time to make and may not dry well.) Use a marking pen to divide the surface up into sections.

Working one section at a time, use a nut pick or toothpick to poke a hole in the skin. Stick the stem of a whole clove into the hole. Do not poke a lot of holes in the skin and then insert the cloves.

Go one at a time so you can see how to fit the cloves together. Be patient. Fill one section at a time, allowing gaps between the cloves. The fruit will shrink as it dries, so the gaps will close up.

When the whole fruit is covered, pour ground cinnamon, cloves, nutmeg, or allspice into a saucer and roll the pomander in it. Allow the pomander to dry in a warm place for two weeks.

Tie ribbons around it and hang up in the kitchen, or give as a holiday gift.

Don't hang a store-bought wreath on your door this year. See how easy it is to make your very own willow wreath in the next article!

For more fun holiday craft ideas and activities for kids, see:

Willow Wreaths

Use weeping willow branches or pussy willows to make lovely Christmas willow wreaths.

What You'll Need:

Willow branches

Scissors

String

Ribbon

Decorations

Ask permission from the owner of the willow tree to cut some branches. When the leaves fall from the willow, have the owner help you cut about 15 of the long, slender branches, each twice as long as you want the wreath to measure around.

Bend one branch to make a circle of the right size. Wrap the long end of the branch around itself, spiraling around the circle. Add more branches, and continue the spiral.

As best you can, lay each new spiral alongside the old one. Keep going until you have used up all the branches you cut. Tie string around the wreath in four places to hold the branches in place. Set the wreath aside to dry for two weeks.

When dry, cut off the string and wrap the wreath in ribbon, spacing each turn of the ribbon a few inches apart. End with a large bow.

Decorate the wreath with natural decorations such as pine cones, acorns, or dried flowers; or use bright Christmas balls, wooden cutouts, tiny toys, or other ornaments suitable for the season.

Next, learn how to turn ordinary drinking straws into spectacular Christmas decorations! See our instructions for making a straw star.

For more fun holiday craft ideas and activities for kids, see:

Straw Star

Weave straws together for glittering straw star Christmas decorations.

What You'll Need:

2 plastic drinking straws

Scissors

String or yarn

Craft glue

Glitter

Who knew ordinary drinking straws could become glittering holiday stars? It's true -- they can be works of art.

Cut the straws in half; be sure the halves are even. Take a long piece of string or yarn in your hand, at least 18 inches long. Criss-cross four straw halves so they are in a star pattern, then wrap the string around the middle of the pieces, being careful to keep the string tight in the center.

Weave around the straws at the middle, pulling the straws slightly apart as you weave to keep the arms of the star separated. Once you've made the weave secure, knot the string, leaving a little dangling as a hanger.

Spread glue on the straw star, and sprinkle it with glitter. Now make enough stars to decorate your house for the holidays!

Next, learn how to make a wonderfully scented Christmas pomander!

For more fun holiday craft ideas and activities for kids, see:

Christmas Pomander

Make a fragrant Christmas pomander, and fill the air with sweet-smelling spicy cheer.

What You'll Need:

Orange

Whole cloves

Dish

Pointed wooden toothpicks

Ribbon

Pomanders are made by gathering good-smelling herbs, spices, or other things into a cloth bag or small box, or by studding an apple or orange with spices.

Spicy pomanders can be hung in hallways or on Christmas trees, or they can be set on tables for Christmas decorations. (People also use pomanders in drawers or closets to add a good smell to clothing or linens.)

Make a scented holiday pomander by inserting whole cloves into an orange. Set the cloves out in a dish so they'll be easier to pick up. Use the toothpicks to make holes in the orange skin.

Insert the stick-end of the cloves into the holes. Push each clove in all the way so the clove top sits right on the orange skin. Add cloves until you're happy with the way it looks.

Wrap a colorful ribbon twice around the studded orange. Knot the ribbon on the top. Then make a loop with the ribbon ends so the pomander can be hung. (You can also use a lemon for the pomander.)

Looking for more Christmas craft ideas? In the next article, learn how to make a precious doily angel!

For more fun holiday craft ideas and activities for kids, see:

Doily Angel

A homemade doily angel makes an extra-special Christmas gift.

Making a doily angel will create magical Christmas memories for the little ones.

What You'll Need:

2 pieces white felt, 9x12 inches each

Scissors

Ruler

Low-temperature glue gun

Glue sticks

White paper doilies: one 12 inch, one 8 inch

2-inch hard-pressed foam ball

Sandpaper

Acrylic paint: beige, pink

Paintbrush

Craft glue

Mini curl blond hair

Black permanent felt-tip marker

Gold tinsel chenille stem

12-inch length light blue picot satin ribbon, 3/8 inch wide

*Note: Adult help is needed.

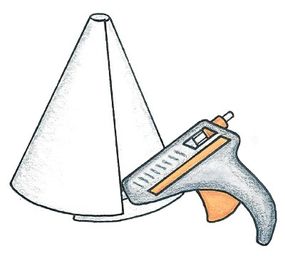
Create a pattern like the one below to cut an angel dress out of white felt. Roll the felt dress into a cone shape, overlapping the straight sides two inches on the bottom of the dress and 1/2 inch at the neckline. Glue the overlapped edges together.

The first step in making a doily angel is to create the dress with white felt.
Next, roll the doily angel's dress into a cone shape and glue the overlapping edges.

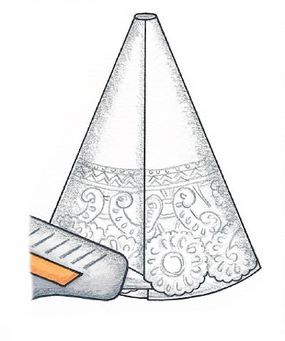
Cut the 12-inch doily in half; discard the other half. Trace just the neckline of the dress pattern on the doily. Trim away the doily above the neckline. Wrap the doily around the felt dress, overlapping the straight edges at the back. Glue in place. Use a few drops of glue to attach the doily to the felt dress at the back.

The doily is attached to the felt dress after it is trimmed.

Use an angel wing pattern like the one below to cut an angel wing out of white felt. Roll the felt wing into a cone shape, overlapping the straight edges one inch at the bottom of the wing and tapering to a point at the top. Glue in place. Cut the 8-inch doily in half; set the other half aside.

Create the doily angel's wings using white felt and a pattern like this.

Wrap the doily around the wing, overlapping the straight edges at the side seam; glue. Use a few drops of glue to attach the doily to the felt wing at the side seam. Apply glue to the side seam of the wing and place it at the side of the dress. The top point of the wing should be even with the dress neckline. Repeat with the second wing.

To make the angel's head, lightly sand the foam ball. Paint the ball with two coats of beige; let dry. Using the glue gun, apply glue to the neckline of the dress and place the head into the glue.

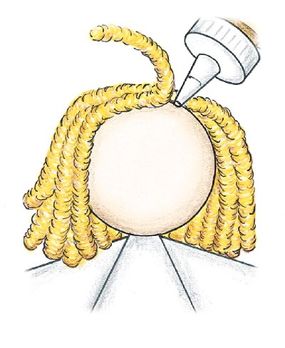
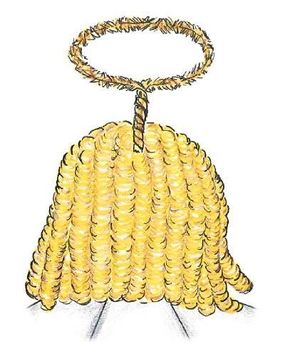
For hair, apply craft glue to the top, sides, and back of the head. Gently fluff the mini curl hair, and place it into the glue, slightly overlapping the curls. Spot-glue and add more hair as needed. Paint the angel's cheeks pink; let dry. Use the marker to draw the eyes, eyebrows, nose, and mouth.

Blond hair is glued on the doily angel's head.

For the halo, make a 2-inch-diameter circle in the middle of the tinsel chenille stem. Twist the ends together. Add craft glue to the twisted ends, and insert into back top of the angel's head. Tie the ribbon into a bow, and glue to the center front of the neckline.

Create the doily angel's halo from the tinsel chenille stem.

Do you want to make a snowman that won't melt? Try our easy milk bottle snowman in the next article!

For more fun holiday craft ideas and activities for kids, see:

Milk Bottle Snowman

Create a milk bottle snowman for an

A milk bottle snowman is as cute as a button and makes the perfect Christmas craft for kids.

What You'll Need:

Plastic milk bottle, empty and dry

Blue fleece: one 6-inch square, one 1-1/2x12-inch piece

Scissors

Low-temperature glue gun

Glue sticks

1-inch white pom

Brown chenille stem

3 buttons

Orange craft foam

Black permanent felt-tip marker

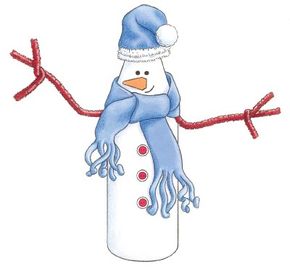
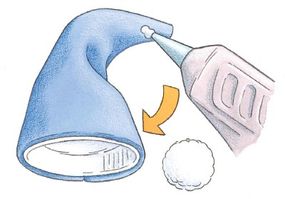
Remove the cap from the bottle. Glue the bottom edge of the 6-inch square of fleece around the edge of the bottle cap to create a hat; cut off any excess fleece. Glue the back of the hat closed. Bend down the top of the hat, glue it off to the side, and add the pom.

Fleece is glued around the milk bottle cap and a pom is added to the top of the snowman's hat.

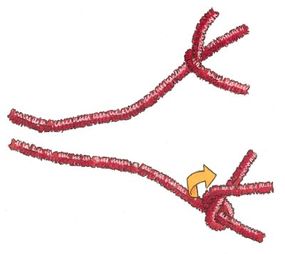
Cut the chenille stem in half. Cut two inches off each half, and wrap each 2-inch length around each end of the chenille stem to make hands. Bend the arms, and glue to the sides of the bottle.

Smaller chenille stems are wrapped around larger ones to create the milk bottle snowman's arms and hands.

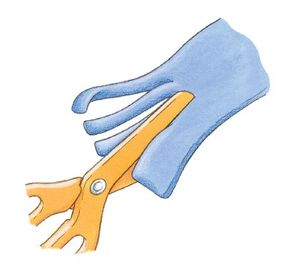
Cut fringes into the ends of the 1-1/2x12-inch piece of blue fleece to make the scarf. Wrap the scarf around the snowman's neck, and glue in place.

The milk bottle snowman's scarf is created by cutting fringes into the fleece.

Glue the three buttons down the center of the snowman body. Make a triangle nose out of orange foam; glue in place. Draw eyes and a mouth with permanent marker. Fill your snowman with treats, and replace the bottle cap.

Note:

Bottles that are not thoroughly cleaned can become sour, but dishwasher cycles can warp and melt plastic bottles. For best results, use a bottle brush to scrub bottles with soap and hot water.

On the next page you'll learn to build festive holiday trivets for your table.

For more fun holiday craft ideas and activities for kids, see:

Wintertime Trivets

Wintertime Trivets

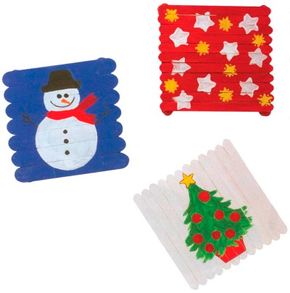
This "hot" project makes a perfect gift for the special person who serves all your favorite meals. Create a wintertime trivet like any of the ones shown, or choose your own design.

What You'll Need:

14 regular craft sticks or 9 mini jumbo craft sticks

Acrylic paint: assorted colors

4 wooden beads, 12mm each

Small stamps or compressed sponge cut into stars (optional)

Clear gloss acrylic spray

Craft glue

Paintbrush

  1. Line up 12 regular craft sticks or seven mini jumbo craft sticks alongside each other.
  2. Using regular sticks with regular sticks, or mini jumbo with mini jumbo, glue a craft stick horizontally across the top and the bottom of the lined-up group.
  3. Paint the top of the trivet. Let dry, then paint the bottom the same color. Let dry. If necessary, apply a second coat.
  4. Paint four wooden beads the same color as the trivet. Glue one bead at each end of the horizontal craft sticks to create four feet. Let dry completely.
  5. Paint or stamp a design on top of the trivet.
  6. With adult help, spray acrylic sealer over the surface to protect the finished trivet.

Continue reading to learn how to make a cool Christmas wreath.For more fun holiday craft ideas and activities for kids, see:

Christmas Wreath

Christmas Wreath

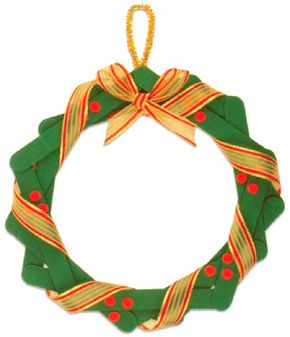
Holly berries and a pretty ribbon turn this Christmas wreath into a holiday masterpiece.

What You'll Need:

15 jumbo craft sticks

Green acrylic paint

4 feet Christmas ribbon

Red craft foam

Gold metallic chenille stem

Craft glue

Paintbrush

Tape measure

Scissors

Paper punch

  1. Arrange and glue five jumbo craft sticks in a pentagon (a five-sided shape). Repeat two more times for a total of three pentagons. Let the glue dry, and paint the front of each pentagon green. Let dry.
  2. Glue the pentagons one on top of the other, each turned slightly so each corner is visible. Let dry.
  3. Cut three feet of ribbon, and wrap it loosely around the wreath. Secure in place with a drop of glue at the beginning and the end. Tie the remaining ribbon into a bow, and glue it to the top of the wreath.
  4. Punch 18 circles out of red craft foam, and glue them to the wreath in groups of three.
  5. Cut the chenille stem in half; discard one piece. Bend the remaining piece in half, and glue the ends to the top of the wreath, behind the bow, to form a hanger.

If you like Christmas trees you'll love the next craft. Keep reading.

For more fun holiday craft ideas and activities for kids, see:

Christmas Tree Ornament

Christmas Tree

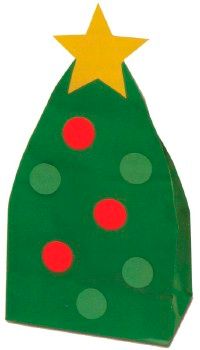
Decorate this Christmas tree with paper "ornaments," or glue on poms, beads, or stickers -- pretty much anything goes.

What You'll Need:

Green paper bag

Colored paper: green, red

Newspaper

Shiny gold paper

Scissors

Craft glue

Pencil

  1. With the bag flat on your work surface, trim the sides into the shape of a tree, starting the curve halfway up both sides and gradually bringing them to within one inch of each other in the center.
  2. Cut out green and red circles, and glue them to both sides of the bag.
  3. Stuff the bag loosely with a crumpled sheet of newspaper, and glue the sides and top closed.
  4. Sketch a star onto shiny gold paper; cut out. Trace around this star on the gold paper to make a second star, and cut out. Glue one star on each side of the top of the tree, lining them up back to back.
  5. This tree makes a great goody bag for a holiday party. Instead of gluing the stars together, punch a hole at the top of each, and tie them closed with a sparkly chenille stem or a piece of cording.

Continue reading to learn about an angelic craft you're sure to enjoy.For more fun holiday craft ideas and activities for kids, see:

Angel Doll

Angel Doll

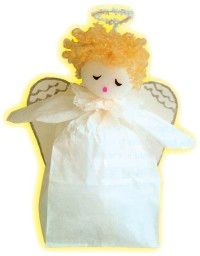
This pretty angel doll can serve double duty: Not only is she a beautiful decoration, but you can even hide candy treats inside the skirt.

What You'll Need:

Small white paper bag

Chenille stems: 1 white, 1 white iridescent

2-1/2-inch foam ball

Craft foam scraps: black, pink

Doll hair

White card stock

Silver glitter glue

Decorative-border paper punch

Pencil

Ruler

Scissors

White twist tie

Tape

Craft glue

  1. Make a lacy edge along the top of the bag with a decorative-border paper punch.
  2. Using a pencil, sketch a U shape on both sides of the bag, starting two inches from the top and ending three inches from the bottom. Cut along these lines to make arms.
  3. Cut the white chenille stem into three equal parts, and push all three pieces into the bottom of the foam ball. Holding the stems in the bag opening, gather the top of the bag together and secure with a white twist tie to create a neck. Use tape to secure the stems to the inside of the bag (reaching in through the arm holes). Fluff out the lace collar above the neck.
  4. Cut eye shapes from black craft foam and a mouth from pink craft foam. Glue the features onto the face, and glue doll hair to the top of the head. Let dry.
  5. Trace or draw wings on white card stock. Outline and decorate the wings with silver glitter glue. Once the glitter is dry, cut the wings out and glue them to the back of the bag.
  6. Bend the iridescent stem into the shape of a halo, and push the stem into the top of the foam ball.

You don't need snow for the snowman craft you'll learn about next. Keep reading to learn more.

For more fun holiday craft ideas and activities for kids, see:

Sassy Snowman

Sassy Snowman

This sassy snowman will last through winter (or summer) without melting one drop.

What You'll Need:

1 white lunch bag

5 plastic grocery bags

Card stock or construction paper: black, orange

Patterned paper (wrapping paper works well)

3 large buttons

Stapler and staples

Pencil

Scissors

Craft glue

Black felt-tip marker

  1. Open the lunch bag. Stuff it with five plastic bags, pushing them evenly into all corners to make the body nice and plump. Staple the top edges of the bag together, fold the top corners diagonally to the back, and staple again.
  2. Trace the top of the hat pattern onto black paper; cut out. Fold it in half at the fold line, and glue it at a slight angle over the stapled edge of the bag (gluing one side to the front of the bag and the other side to the back).
  3. Cut two brims from black paper. Fold each along the fold line. Glue the folded edge of one piece to the front of the bag and the other to the back.
  4. Cut two coal eyes and three smaller pieces of coal for the mouth from black paper, a carrot nose from orange paper, and a scarf from wrapping paper. Use a black marker to add carrot wrinkles to the nose. Glue all the pieces to the bag.
  5. Glue three buttons down the center of the bag; let dry.

Don't know what to do with all your greeting cards? Keep reading.

For more fun holiday craft ideas and activities for kids, see:

Christmas Wreath Wall Basket

Christmas Wreath Wall Basket

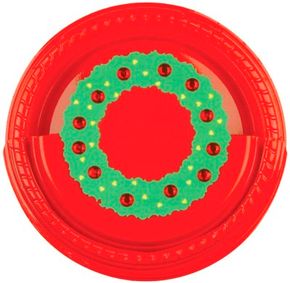
Hang this Christmas wreath wall basket on the wall to hold cards, candy, or Christmas greens. Tiny hearts and sparkling gems resemble twinkling lights.

What You'll Need:

2 red paper or plastic plates, 6-3/4 inch each

Card stock, 4 1/2-inch square: green and yellow

12 red faux gems

Tape

Pencil

Ruler

Decorative-edge scissors

Tiny heart-shape paper punch

Craft glue

Scissors

Circle paper punch

1. Place a piece of green card stock on top of a piece of yellow card stock; hold them together with a small piece of tape at each edge. Draw a 4-1/4-inch circle on the card stock and a 2-1/4-inch circle inside that one. Using decorative-edge scissors, cut out both layers of the ring.

2. Using a small heart punch, punch an array of hearts through the green card stock only. Glue the two rings together with the yellow behind the green, making sure the patterns created by the decorative-edge scissors align. Glue gems around the wreath. Let dry.

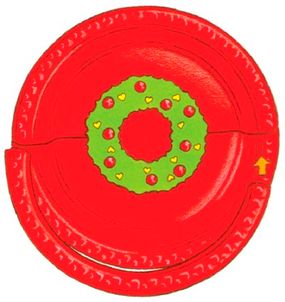
3. Center the wreath on the back of a plate, and trace around the outer wreath outline. Start cutting the plate in half; cut until you get to the outline you've traced. Cut along the upper half of the outline of the wreath, then finish by cutting straight across the plate at the halfway point.

4. Glue this plate to the other plate, front sides together. Let dry. Glue the wreath onto the front of the basket, centering it over the wreath outline.

Glue rim to bottom of basket. (Step 5)

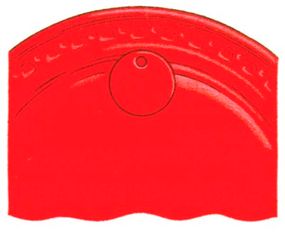
5. Using the plate scraps discarded in step 3, cut away all but the rim of the unused plate half. Glue the rim to the bottom rim of the basket for extra decoration.

Glue the half-circle to the back of the basket. (Step 6)

6. ­Cut a 1-1/2-inch half-circle from the rest of the scrap, and punch a round hole near the top. Glue this piece to the back of the basket to use as a hanger.

Note: To make a larger basket, use nine-inch plates and draw a bigger wreath.

Continue to the next page to learn how to make a sensational spiral snowman.

For more fun holiday craft ideas and activities for kids, see:

­

Sensational Spiral Snowman

Sensational Spiral Snowman

You've never made a snowman quite like the sensational spiral snowman before.

What You'll Need:

White paper plate

Construction paper: black, green, red

8-inch length cord

Pencil

Scissors

Fine-point markers: black, orange

Craft glue

1/8-inch hole punch

  1. Draw a spiral on the plate, starting in the center and radiating outward. Leave a small circle in the center for the head. Cut along the lines of the spiral.
  2. Draw the eyes, nose, and mouth on the head (the center of the spiral) with black marker. Color the nose orange. Fold the head upward.
  3. Download the hat pattern and the arm pattern. Trace the hat and arm patterns on black paper twice; cut out. Apply glue to one side of each hat piece, and sandwich them together with the snowman's head in between. Let dry. Glue one arm to each side of the first spiral below the head; let dry.
  4. Draw two holly leaves on green paper; cut out. Use the hole punch to make a red berry from the red paper. Glue the holly leaves and the berry to the hat.
  5. Punch a hole in the top of the hat. Fold the cord in half, and tie the ends together. Push the cord loop through the hole, and thread the tied ends of the cord through the loop of the cord; pull tight.

Mother Nature loves the holidays, too. Continue reading to learn how to make a pine cone wreath.

For more fun holiday craft ideas and activities for kids, see:

Pine Cone Wreath

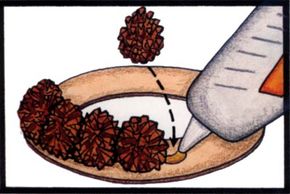
Glue the pine cones to the mat board. (Step 2)

Put a natural twist on a traditional decoration with this pine cone wreath.

What You'll Need:

5×5-inch square of brown mat board or cardboard

Pine cones: about fifteen 1 inch in diameter; about thirty 1/2 inch in diameter

8mm round beads: seven red; eight green

15-inch length of red and green plaid ribbon, 5/8 inch wide

8-inch length of red satin ribbon, 1/8 inch wide

  1. Using the pattern you can download here, trace and cut a circle from the mat board. Glue the one-inch pine cones standing upright in a circle on the mat board; arrange them so they fit tightly against each other.
  2. Glue about half of the 1/2-inch pine cones on their sides on the outer edge of the mat board in the spaces between the one-inch pine cones. Glue the rest of the 1/2-inch pine cones around the inner edge of the mat board in the same way. It might be easier for you to arrange the pine cones if you use tweezers.
  3. Glue the beads onto the wreath.
  4. Tie a bow in the plaid ribbon, and cut "V" notches in the tail ends. Glue the bow to the top of the wreath. To make a hanger, fold the satin ribbon in half to form a loop, and glue the ends to the back of the mat board at the top of the wreath.

Adorn your windows with the beautiful Christmas Window decorations you'll learn about next.

For more fun holiday craft ideas and activities for kids, see:

Christmas Window Decorations

Christmas Window Decorations

Your house will be the most Christmas-y on the block with these Christmas window decorations.

What You'll Need:

Five 6×6-inch pieces of cardboard

Dimensional squeeze paint: red, white, green, glittering gold

Plastic wrap

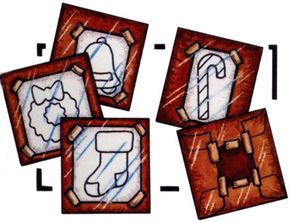
  1. Trace the patterns you can download here onto individual pieces of paper, and then tape each piece of paper to a piece of cardboard. Tightly cover each pattern with plastic wrap and tape the edges of the plastic wrap to the back of the cardboard.
  2. Carefully paint the plastic wrap using the pattern as a guide; refer to the photograph for color direction. Work with one color at a time and let each color set for ten minutes before you paint with the next color. To begin painting, outline the part of the pattern you're going to paint; lightly touch the tip of the bottle to the plastic wrap, carefully squeeze the bottle, and pull (don't push) the tip along the outline; the paint should be about 1/8 inch thick.
  3. Then paint inside the outlined area, working from left to right and top to bottom. If you make a mistake, wipe the paint off with a paper towel. If the tip of the bottle clogs, use a straight pin to open the hole and then squeeze a bit of paint on a paper scrap to regain a smooth flow.
  4. Let the paint dry for 24 hours. Then peel the decorations off the plastic wrap. Trim off any paint that has spread beyond the outline of the decoration.
For more fun holiday craft ideas and activities for kids, see:

Advertisement
Loading...