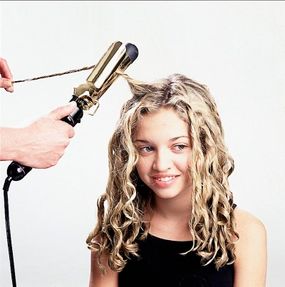
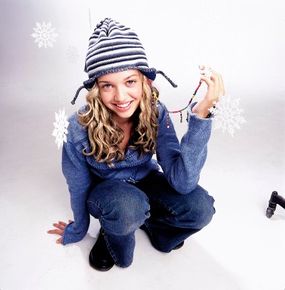
How to Make Beaded Hair Accessories

Beaded Hair Accessory

From bows and beads to bubbles and butterflies, in this article you will learn how to make beaded hair accessories of all types in just a few easy steps. Not only are these creative accessories fun to make, they are fun to wear, too!

Take a look at the pages below to learn how to make a variety of beaded hair accessories.

Advertisement

Multiloop Bow with Pullthrough

Kids can learn how to use one simple bow-making technique to make several different beaded accessories for the hair. Go to this page to learn more.

Dragonfly Dance Hair Accessory

Discover how a few bobby pins and some nylons can transform your do into a work of art! Check out this page to find out how to create this dragonfly dance hair accessory.

Tiny Bubbles Hair Accessory

Bubble beads are lots of fun to work with, so kids will surely pay attention to this one. In this section, we'll show them how to make a tiny bubbles hair accessory in 10 easy steps.

Butterflies Aflutter Hair Accessory

Learn how to make a gorgeous butterfly hair accessory and style your hair at the same time. Go to this section to learn how to create an accessory and a hairstyle that's sure to turn heads!

It's a Wrap

You've never seen anything like it. Watch your hairdo transform into a work of art as you weave beads, wire, and colorful floss into strands of hair. Go to this page to get started.

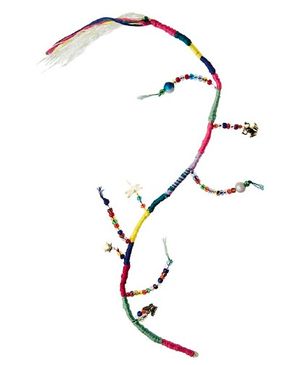
So Faux Hair Wrap

Floss, beads, and gold charms -- your kids will love getting decked out in these glitzy accessories as they create an eye-popping faux hair wrap from scratch. Read the final page of our how-to article to learn how to create this fabulous wrap.

You can continue to the next page to learn how to make a multiloop bow with pullthrough or select your favorite beaded hair accessory and start there. It's up to you!

For more fun crafts and activities for kids, see:

Advertisement
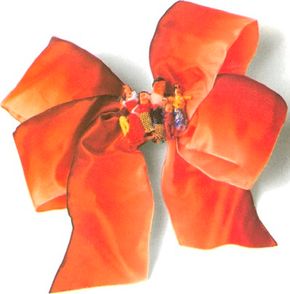
Multiloop Bow with Pullthrough

Set yourself free by adding these tiny worry dolls to your bow.

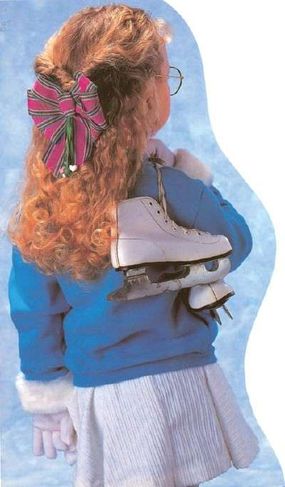
How's this for a beaded hair accessory? Loops, loops, loops, and more loops! Learn how to make a multiloop bow with pullthrough by using one basic technique to create this styled tangle of ribbon. You can also give yourself a classic look by making fewer, neatly formed loops. Add extra loops to make it even more outlandish!

What You'll Need:

Advertisement

1-2/3 yards ribbon

1-1/2" wide craft wire

Seven pieces of ribbon, 1/8" wide and 5" long

Seven heart beads

2-3/4" barrette

Legend has it that worry dolls like the ones on this bow (below) can help to free you from your cares. This design uses a wide, wired ribbon and fewer loops for a more subtle effect.

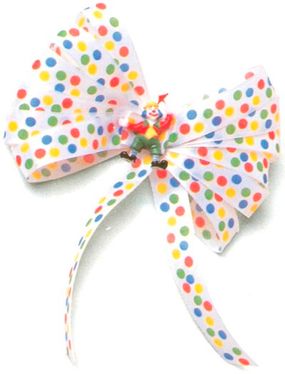
This bow (below) was made with a thinner, longer ribbon. The loops are floppy and numerous, the colors are bright, and the clown makes the whole thing even more whimsical.

There's something funny about the clown hanging out in the middle of this elaborate bow creation.
Multiloop Bow with Pullthrough

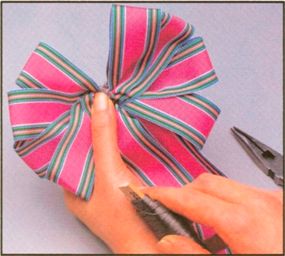
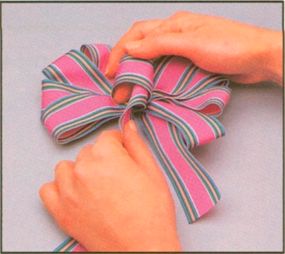
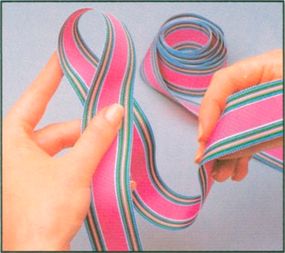
Step 1: Hold the 1-1/2" ribbon between your thumb and forefinger approximately 3" from the end to leave a tail. Make a 3" loop by bringing the ribbon to the left and then back under. Hold the loop securely between the thumb and forefinger. Bring the ribbon to the right and begin forming another 3" loop.

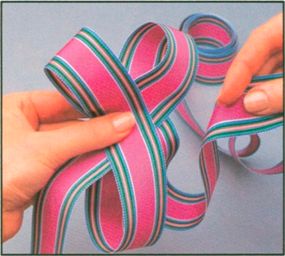
Step 2: Bring the ribbon to the left and then back under to form a third loop next to the first one.

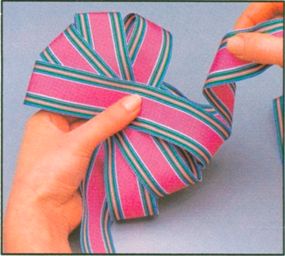
Step 3: Continue looping the ribbon right and left, over and under, until you have four 3" loops on either side of your thumb and forefinger, for a total of eight loops. You should be left with a second tail about 8" long. As you are looping, maintain tension on the center area and arrange the loops so they spread out neatly.

Step 4: Wrap craft wire around the center of the bow to secure the loops; position the wire so there are four loops and a tail on either side. Twist the wire securely and trim any excess.

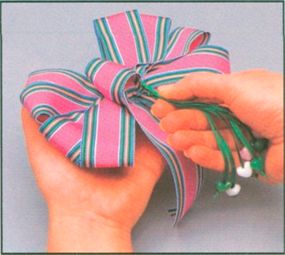
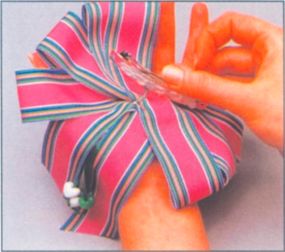
Step 5: Using the long tail, make a small loop at the center as shown. Feed craft wire through the loop and wrap it around the center of the bow to secure the loop in place. Twist the wire securely and trim any excess. Trim the ends of the tails on an angle so that they are even.

Step 6: Make a knot at the end of each piece of 1/8" ribbon. Put a heart bead on each ribbon and glue it in place just above the knot.

Step 7: Glue the 1/8" ribbons together at the top ends. Put the top ends inside the center loop on the bow and glue them securely.

Step 8: Glue the barrette to the back of the bow.

Pullthrough

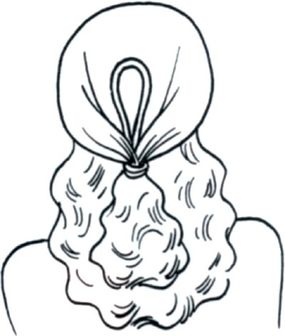
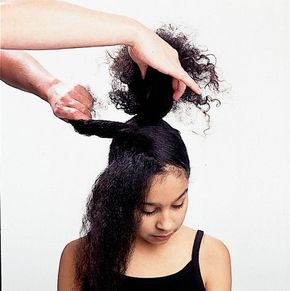
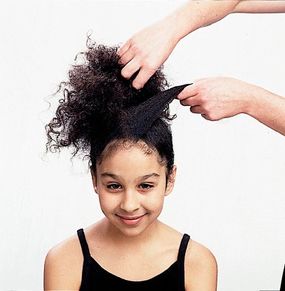
Step 1: Comb a section of hair from each side of the head to right behind the ear and bring together at the crown in a ponytail. Secure with a coated band. Insert the ponytail styler behind the band, loop end up.

Step 2: Pull the ponytail up through the loop.

Step 3: Gently holding the ponytail, pull the ponytail styler down so that the ponytail is pulled through behind the covered band. Hair flips over and drops down in front of free-falling hair.

Your pretty bow is complete! Continue to the next section to learn how to make a daring dragonfly dance hair accessory.

For more fun crafts and activities for kids, see:

Advertisement
Dragonfly Dance Hair Accessory

Your friends will do a double take when they see this fabulous beaded hair accessory.

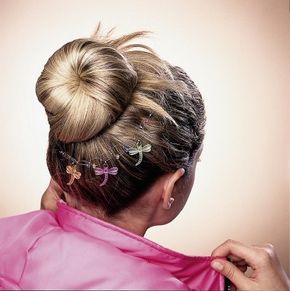
Quit dragging your feet and learn how to make this head-turning beaded hair accessory! This colorful dragonfly dance hair accessory will add pizazz to even the most ho-hum hair day.

What You'll Need:

Advertisement

2 bobby pin clips

2 bobby pins

3 jump rings

3 dragonfly charms (1 each of green, purple, and peach)

2 strands nylon line, 9 inches each

10 crimp beads

6 frosted round size 6 beads (2 each of purple, blue, and yellow)

Needle-nose pliers

Scissors

Step 1: Attach the bobby pin clips to the bobby pins by pushing each one onto one side of a bobby pin and squeezing it in place with ­needle-nose pliers.

Step 2: Using needle-nose pliers, attach a jump ring to each of the dragonfly charms.

Step 3: Holding both strands of nylon line together at one end, string on a crimp bead.

Step 4: Thread the ends of the nylon line through and around the hole in one of the bobby pin clips and back through the crimp bead. Crimp down.

Step 5: Separate the strands, and string a purple size 6 bead onto 1 of the strands.

Step 6. Bring the strands back together, and string on a crimp bead. Crimp down 3/4 inch from the previous crimp bead, leaving the nylon line loose to form a loop.

Step 7: Separate the strands again, and string the green dragonfly onto the same strand as the purple bead (the bottom strand).

Step 8: String a crimp bead on 1 of the strands, then thread the other strand through the crimp bead from the opposite direction. (This will cause the nylon line to form another loop.) Crimp down 3/4 of inch from the previous crimp bead.

Step 9: To add the rest of the beads, repeat steps 5 through 8.

Step 10: To finish, hold both strands of nylon line together and string on a crimp bead. Thread the ends of the nylon line through and around the hole in the other bobby pin clip, then back through the crimp bead. Crimp down 3/4 inch from the last crimp bead.

In the next section, we'll show you how to create one of the most delicate beaded hair accessories on our list. Find out how to create a tiny bubbles hair accessory.

For more fun crafts and activities for kids, see:

Advertisement
Tiny Bubbles Hair Accessory

Tiny Bubbles Hair Accessory

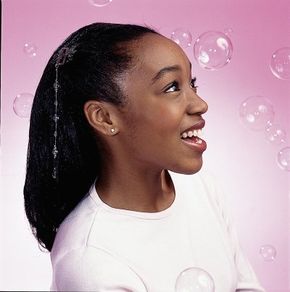
So, you want to learn how to make a tiny bubbles hair accessory? With the steps below we will show you how to make this beaded hair accessory that will make you sparkle wherever you go!

What You'll Need:

Advertisement

1 metal snap comb

1 jump ring

7 inches nylon line

12 crimp beads

6 round iridescent beads, 2mm

3 round iridescent beads, 4mm

2 pink faceted beads, 2mm

1 iridescent faceted bead, 5mm

1 head pin

Needle-nose pliers

Scissors

Wire cutter

Round-nose pliers

Step 1: Using needle-nose pliers, attach a jump ring to the bottom left hole of the snap comb so that the teeth of the comb face to the right.

Step 2: Follow the instructions on page 5 to attach the nylon line to the jump ring with a crimp bead.

Step 3: String on another crimp bead, and crimp down 1/2 inch from the first crimp bead.

Step 4: Next, string a 2mm iridescent bead, a 4mm iridescent bead, another 2mm iridescent bead, and a crimp bead, and slide them up until they touch the previous crimp bead. Crimp snugly in place.

Step 5: String on another crimp bead, and crimp down 1/2 inch from the last crimp bead.

Step 6: String on a pink faceted bead and another crimp bead and slide them up until they touch the other crimp bead. Crimp down.

Step 7: Repeat steps 3 through 6.

Step 8: Repeat steps 3 and 4 again, and then set this piece aside until step 10.

Step 9: String the last crimp bead onto the nylon line, sliding it up so it is 1/2-inch from the ­previous bead grouping. Before you crimp down, thread the end of the nylon line through the charm and back through the crimp bead. Crimp down, and trim the excess line.

The next hair accessory craft on our list will give you butterflies. Continue to the next page to learn how to make a festive butterflies aflutter hair accessory!

For more fun crafts and activities for kids, see:

Advertisement
Butterflies Aflutter Hair Accessory

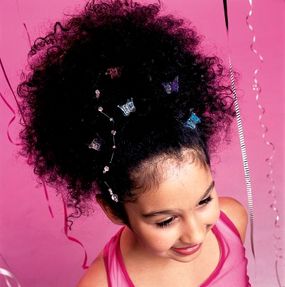
This butterflies aflutter hair accessory is an excellent complement to tumbling ringlets set high on the head. Learn how to make this beaded hair accessory and watch the butterfly dangle and flutter prettily through your hair -- clamoring for attention.

What You'll Need:

Advertisement

Butterfly clip

Nylon line

3 small, round crystal beads

5 pink flower beads

4 crystal-and-pink beads

1 large crystal round bead

Scissors

Measuring tape

Step 1: Cut about 8 inches of nylon line. Tie the nylon line onto the butterfly clip. (Make sure all knots throughout this design are tight.) Cut the excess short line, leaving a long tail.

Step 2: Slide on a small crystal bead. Tie a knot under the bead 1/2 inch from the previous knot. Don't worry about measurements being exact. Slide on a pink flower bead. Tie a knot under the bead 1/2 inch from the previous knot. Slide on a crystal-and-pink bead. Tie a knot under the bead 1/2 inch from the previous knot.

Step 3: Repeating instructions from step 2, add a flower bead, a small crystal bead, a flower bead, a crystal-and-pink bead, a flower bead, a small crystal bead, a flower bead, and a crystal-and-pink bead.

Step 4: Slide on the last 2 beads (large crystal bead and crystal-and-pink bead). Tie a knot under the last bead so they touch the previous knot. Trim the nylon line, leaving a short tail.

How to Create a Butterflies Aflutter Hairdo

Step 1: Begin with dry hair. Make an irregular part from ear to ear. The part moves up and over the top of the head.

Step 2: Clip the front hair out of the way. Gather the back hair up high into a ponytail. Using a coated hair band with 2 bobby pins attached, insert 1 bobby pin into the ponytail. Pull the hair band around the base of the ponytail until it is taut. Fasten the second bobby pin into the base of the ponytail to secure it.

Step 3: Release the front hair. Divide the front hair into 2 sections with a diagonal part. Bring the right section of hair toward the left over to the crown of the head, pulling the hair smooth.

Step 4: Lift the ponytail up and wrap the section of hair around the base of the ponytail. Secure with bobby pins to hold.

Step 5: Repeat this on the left front section, wrapping the hair around the base of the ponytail and then securing it with a bobby pin.

Step 6: Place the butterfly clip at the front of the ponytail, allowing the end to dangle forward. Add other butterfly clips for more beauty!

In the next section, learn how to create yet another hairstyle as you work with beads in colorful floss. Learn how to create a wrap!

For more fun crafts and activities for kids, see:

Advertisement
It's a Wrap

This beaded hair accessory looks as if it's floating on hair!

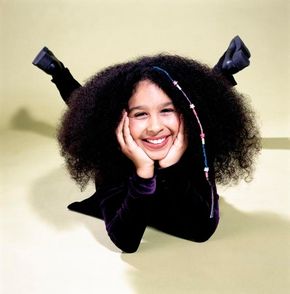
It's hip, it's happening -- it's a wrap! You'll work with lots of colorful beads as we teach you how to make this beautiful beaded hair accessory. It's easy to do, and it looks great for days and days!

What You'll Need:

Advertisement

3 colors embroidery floss

Assorted beads with large holes

6 inches flexible bead wire

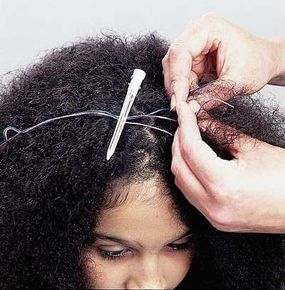
Step 1: Prepare your hair by gently toweling it dry and combing it out using a large-toothed comb. Work a texturizing lotion or foam through your hair to define the curl pattern. Let your hair dry naturally or use a diffuser attachment with your blow-dryer.

Step 2: Apply shine drops to your hair to protect it and add shine. Work the shine drops through your hair.

Step 3: The floss length you should use is double your hair length. Pick up a small section of hair, approximately the size of a penny, to begin the wrapping process. You can place the hair wrap wherever you want on your head.

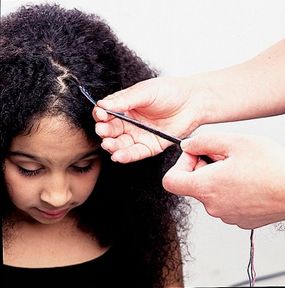
Step 4: Place 3 inches of floss along the hair that will be wrapped. Clip the long length of floss to the other side of your head. Do a 3-strand braid with the hair, joining a different color of floss with each hair strand.

Step 5: Braid as far as you need to attach all the floss. (Note: If you want your hair to stay wrapped for a long time, use a bonding solution, available at beauty supply stores.)

Step 6: Unclip the longer length of floss, and bring it next to the hair section to be wrapped.

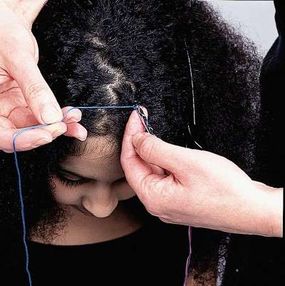
Step 7: Pick the color of floss you want to begin with. With your finger and this floss, make a loop. Bring the tail of the floss over the hair strand, then under and through the loop.

Step 8: Pull up to tighten. Repeat this step until you've gone a third of the way down the hair strand. This is the same pattern you will use to create the wrap throughout.

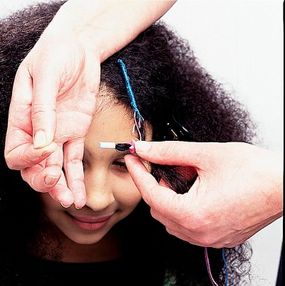
Step 9: To add beads, make a U shape out of the bead wire, and place it around the hair. Slide the beads onto both wires, and pull the hair (and floss) through the beads. Move the beads below the wrapped hair.

Step 10: Double-knot the floss to hold the beads in place. When you are ready to change colors, pick up another color of floss and begin wrapping with it. We changed floss color after we put on beads. Continue wrapping and adding beads until you are almost at the bottom of your hair strand.

Step 11: When you have finished the wrap, double-knot the floss to hold the wrap and the beads in place. Trim the ends of the floss to match the ends of your hair length. Or, if you'd prefer, trim the ends of the floss at the knot.

In the next and final section of this article, test your newfound wrapping skills as we teach you how to make a dazzling so faux hair wrap!

For more fun crafts and activities for kids, see:

Advertisement
So Faux Hair Wrap

This so faux hair accessory looks great with just about any hairstyle.

By now you know how to make a variety of beaded hair accessories. On this page, you'll learn how to create a so faux hair wrap accessory and hairdo in one!

What You'll Need:

Advertisement

Bobby pin

15-inch piece rayon/polyester cord (color to match your hair)

Embroidery floss

4mm rocaille beads

8mm faceted beads

Small gold-tone charms

Clear tape

Craft glue

Scissors

Step 1: Secure the bottom (flat) side of the bobby pin to the edge of a secure, flat surface with clear tape.

Step 2: Thread the cord through the end of the bobby pin. Fold about 1-1/2 inches over, and bind together with a piece of clear tape.

Step 3: Use a tiny piece of scotch tape to secure the end of a piece of embroidery floss to the top of the cord, and begin wrapping the

embroidery floss around the cord, starting as close to the bobby pin as you can. As you wrap, be sure to cover the tape completely.

Step 4: To change colors, make a half-hitch knot in the floss, and pull floss tight. Cut the floss, leaving about a 1-inch tail. Start a new color by taping the end of the floss to the cord and wrapping the new floss around the cord, being sure to cover the tape and the tail of the previous color.

Step 5: To make an extension, cut 4 to 6 inches of floss. Stiffen the ends by smoothing on a bit of glue and letting them dry. Thread on the beads, and end with a charm. Thread 1 end of the floss back up through the beads, and trim the floss ends to 1 inch.

Step 6: Attach the extension to the center cord with a small piece of tape, then continue wrapping with the main floss, letting the bead extension dangle to one side.

Step 7: Continue wrapping floss and adding bead extensions until the wrap is the length you want. Knot the final piece of floss, then trim the floss and the cord, leaving about 1-1/2 inches of cord. Unravel and fluff the cord so it looks like hair.

How to create your So Faux Hair Wrap hairdo:

What You'll Need:

Comb

Curling iron

Foam or volumizing lotion

Hairspray

Step 1: On damp hair, use a foam or volumizing lotion to give the hair body. Then dry your hair.

Step 2: Take a small section of hair, twist it from the scalp out to the ends. Make the twisted sections different sizes to vary the size of the dreads.

Use this technique to create twists for your so faux hair accessory.

Step 3: Use hair spray along the length of the twist to hold the dread. Use a large curling iron to seal the sprayed hair. Run the heated barrel of the opened iron along all sides of the twist. If you want a straight dread, skip to step 5.

Step 4: Roll the twisted strand around the barrel of the curling iron. This will give a slight wave to the dread. Put a comb near your scalp to protect it from the heat.

You can let the faux wrap dangle from your hair.

Step 5: Place the faux hair wrap in your hair.

For more fun crafts and activities for kids, see:

ABOUT THE CRAFT DESIGNERS

Multiloop Bow With Pullthrough by Janis Bullis and Mary Beth Janssen-Fleischman

Advertisement

Advertisement

Loading...