Backyard Activities for Kids

Make a High Flying Rocket and watch it soar!
Make a High-Flying Rocket and watch it soar!
©2007 Publications International, Ltd.

Backyard Activities for Kids will amuse your children for hours in the safety of your own backyard. They'll have fun while they learn valuable lessons about the great outdoors and develop useful skills.

These projects get kids out into the fresh air and bring the whole family together.

Advertisement

On the following pages, you'll learn backyard activities to enjoy with your kids.

Vegetable in a Bottle

This backyard activity teaches kids how vegetables grow and gives them a creation that will amaze their friends. Learn this backyard activity.

Map Your Yard

Encourage kids to learn more about the plants and animals that live in their own backyard. Get directions for this backyard activity.

Happy Trails

Create a nature hike through your backyard or local park, and have a great time making trail markers. Find out how to organize this backyard activity.

No-Sting Bubbles

No-Sting Bubbles won't hurt if they pop in your child's eye. Learn this safe and fun backyard activity.

High-Flying Rocket

Let your kids get creative when they make their very own High-Flying Rocket, and then take it into the backyard and watch it soar.

Soil Wildlife

Kids learn to about the bugs that live in the earth with the Soil Wildlife activity. Identify backyard Soil Wildlife with your kids.

The Vegetable in a Bottle, our first backyard activity, is a learning experience with a big surprise. Read about it on the next page.

Looking for more outdoor games? Try:

Advertisement
Vegetable in a Bottle

The Vegetable in a Bottle trick will mystify everyone -- but it takes a lot of patience!

How to Make a Vegetable in a Bottle
What You'll Need:
  • Clear Plastic Bottle with a Narrow Mouth (such as a soft drink bottle)
  • Garden Vegetable Plant (such as cucumber or zucchini)
  • Wooden Box (optional)

Step One: Find someone friendly who has a vegetable garden and who is willing to help you. Watch for a garden plant to blossom and set fruit.

Advertisement

Step Two: Cucumbers, zucchini, or gourds work well for this. Slip the tiny vegetable -- still attached to the stem -- into the neck of a plastic bottle. Be careful not to break the stem.

Step Three: Make sure the bottle is shaded under the leaves of the plant, or cover the bottle with a wooden box to keep the sun from heating the bottle too much.

Step Four: Now wait for the vegetable to grow. Once it's big enough to nearly fill the bottle, cut the stem and go show your friends. See if they can figure out how the vegetable got in the bottle. Then you can cut away the bottle to get the vegetable out.

The Map Your Yard summer activity teaches kids how maps are made. Read about this backyard activity on the next page.

Looking for more outdoor games? Try:

Advertisement
Map Your Yard

The Map Your Yard activity teaches kids the basic principles of map making. How well do you think you know your yard? Find out when you draw a nature map.

How to Map Your Yard
What You'll Need:
  • Large Piece of Paper
  • Markers
  • Field Guide to Plants and Trees

Step One: First, try to draw a map of your yard from memory. No peeking outside! How much can you remember?

Advertisement

Step Two: When you're finished, take a look and compare, then make another yard map that shows how much you know about nature. Map all the trees, shrubs, flowers, and so on. Label them with their names.

Step Three: Also include any other interesting features of your yard, such as large rocks and animal homes.

Make Happy Trails through your yard or a park near your home. Learn this backyard activity on the next page.

Looking for more outdoor games? Try:

Advertisement
Happy Trails

In the Happy Trails backyard activity, your kids can turn your backyard, local park, or camp into a nature trail.

How to Make Happy Trails
What You'll Need:
  • Stakes and Small Thin Boards to Make Signs
  • Paint

Step One: If you have a favorite natural area, make a trail to point out its interesting features. You can make a permanent trail on private land, or a temporary one in a park for a special occasion.

Advertisement

Step Two: Make small signs from scrap wood. Paint them, and use paint or permanent markers to write out descriptions of the interesting features or things to do at each station.

Step Three: Nail the signs to stakes. Here are some ideas for stations:

  • Give the name of a tree and list some interesting facts about it.
  • Point out a tree that has a bird nest in it. Tell what kind of bird has made the nest.
  • State that an animal has made its home near the station. Challenge your readers to find it.
  • Have the reader stop and listen for the call of a particular bird that lives near the station.
  • Put a station near some sweet-scented flower or other plant.

No-Sting Bubbles are fun to play with, and they won't hurt if they burst in a child's eye. Learn how to make No-Sting Bubbles on the next page.

Looking for more outdoor games? Try:

Advertisement

No-Sting Bubbles

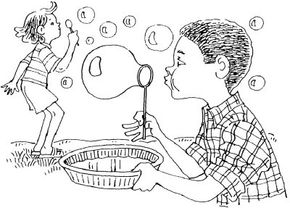
No-Sting Bubbles will not burn your eyes if they pop in your face.
No-Sting Bubbles will not burn your kids' eyes if they pop near their faces.
©2007 Publications International, Ltd.

The No-Sting Bubbles backyard activity is great for kids of all ages. These bubbles won't sting your eyes if you get some of the mixture near your face (which always seems to happen). This is a great project to do outside on a summer day!

How to Make No-Sting Bubbles
What You'll Need:
  • 1/4 Cup Baby Shampoo (no-sting type)
  • 3/4 Cup Water
  • 3 Tablespoons Light Corn Syrup
  • Measuring Cups and Spoons
  • Mixing Bowl
  • Mixing Spoon
  • Thin Wire
  • Pie Plate

Step One: Mix the baby shampoo, water, and light corn syrup in a bowl. Stir the ingredients gently so you don't create lots of bubbles; let the bubbles settle.

Advertisement

Step Two: Bend an end of a piece of thin wire into a circle; this is your bubble blower.

Step Three: Pour some of the bubble mixture into a pie plate, dip the circle into the bubble mixture, then blow to create some bubbles!

Step Four: For more bubble experimentation, make other shapes out of thin wire. Make a triangle, square, hexagon, or other shape out of the thin wire. See if the bubble shapes are any different depending on the shape of the blower. You can also blow bubbles with a plastic berry basket.

Step Five: Can you find any other things that would make good bubble blowers? Explore and experiment!

Teach your kids to make a High-Flying Rocket, and see how far up it can go. Read about this backyard activity on the next page.

Looking for more outdoor games? Try:

Advertisement

High-Flying Rocket

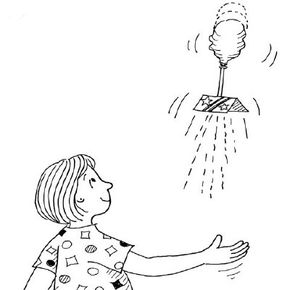
Make a High Flying Rocket and watch it soar!
©2007 Publications International, Ltd.

Teach your kids how to make a High-Flying Rocket, and let them launch a patriotic rocket in their own backyard! This balloon rocket will fly high in the air, just like fireworks. Get your friends together for some high-flying fun!

How to Make a High-Flying Rocket
What You'll Need:
  • Plastic Drinking Straws
  • Scissors
  • Long Red, White, and Blue Balloons
  • Rubber Bands
  • Paper
  • Ruler
  • Markers
  • Pencil

Step One: To make a rocket, cut a straw in half. Fold the tip of 1 straw in half, and insert it into the end of the other straw half until it is all the way inside.

Advertisement

Step Two: Slide the neck of a balloon over 1 end of your double straw, and secure it with a rubber band.

Step Three: Cut a 3-inch square piece of paper, and fold it in half. This will be your rocket's fin, which you can decorate with patriotic designs. Use a pencil to poke a hole through the middle of the fin, and slide it over the double straw.

Step Four: To make your rocket fly, hold the rubber band around the balloon's neck and blow through the straw. When the balloon is full of air, let your rocket go! Make sure that no one is in the way before you let go. Your rocket should fly high.

Step Five: Experiment with different shapes and sizes of rocket fins. The fin controls the rocket's path.

NOTE: Balloons are choking hazards -- be sure to keep them away from small children. Discard all broken balloons immediately.

Soil Wildlife is a backyard activity that teaches kids about nature. Get directions on this learning activity on the next page.

Looking for more outdoor games? Try:

Advertisement

Soil Wildlife

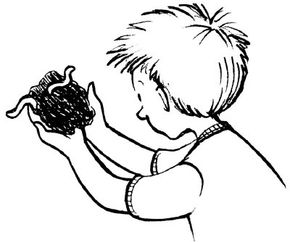
Observe Soil Wildlife in your own backyard.
©2007 Publications International, Ltd.

The Soil Wildlife backyard activity helps kids learn important lessons about nature. They will discover a community of creatures living under the soil!

How to Observe Soil WIldlife
What You'll Need:
  • Trowel
  • Shallow Dish
  • Magnifying Glass
  • Notebook
  • Pencil or Pen

Step One: Go outdoors with a trowel and dig around under large shrubs where leaves have fallen. Brush aside the top layer and dig up some of the partially decayed leaves and the soil underneath them.

Advertisement

Step Two: Spread your sample out in a shallow dish and observe it with a magnifying glass. Record and draw the organisms you see, such as:

  • Earthworms: Easy to recognize by their segmented bodies.
  • Beetles: These insects have six legs and a hard, shiny look. They may be black, metallic green, gold, or blue.
  • Grubs: These larvae of beetles and flies are worm-like, but thick-bodied with many stumpy legs.
  • Springtails: These tiny, pale, wingless insects, usually white or pale gray, have a special structure on their abdomens which they use to spring high into the air.
  • Spiders: Unlike insects, spiders have eight legs. Not all spiders weave webs. Some live and hunt near the ground.
  • Mites: These have eight legs, like spiders, but are round-bodied.
  • Centipedes: Centipedes have one pair of legs per segment. They can bite, since they are predators.
  • Millipedes: They resemble centipedes, but their legs are shorter, and they have two pairs of legs per segment. Millipedes do not bite.

Beetles, earthworms, springtails, and millipedes feed on dead plant material. By breaking leaves into tiny pieces, they make it easy for bacteria and fungi to complete the decay process. Centipedes and spiders are predators.

Looking for more outdoor games? Try:
ABOUT THE CRAFT DESIGNERS

Soil Wildlife by Maria Birmingham, Karen E. Bledsoe, and Kelly Milner Halls

Advertisement

Advertisement

Loading...