Sewing Crafts

Get the needle and thread out -- it's sewing craft time!

Sewing is a useful, functional skill, but it can be crafty as well. Using a needle and thread to guide you, you can create all kinds of fun things for kids.

These sewing craft projects and instructions for kids will start you on the right track. Do one or do them all and enjoy the results!

Advertisement

Get your needle or sewing machine out ,and follow these links to some crafty sewing projects:

Tote It Denim Tote

Fashionable and functional, you can carry your sewing stuff around with you in this simple tote. Find out how to personalize this craft.

Fabric Tubes

Learn how to make a basic tube to create dozens of other sewing projects. These fun tubes can make a snake, a wreath or even a bed bolster.

Soft Muslin Doll

This Soft Muslin Doll sewing craft turns the art of doll-making into something simple and fun.

Bed Banner

Personalize your kids' bedroom or your own with this bed banner craft. Stitch up this project, and watch as dreams take flight.

T-Shirt Pillows

The soft fabric of T-shirts makes an ultra comfortable pillow. Check out this creative T-Shirt Pillow sewing craft.

Paint-a-Patch

Patch up clothes with decorated patches that stand out in this sewing craft.

Waiting Room Kit

Stuck in a waiting room with nothing to do? Follow these instructions to create a sewing kit that will transform any waiting room into your own craft studio.

Beanbags

Create one, two, or even a dozen -- this sewing craft idea is worth giving a toss.

Doll Bed Sewing Craft

Stitch up a miniature bed in this sewing craft, and give your child's doll a comfortable place to rest.

Paint-Proof Art Smock

This sewing project will help keep other painting projects neat and clean. Make a smock to keep kids free of paint spatters.

Carry around your sewing gear in a pouch you'll want to show off. Start with the first craft to sew a tote you can tote around with pride.

For more fabric crafts and kids' activities, see:

Advertisement

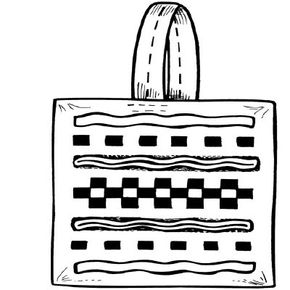
Tote It Denim Tote

Tote It Denim Tote sewing craft

This tote sewing craft is the most usable piece of art you'll ever create. You can even personalize this art craft for yourself or a friend.

What You'll Need:

  • 1 yard of bright-colored denim fabric
  • Tape measure
  • Scissors
  • Sewing machine
  • Iron-on fabric adhesive
  • Iron and ironing board
  • Fabric scraps
  • Fabric paint

How to Make Tote It Denim Tote:

Step 1: Cut a 14x9-inch piece of denim fabric for the bag and a 3x15-inch piece for the handle. (To make a book bag, cut a 22x12-inch piece for the bag and a 24x3-inch piece for an over-the-shoulder handle.)

Advertisement

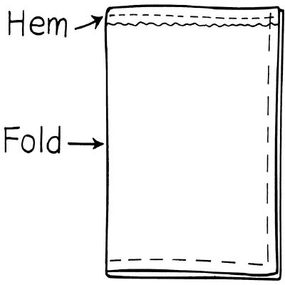
Step 2: Hem one 14-inch side on the larger piece of fabric. Fold the fabric in half with the seam of the hemmed edge facing out. Sew the two sides of the fabric together, running a stitch along the bottom and up the side of the folded fabric. Turn the bag inside out.

Fold the fabric in half with the hem facing out.

Step 3: To make the tote bag handle, fold the 3x15-inch piece of fabric in thirds. Sew along the length of the fabric to stitch it together. Sew each end of the handle to the inside of the bag. Sew several stitches to secure the handle.

Step 4: Decorate your bag with fabric. Iron the fabric adhesive to the back of some fabric scraps. Cut out shapes or a design from the fabric.

Step 5: Remove the paper backing from the adhesive. Place a fabric shape on the tote bag, and iron it in place.

Step 6: Continue decorating the tote bag with the remaining fabric shapes. Use fabric paint to outline the shapes or to add more shapes. Let the paint dry.

Sew tubes and let your imagination do the rest in the next craft.

For more fabric crafts and kids' activities, see:

Advertisement
Fabric Tubes

Snake Fabric Tubes sewing craft

These tube sewing crafts are just the beginning. When your creative juices are flowing, see how many more art craft ideas you can come up with.

What You'll Need:

  • 1 yard of fabric
  • Blunt scissors
  • Needle and thread
  • Cotton batting
  • Felt
  • 2 buttons
  • Markers
  • Ribbon

How to Make Fabric Tubes:

To make a snake:

Advertisement

Step 1: Cut a 5x30-inch piece of fabric. Fold the fabric in half lengthwise with the wrong side of the fabric facing out. Sew a seam along the long end, then turn it inside out. Sew one end of the tube closed.

Sew a seam along the long end of fabric.

Step 2: Stuff the fabric tube with batting at the open end. Sew the open end closed.

Stuff the fabric tube with batting.

Step 3: Cut a piece of felt for the tongue. Sew it to the snake. Sew on two buttons for the eyes. Use markers to decorate the snake.

To create a wreath:

Step 1: Make 3 tubes just like the snake but use 3 different colors of fabric.

Step 2: Braid the tubes together, then sew the ends together forming a circle. Use ribbon to tie a bow around the ends.

To make a bed bolster:

Use an 18x54-inch piece of fabric. Repeat snake steps 1 and 2 to make the tube.

Learn how to make a simple, hand-made doll in no time by following the next sewing craft.

For more fabric crafts and kids' activities, see:

Advertisement
Soft Muslin Doll

Soft Muslin Doll sewing craft

Make an extra special handmade doll using muslin, a soft and tightly woven cloth material.

Follow the instructions in this sewing craft to create a one-of-a-kind doll because nothing says special quite like an art craft you make yourself.

Advertisement

What You'll Need:

  • Muslin
  • Pencil
  • Scissors
  • Needle and thread
  • Cotton batting
  • Fabric paint
  • Yarn
  • Felt

How to Make Soft Muslin Doll:

Step 1: Fold the muslin in half. Draw a cookie-cutter doll shape on the muslin. Cut out the shape; you should have 2 pieces.

Step 2: Sew pieces together leaving 3 inches open at the top of the head. Cut a slit to the seam at the armpits, neck, and between the legs.

Step 3: Turn the fabric inside out. Stuff it with cotton batting. Sew the head closed.

Step 4: Use fabric paint to draw on the face. Sew on yarn for the hair. Make an outfit for your doll from felt.

The next sewing craft will put dreams in your head and above your bed.

For more fabric crafts and kids' activities, see:

Advertisement

Bed Banner

Bed Banner sewing craft

This sewing craft will put dreams in heads and above beds. Every night before bed, the bed banner art craft can be admired to ensure good dreams throughout the night.

What You'll Need:

  • 36x48-inch piece of felt
  • Fabric glue
  • Two 36-inch wood dowels with 1/2-inch diameter
  • 4 large wood beads
  • Fabric and felt scraps
  • Blunt scissors
  • Yarn or string

How to Make Bed Banner:

Step 1: Fold both shorter ends of the felt over about 2 inches, and glue in place to form pockets. Insert a dowel through each pocket, then glue the beads on each end.

Advertisement

Step 2: Cut pieces of fabric and felt to make a picture. Do you dream of being an astronaut, a ballet dancer, or a basketball player? Cut out shapes to match your dreams.

Step 3: Apply a thin film of glue on the back of each cutout shape. Assemble the pieces on the felt banner to make your picture.

Step 4: Tie a piece of yarn or string to the ends of the top dowel. Hang the banner above your bed.

Nothing says comfort like a T-shirt pillow. To find out how to make one, continue to the next sewing craft.

For more fabric crafts and kids' activities, see:

Advertisement

T-Shirt Pillows

T-Shirt Pillows sewing craft

In this sewing craft, turn your favorite T-shirt into a huggable pillow. It's so easy, you'll want to make a set.

What You'll Need:

  • T-shirt
  • Needle and thread
  • Cotton batting

How to Make T-Shirt Pillows:

Step 1: Find a T-shirt with a fun picture on it. Stitch the bottom and the sleeves closed.

Advertisement

Step 2: Stuff your pillow through the neck opening with cotton batting. Then sew the neck closed.

Step 3: Make a set of pillows for your room. If you have a plain T-shirt, make it into a custom pillow with your own design.

Patches are good for patching, but they're also great for decorating. Continue on to "Paint-a-Patch" to find out how to decorate a patch worth sewing on.

For more fabric crafts and kids' activities, see:

Advertisement

Paint-a-Patch

Decorate your patch before sewing it on in this art craft. Show your school spirit or your dedication to a cause by designing a patch that sends a message.

What You'll Need:

  • Denim fabric
  • Pencil
  • Fabric paint
  • Scissors
  • Needle and thread

How to Make Paint-a-Patch:

Step 1: Draw a circle or square on the denim fabric with a pencil.

Advertisement

Step 2: Sketch in a design on the circle or square. It can be a team logo, a rain forest scene, or a pretty picture. Use fabric paint to fill in the design.

Step 3: Put an outline of fabric paint around the circle or square. Let the paint dry.

Step 4: Cut out the patch. Sew the patch on a T-shirt, jacket, or jeans.

In the next craft, find out how to turn a waiting room into a craft room with a simple take-with-you kit.

For more fabric crafts and kids' activities, see:

Advertisement

Waiting Room Kit

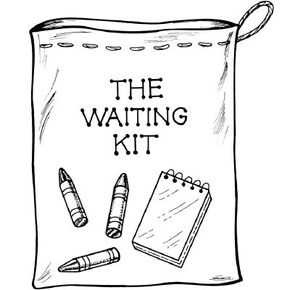
Waiting Room Kit sewing craft

With sewing crafts, there are no more boring waiting rooms with nothing interesting to do. This art craft project creates activities for you to do anytime, anywhere.

What You'll Need:

  • 10x24-inch piece of muslin
  • Needle and thread
  • Yarn or string
  • Cardboard
  • Permanent markers or fabric paint

How to Make Waiting Room Kit:

Step 1: Hem the 2 short ends of muslin. Fold the muslin in half bringing the 2 hemmed ends together with the hems facing out.

Advertisement

Step 2: Cut a few small holes in the hemmed ends for the drawstring. Thread a piece of yarn or string through the holes and tie it in a knot. Sew the 2 side seams closed. Turn the bag inside out.

Step 3: Place a piece of cardboard inside the bag. Decorate the bag with permanent markers or fabric paint. Let the paint dry. Remove cardboard.

Step 4: Fill the bag with a notepad, colored pencils, crayons, scissors, a glue stick, a travel game, and a good book.

Find out how you can create your own beanbags in the next sewing craft.

For more fabric crafts and kids' activities, see:

Advertisement

Beanbags

Beanbags are great for target practice, a fun game of catch or for juggling high in the air, but the best part about beanbags is making them yourself! Follow these simple instructions on how to create your own beanbags.

What You'll Need:

  • 2/3 yard of fabric
  • Scissors
  • Needle and thread
  • Stuffing materials such as dried beans, aquarium rocks, or small packing peanuts

How to Make Beanbags:

Step 1: Cut three 4x8-inch pieces of fabric. Fold them in half vertically to form a square. Sew two sides closed on each square of fabric.

Advertisement

Step 2: At the open end, fill the squares with stuffing materials. Make them heavy or light, depending on how you will use the beanbags.

Step 3: To make heavy bags, use aquarium rocks; to make light bags, use packing peanuts; to make medium-weight bags, use dried beans. Sew the last side closed.

Make the next craft and dolls won't have to sleep on the floor anymore.

For more fabric crafts and kids' activities, see:

Advertisement
Doll Bed Sewing Craft

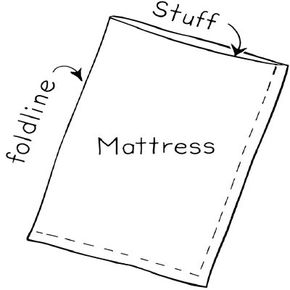
Sew two sides closed and stuff mattress.

With this sewing craft, you can tuck a doll or stuffed animal into its own bed with a mattress, pillow and bedspread you've made yourself.

What You'll Need:

  • 3/4 yard of white fabric
  • Yardstick
  • Blunt scissors
  • Cotton batting
  • Needle and thread
  • 1/2 yard of print fabric
  • 1-1/4 yard of 1/2-inch-wide lace

How to Make Doll Bed:

Step 1: Cut a 7x7-inch piece and a 13x18-inch piece of white fabric.

Advertisement

Step 2: To make the pillow, fold the small piece in half and sew two sides closed.

Step 3: To make the mattress, fold the big piece in half so it measures 9x13 inches. Sew two sides closed.

Step 4: Turn both pieces inside out. Stuff the pillow and the mattress with batting. Fold the open end on each piece under and sew it closed.

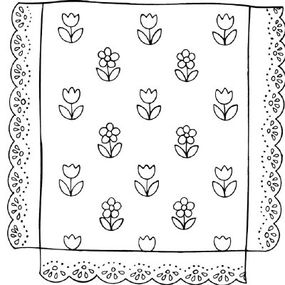
Step 5: For the bedspread, cut a 13x15-inch piece of print fabric. Hem the edges of the fabric and sew lace trim all around the bedspread.

Sew lace trim all around the bedspread.

Next, find out how to sew a wearable smock that will protect your clothes when you're making other crafts with paint.

For more fabric crafts and kids' activities, see:

Advertisement
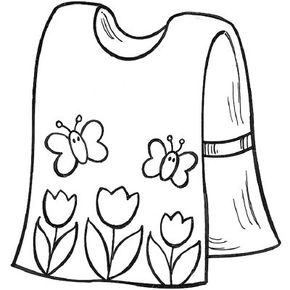
Paint-Proof Art Smock

Paint-Proof Art Smock sewing craft

With this sewing craft, there's no need to worry about messy art projects. After you create this art smock, you can put it on and let your imagination -- and paints -- run wild!

What You'll Need:

  • Measuring tape
  • Vinyl fabric
  • Blunt scissors
  • 14 inches of 3/4-inch-wide elastic
  • Needle and thread
  • Permanent markers

How to Make Paint-Proof Art Smock:

Step 1: Get measurements from neck to mid-thigh and from shoulder to shoulder.

Step 2: Cut a long rectangle of vinyl two times as long as body measurement and as wide as shoulders. Cut a hole in the center for head.

Step 3: Try on and see how it fits. Mark the position of where the elastic will go from one side to the other at waist. Cut the elastic in half.

Step 4: Sew each piece on the vinyl fabric. Decorate your art smock with permanent markers.

For more fabric crafts and kids' activities, see:

Advertisement
Loading...