How to Blend Your Makeup Flawlessly

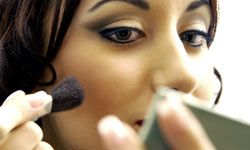
woman applying makeup, woman looking in mirror, makeup
If you think that your face is finished as soon as you've applied all of your cosmetics, we're sorry to tell you there's a bit more work to do.
Design Pics/Thinkstock

Most women (we hope) are very familiar with what is probably the cardinal rule of makeup blending: Never stop applying foundation at your jaw line, lest you end up with the dreaded mask effect. For the most natural results, you should always blend your foundation all the way down your neck.

This beauty commandment, while it's definitely crucial, is just the tip of the blending iceberg. If you've been operating under the assumption that your face is finished as soon as you've applied all of your cosmetics, we're sorry to tell you there's a bit more work to do. With minimal makeup, you might be able to get away without too much attention to blending. But if you're dealing with foundation, eye shadow, eyeliner, blush, lip liner and lipstick, you've gotta blend, blend, blend.

Advertisement

Each cosmetic component doesn't exist in a vacuum -- they all work together to create a flawless face. And you definitely won't have a flawless face if your complicated smoky eyes are three distinct shades and your blush is swiped in a harsh streak down your cheek. So, you need to pay close attention to the details and treat your face like a work of art!

We'll start off with some basic tips on how to blend your makeup seamlessly and then tell you what tools you need to get the job done. Happy blending!

Advertisement

Makeup Blending Tips

A clean, moisturized face is the key to successful blending. Primer doesn't hurt, either, especially if you have very oily skin or heavy scarring. After your moisturizer, you'll want to apply concealer under your eyes and on any blemishes you might have. All of this will even out your skin tone and make a smoother surface.

Foundation is what's going to make or break the rest of your blending efforts. Your skin type and coverage needs will dictate your foundation choice, and it also has to match your skin tone perfectly -- no amount of blending can fix things if you start off with the wrong color.

Advertisement

It's important to apply your foundation correctly so the rest of your makeup can blend into it smoothly. Start in the middle and blend out, and apply it in thin layers so you don't end up with that caked-on effect. You can always add more if you need to. The method of application depends on which kind of foundation you're using and how much coverage you want.

When you're blending eye shadows, always work in one direction only: outward. And don't sweep the brush over the entire lid -- that'll just make things murky. You want the colors to intermingle but also have their own defined areas, so confine your blending to the line between the two colors.

If you're using a lip liner, do the world a favor and make sure the liner matches either your lipstick or the color of your lips. Avoid dark lip liner at all costs. Don't worry too much about blending if you're just using a gloss.

When you're all finished blending, don't forget to set everything with a light dusting of translucent powder or a mist of setting spray.

On the next page we'll reveal all the tools you need to blend away.

Advertisement

Tools for Blending Makeup

If you've been applying and blending your makeup with the bare-basics tools that come with your eye shadows, blushes and foundation, you're probably going to have to do a little shopping. Those devices are fine and dandy for the novice cosmetic dabbler, but you're ready to make your face a work of art, right? It's time to buy some new tools.

As we mentioned on the previous page, the tool you use to apply foundation depends on its formulation and the amount of coverage you want. The rule of thumb for liquid or cream foundation is: sponge or fingers for sheer coverage, brush for heavier coverage. Powder foundations, which are best for oily skin, go on with a brush (which is an entirely different kind of brush, of course, than the one for cream foundation). Stick foundations provide full coverage and can be blended with your fingers. A damp sponge is invaluable for thinning out foundation and blending it into your neck.

Advertisement

Concealer can be applied with your fingers or a brush, too. It just depends on how much coverage you need. Most concealer brushes can be used to both apply and blend, and they tend to be flat and dense, with an oval tip.

For eyes, they actually make a brush that's specifically for blending. They can be domed or pointed, which helps when you're trying to confine your blending to the line dividing two colors (as we explained on the previous page). If you want to get even more specialized, you can get a brush that's only for blending your crease color to your lid color.

As far as lips go, a flat, oval lip brush is the best thing for merging lip liner with matte or semi-matte lip color.

For more information and tips about makeup, take a look at the links on the next page.

Advertisement

Lots More Information

Related Articles

  • Harriet, Alison. "Perfect Makeup is Perfectly Blended." iVillage. Nov. 30, 2006. (June 5, 2012) http://www.ivillage.com/perfect-makeup-perfectly-blended/5-a-146596
  • Lavinthal, Andrea. "The Secret to Blending Your Makeup." Cosmopolitan. March 3, 2009. (June 5, 2012) http://www.cosmopolitan.com/hairstyles-beauty/beauty-blog/blending-your-makeup
  • Makeup Talk. "MACGoddess' Blending Tutorial." March 21, 2006. (June 5, 2012) http://www.makeuptalk.com/t/23781/macgoddess-blending-tutorial
  • Makeup Geek. "How to Avoid a Cakey Face." May 27, 2011. (June 5, 2012) http://www.makeupgeek.com/tutorials/how-to-avoid-a-cakey-face/

Advertisement

Loading...