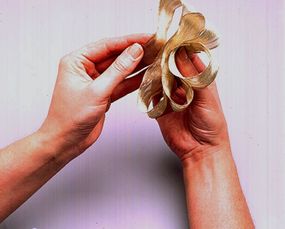
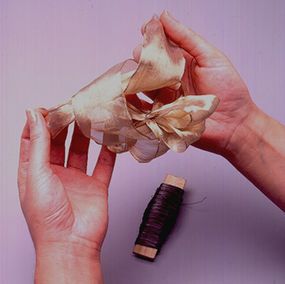
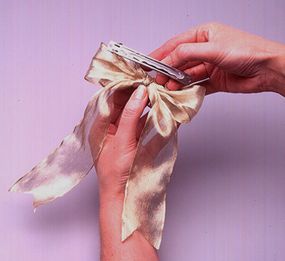
How to Make Girls' Hair Bows

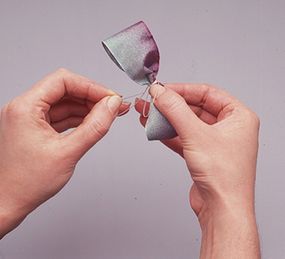
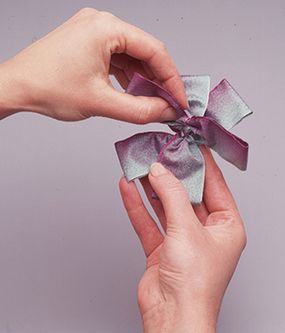
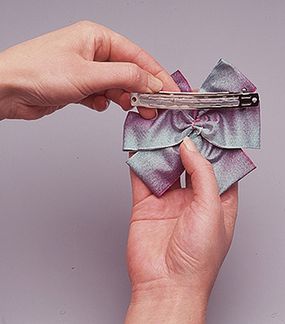
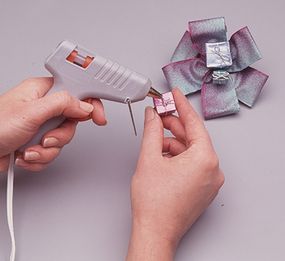
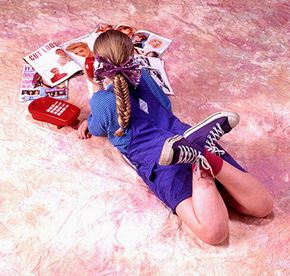
Do you want to know how to make girls' hair bows? These fun designs have flair and can be festive on any occasion. From a classic bow to a fancy round-a-bow, you can make many hair bows that reflect your child's style whatever the season.

Although these hair bows are simple to make, some require sewing or using a hot glue gun. So you may want to create them yourself or supervise your child when she makes them.

Advertisement

In this article you'll also learn how to style your child's hair to show off the hair bows to their best advantage. French braids and chignons may sound complicated, but our detailed instructions will help you perfect your technique.

Follow the links to learn how to make hair bows and hairstyles:

Shoelace Bow with Front Braids

Turn heads with the shoelace bow. It's as easy to make as tying your shoes!

Simple Bow with Three-Strand Ropes

This simple bow can be decorated with any small novelty item. Use it to tie back hair that's twisted into three-strand ropes.

Round-A-Bow with Braided Chignon

This fancy bow is similar to a scrunchie but doesn't need to be twisted. Use lace to create an elaborate design or denim to keep it casual.

Gift Box Bow with French Braids

Using any novelty you choose, including photos, make a bow that's highly individual and special to you.

Plastic Bow with Herringbone Braid

A clear plastic bow frames and sets the stage for novelties inserted inside it.

Classic Bow with French Underbraids

A classic bow is elegant and appropriate for even the most dressy occasions.

Embrace your creative side and begin making hair bows on the next page.

For more fun arts and crafts activities, check out:

Advertisement
Shoelace Bow with Front Braids

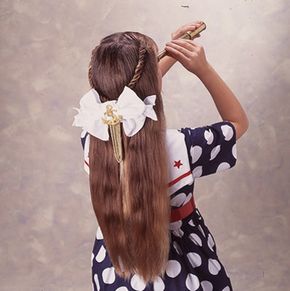
Making a shoelace bow with front braids is as easy as tying your shoes, and the effect can be smashing when you combine materials to make it more intricate. Adding them on these side braids brings a new twist to an old hairstyle.

What You'll Need:
  • 18 inches of strung sequins
  • Three 18-inch ribbons, 1/8 inch wide
  • 1-1/2 inch barrette

You can put these shoelace bows on barrettes, combs, or ponytail holders, or you can tie them directly onto the end of a braid or the base of a ponytail.

Advertisement

The pattern on this ribbon gives you a shoelace bow that's out of this world. To get that pinched look at the ends of the tails, trim each end so that it comes to a point at the center, then fold the two sides back and glue them together before you add the stars.

Here's a radical concept -- use shoelaces to make a shoelace bow! Four shoelaces, four stars, for sure!

Step 1: If you have to cut the strung sequins to the proper length, put glue on the ends of the string to keep the sequins on.

Step 2: Hold the sequins and ribbons together about 4-1/2 inches from the ends. Form a loop about 2-1/2 inches long.

Step 3: Wrap the materials loosely around the base of the loop to form a small circle around it and then feed the materials through the circle to form a second loop, just as if you were tying a shoelace.

Step 4: Pull the two loops in opposite directions to secure the bow, just as if you were tying a shoelace. Adjust the loops and the tails so the two sides are symmetrical.

Step 5: Glue the barrette to the back of the bow.

To create front braids, follow these instructions:

Step 1: Completely part the hair down the center of the head, brushing each side into a ponytail just behind the ear. Secure each ponytail with a coated band. Place a ponytail styler behind the coated band of the ponytail on right side, loop end up.

Step 2: Pull the ponytail up through the loop.

Step 3: Gently holding the ponytail, pull the ponytail styler down so that the ponytail is pulled through behind the covered band. Hair flips over and drops down.

Step 4: Section the ponytail into three equal-size strands. Cross the right strand under the center strand and pull the center strand to the right. This will make the two strands exchange positions. Cross the left strand under the center section so that these two strands exchange positions.

Step 5: Continue crossing sections in this way to the end of the ponytail. Secure with a coated band. Repeat on the ponytail on the left side.

On the next page you'll learn how to make a simple yet pretty bow with a nautical theme.

For more fun arts and crafts activities, check out:

Advertisement

Simple Bow with Three-Strand Ropes

simple girls hair bow
This simple bow is easy to make and sets off a roped hairdo.
b

Do up this simple yet classic bow with three-strand ropes in a nautical theme. The gold appliqué anchor is bound to the shimmery white satin ribbon by a gold-link chain. Cast off any hair design with this one.

What You'll Need:
  • 1-1/3 yards of wired ribbon, 2-1/2 inches wide
  • Craft wire
  • 5 inches of wired ribbon, 1-1/2 inches wide
  • Anchor appliqué
  • 24 inches of plated chain
  • 2-3/4-inch barrette
how to make a simple hair bow
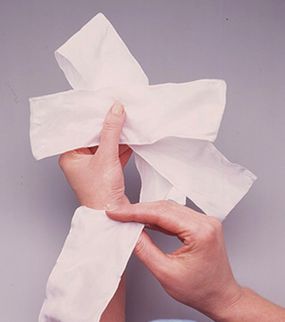
Make two 4-inch loops, holding the ribbon between your thumb and forefinger.
b

Step 1: Hold the 2-1/2-inch ribbon about 4 inches from the end to leave a tail. Make a 4-inch loop, bringing the ribbon under and holding it between your thumb and forefinger. Make another 4-inch loop on the other side, bringing the ribbon over and holding it between your thumb and forefinger.

Advertisement

nautical hair bow
Make another four inch loop.
b

Step 2: Make another 4 inch loop next to the first one, again bringing the ribbon under and holding it between your thumb and forefinger.

simple hair bow
Ensure that the tail is between the ribbon and the second loop.
b

Step 3: Direct the ribbon to the other side of the tail, so that the tail is between the ribbon and the second loop.

how to make a girls hair bow
Make a fourth loop using the same technique.
b

Step 4: Bring the ribbon over to make a fourth loop. Put the end of the ribbon under the top layer of ribbon in the center and bring it out between the first and third loops. You now have four loops, with one tail between the first and third loops and one tail between the second and fourth loops. Trim any excess ribbon from the tail.

hair bow with anchor
Wrap wire around the center of the bow.
b

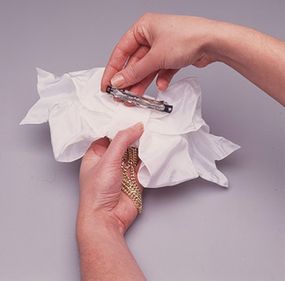
Step 5: Wrap craft wire around the center of the bow to secure. Wrap the 1-1/2 inch ribbon around the center to cover the wire and glue the ends together.

hair bow with chain
Glue the chain and anchor on the bow.
b

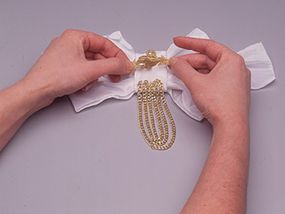
Step 6: Fold the chain in half, drape it at the center front of the bow as shown, and glue it in place. Glue the anchor on top of the chain.

make a hair bow
Glue the barrette to the back of the bow.
b

Step 7: Glue the barrette to the back of the bow. Trim the tail ends in a V-shape.

To show off the nautical bow to the best advantage, pull back hair using the three-strand ropes technique. Follow these directions:

Step 1: Gather up the hair on one side of the head from the front hairline to the ear. Divide it into three equal strands.

Step 2: With your right hand palm down, grasp the right strand and turn your hand palm up so that you twist the strand; do this two or three times. Then cross the right strand over the center strand so they switch positions.

Step 3: With your left hand palm up, grasp the left strand and turn your hand palm down so that you twist the strand; do this two or three times. Then bring the left strand under the center strand so that they switch positions.

Step 4: Continue twisting and braiding the hair in this fashion, alternating from right to left, until you have a strand long enough to reach the nape of the neck. You'll have to maintain tension on the strands and handle them carefully to keep them twisted. Secure the strand at the nape of the neck with hairpins.

Step 5: Repeat this procedure on the other side of the head. Secure the two strands together at the nape of the neck and let the rest of the hair hang down naturally.

neon hair bow
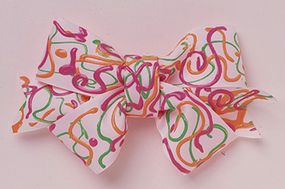
Use a plain white bow and brightly colored paints to create a lively bow.
b

If you want, you can skip the nautical theme and express yourself with a basic white ribbon and lots of neon paints. This vibrant burst of color is fun and easy to make.

On the next page you'll learn how make a round bow to offset a braided chignon.

For more fun arts and crafts activities, check out:

Advertisement
Round-a-Bow with Braided Chignon

round-a-bow hair bow
This elegant round-a-bow derives
b

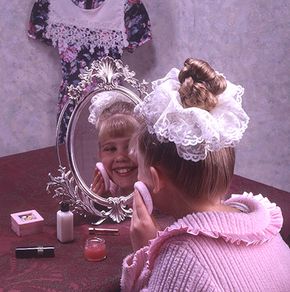
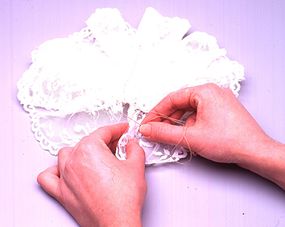
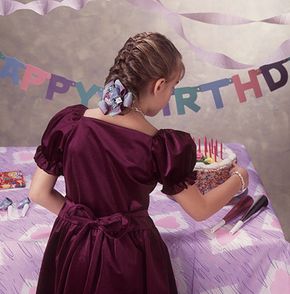
Round-a-bows are a frilly, fluffy, lacy explosion and look lovely with a braided chignon! These bows are similar to scrunchies, but they don't have to be twisted to create an interesting style -- this design stands on its own.

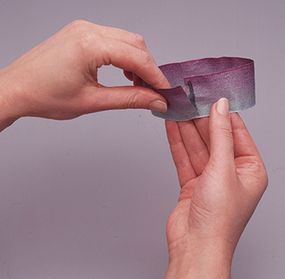
Netting and satin create a soft, shimmery, exotic round-a-bow for a touch of mystery.

Advertisement

What You'll Need:
  • 1 yard of lace, 10 inches wide
  • 5 inches of elastic, 1/4 inch wide
lace hair accessory
Fold the lace in half and sew the folded end.
b

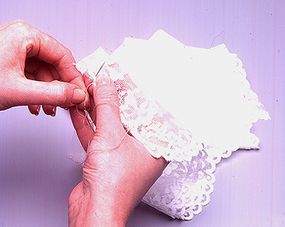
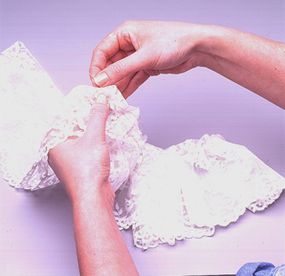
Step 1: Fold the lace in half lengthwise. At one end of the closed, folded side, sew a double stitch 1/2 an inch from the edge to secure the thread.

lace scrunchie
Sew a row of running stitches to secure the lace.
b

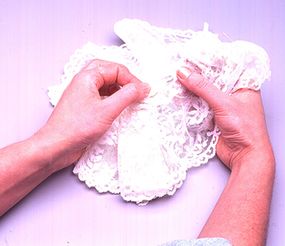
Step 2: Sew a row of running stitches up the length of the lace on the closed, folded side, staying 1/2 an inch from the edge.

how to make a scrunchie
Use a pin to thread the elastic through the lace.
b

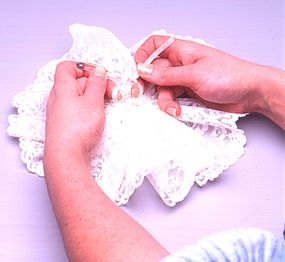
Step 3: When you reach the other side of the lace, weave the needle through the lace to hold it in place. Attach a safety pin to the end of the elastic and feed it all the way through the seam you have just created.

lace hair tie
Knot elastic twice.
b

Step 4: Tie the ends of the elastic together in a double knot. Trim any excess elastic.

lace hair bow
Stitch the knotted ends of the elastic.
b

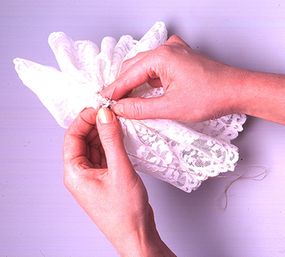
Step 5: Remove the needle from the lace and gently pull on it to gather the lace around the elastic. Stitch the knotted ends of the elastic together securely. Trim any excess thread.

girls hair scrunchie
Sew the edges of the lace closed.
b

Step 6: Pull together the ends of the lace to cover the knotted elastic. You'll be left with four loose edges of the lace. Neatly sew together each pair of edges.

denim round-a-bow
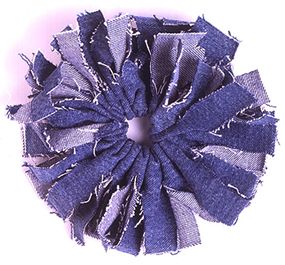
Denim lends a more casual take on the lace round-a-bow.
b

This round-a-bow was made from the leftovers of a pair of jeans that were cut into shorts. Cutting into the edges makes it loose and floppy and adds to the design by exposing the reverse side of the material.

To make the braided chignon featured in the photo, follow these directions

Step 1: Fasten a pontytail at the crown of the head with a coated band. Divide it into three equal strands. Hold the left strand in your left hand. Hold the other two strands in your right hand; with your palm facing up, the right strand is between your thumb and forefinger and the center strand is between your forefinger and middle finger.

Step 2: Turn your right hand over so your palm is facing downward. This will make the right strand cross over the left strand so that they switch positions.

Step 3: Now hold the right strand in your right hand. Hold the other two strands in your left hand; with your palm facing up, the left strand is between your thumb and forefinger and the center strand is between your forefinger and middle finger. Turn your left hand over so your palm is facing downward. This will make the left strand and the center strand switch positions.

Step 4: Continue this procedure, alternating from right to left until the whole pontytail is braided. Fasten the end with a coated band.

Step 5: Take the braid and wrap it around its base at the crown to make the chignon. Use hairpins to secure the chignon to the hair near the scalp. Wrap the chignon in different ways to create new looks.

On the next page, learn how to make a fancy bow called the Gift Box Bow, which is perfect for accenting a French braid.

For more fun arts and crafts activities, check out:

Advertisement
Gift Box Bow with French Braid

gift box bow
This gift box bow is a festive way to tie off a French braid.
b

A gift box bow is a simple and stylish way to accent a French braid. This bow is versatile and easy to make.

You can top it with almost any type of novelty, and your choice of material will give you a bow that's understated or bold, elegant or expressive. Doll house shops are a terrific place to find some interesting novelties for the finishing touch.

Advertisement

What You'll Need:
  • Three pieces of ribbon, 1-1/2 inches wide and 10 inches long
  • Metal barrette, 2-3/4 inches long
  • Novelty wrapped packages
round hair bow
Glue the loop together to make it easier to handle.
bv

Step 1: Overlap the ends of the ribbon 1/2 an inch to form a loop. You may want to glue the ends together to make the loops easier to handle.

easy-to-make hair bow
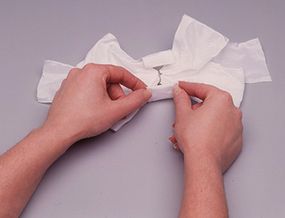
Sew the middle of the bow to secure it.
b

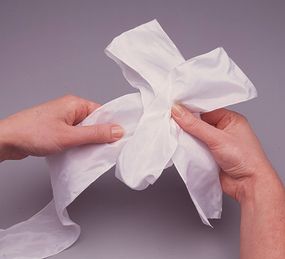
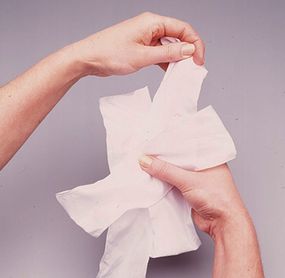
Step 2: Pinch both sides of each loop together at the center to form a bow. Sew the pinched area of each bow to secure it.

hair bow with novelty
Create a pinwheel by stacking the bows.
b

Step 3: Stack and glue the three bows together at the center in a pinwheel fashion.

how to make a gift box bow
Glue the bow to the barrette.
b

Step 4: Glue the barrette to the bottom bow.

girls hair bow
Use a hot glue gun to attach the novelties to the bow.
b

Step 5: Glue novelties to the top of the bows.

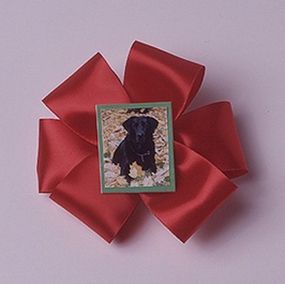
Add a personal touch to your bow with a photo of your pet, your best friend, some hunky guy, or even a picture you've drawn yourself. Just glue the picture to a piece of colored cardboard and slap it on the bow.

girls hair bows
This bow allows a girl to show off her favorite pet.
bkjb

When gluing novelties to the bows, think about what direction the barrette is in. If you're putting on a picture or a message, make sure it will be right side up when the barrette is in your hair.

French braiding is a difficult technique to master. Don't be discouraged if you have trouble the first time you try it. Or the second, third, fourth, or fifth time, for that matter. Keep at it; your fingers will eventually get the hang of it.

Step 1: Comb all the hair back. Pick up a section of hair at the center front hairline and divide it into three equal strands.

Step 2: Take the right strand and cross it over the center strand so that they switch positions. Take the left strand and cross it over the new center strand so that they switch positions.

Step 3: Now comes the tricky part. Hold all three strands in your left hand. With your right hand, pick up a section of hair along the hairline to the right of the braid and add it to the right strand.

Step 4: Take this right strand and cross it over the center strand so that they switch positions.

Step 5: Now hold all three strands in the right hand. With your left hand, pick up a section of hair along the hairline to the left of the braid and add it to the left strand.

Step 6: Take this left strand and cross it over the center strand so that they switch positions.

Step 7: Continue in this way, alternating from right to left and adding new hair to each strand until all the hair has been picked up. Then continue braiding the three loose strands until all the hair is braided. Secure the braid with a coated band.

Step 8: Now take the hanging end of the braid and fold it up and under to the nape of the neck. Secure it there with hairpins.

On the next page, find out how to make an exciting plastic bow to top a herringbone braid.

For more fun arts and crafts activities, check out:

Advertisement
Plastic Bow with Herringbone Braid

plastic hair bow
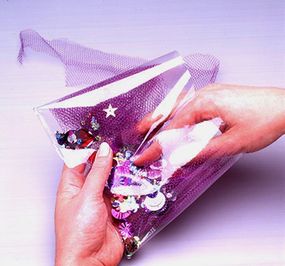
This plastic bow glitters with sequins inside.
b

A plastic bow that acts as frame to display trinkets is a sassy way to top off a herringbone braid. The design offers you a window to display whatever special effects you can think of, and the clear vinyl forms a "pocket" for your decorations to swim around in.

In this version, the sequins will sparkle and shine with your every little movement.

Advertisement

What You'll Need:
  • Clear vinyl, 6 inches x 14 inches
  • Netting, 16 inches x 18 inches
  • Sequins
  • Craft wire
  • 2-3/4 inch barrette
vinyl hair bow
To begin making this bow, fold the vinyl.
b

Step 1: Fold both ends of the vinyl over to the middle and overlap them 1/2 an inch.

hair bow with netting
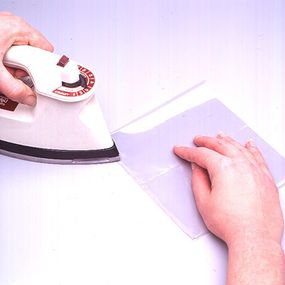
Iron the vinyl to create a seal.
b

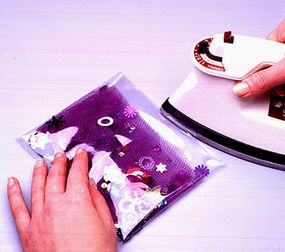
Step 2: Run a medium iron over the bottom 1/4 inch of the vinyl to seal it closed. Use only the edge of the iron and work slowly to be sure you get a straight, complete seal.

plastic hair bow
Pour the sequins into the netting and insert it into the vinyl.
ghjbkj

Step 3: Cut a 2 inch x 18 inch strip off the netting and set the strip aside. Bunch up the remaining netting and put it inside the vinyl. Fan the netting out as needed. Pour the sequins into the vinyl and spread them around.

hair bow with sequins
Iron the edges of the vinyl closed.
b

Step 4: Run a medium iron over the top 1/4 inch of the vinyl to seal it closed.

hair bow with window
Pinch the vinyl to make the bow shape.
b

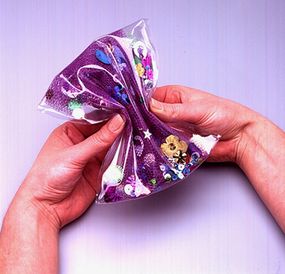
Step 5: Pinch the vinyl together at the center to form a bow.

girls hair bow
Secure the shape of the bow with craft wire.
b

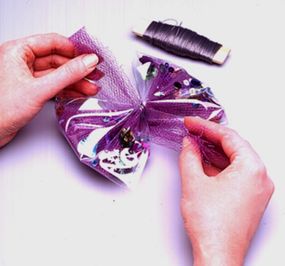
Step 6: Wrap craft wire around the center of the bow to secure it. Wrap the strip of netting around the center of the bow several times and tie it securely. Trim any excess netting.

hair bow with see-through pocket
Fix the bow to the barrette with glue.
b

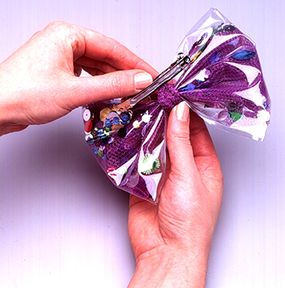
Step 7: Glue the barrette to the back of the bow.

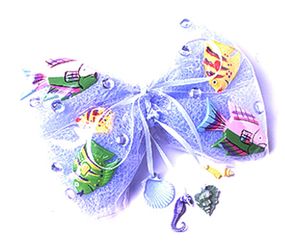
Here's a different way you can create this bow: Make it your very own aquatic ecosystem, complete with multicolored fish, crystal "bubbles," and a few shells. This one-of-a-kind tropical seascape is definitely a conversation piece!

hair bow with fish theme
This plastic bow features a tiny aquarium, complete with fish!
b

A herringbone braid looks intricate and complicated, but it's similar to a French braid. Follow these instructions to create this style:

Step 1: Fasten a ponytail at the nape of the neck with a coated band. Divide the ponytail into two equal sections and hold in the left hand. Using your right hand, separate a small section of hair from the back of the right strand.

Step 2: Cross this section over to the left strand so that it becomes a part of the left strand. Run your right hand down the length of the left strand to smooth the hair together.

Step 3: Move the two strands into your right hand and hold. Using your left hand, separate a small section of hair from the back of the left strand and cross it over to the right strand so that it becomes a part of the right strand.

Step 4: Alternating from the right strand to the left strand, continue separating small sections from the back of each strand and crossing them over to the other strand all the way down the ponytail. Secure the end with a coated band.

On the next page you'll find out how to make the classic bow made out of ribbon and how to create the more complex French underbraid hairstyle.

For more fun arts and crafts activities, check out:

Advertisement
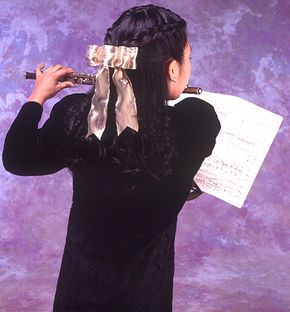
Classic Bow with French Underbraids

classic girls hair bow
A classic hair bow never goes out of style.
b

A classic bow with French underbraids is a timeless, eye-catching style, and it's always in good taste. Wired ribbon works especially well with this design; it helps the bow to keep its shape.

What You'll Need:
  • 27 inches of wired ribbon, 2 inches wide
  • 18 inches of wired ribbon, 2 inches wide
  • Craft wire
  • 2-3/4 inch barrette
how to make a classic hair bow
Roll the ribbon into a circle.
b

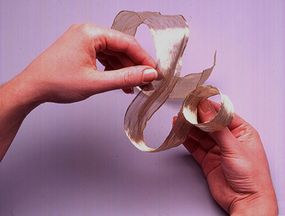
Step 1: Begin working with the 27-inch ribbon. At one end, roll about 5 inches of the ribbon into a circle and hold it securely with the thumb and forefinger.

Advertisement

classic hair bow
Loop the ribbon twice.
b

Step 2: Using the next 5 inches of ribbon, form a 2-1/2 inch loop to one side of the circle, again holding it securely in place between the thumb and forefinger. Make a second loop of the same size on the other side of the circle and again secure the ribbon between the thumb and forefinger.

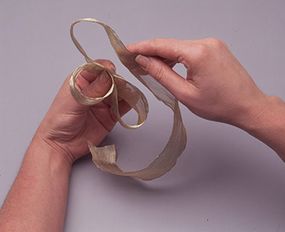
classic hair ribbon
Make another pair of loops with the ribbon.
b

Step 3: With the same method, make another pair of loops with the remaining ribbon; each loop should be about 3 inches long.

hair ribbon with wire
Make sure that the tails of the ribbon are roughly the same length.
b

Step 4: Feed craft wire through the circle and around to the back of the loops; secure the loops and the circle together with the wire. Feed the 18 inches of ribbon halfway through the circle. Tie the ribbon in a tight knot in back of the loops, making sure the tails of the ribbon are the same length.

classic hair bow with wire
Attach the bow to the barrette with glue.
b

Step 5: Trim the tails of the 18-inch ribbon in a V-shape. Glue the barrette to the back of the bottom loop.

Bring a little something extra to this design by gluing a novelty to the top of the bow. Festive red and gold ribbon and a small bell are suitable for a holiday, or any day for that matter.

The French underbraid is a tough hairstyle to create. Be sure you're comfortable making a basic French braid before you try to do this one.

Step 1: Begin by making an off-center part from the front hairline to the crown. Pick up a section of hair at the hairline on one side of the part and divide it into three equal strands.

Step 2: Cross the right strand under the center strand so that they change positions. Then cross the left strand under the center strand so that they change positions.

Step 3: Hold all three strands in the left hand. With the right hand, pick up a new section of hair from along the hairline and add it to the right strand.

Step 4: Take the right strand and cross it under the center strand so that they change positions.

Step 5: Hold all three strands in the right hand. With the left hand, pick up a new section of hair from along the part and add it to the left strand.

Step 6: Take the left strand and cross it under the center strand so that they change positions.

Step 7: Continue braiding in this way, adding new hair to the outside strand and then crossing it under the center strand, alternating from right to left, until you reach the crown. Secure the braid to the crown with hairpins.

Step 8: Repeat this procedure on the other side of the head. Join the two braids together at the crown and secure them. Let the rest of the hair fall naturally down the back of the head.

For more fun arts and crafts activities, check out:

Advertisement
Advertisement
Loading...