Fun Science Projects for Kids

Top secret invisible ink
Learning to make invisible ink is just one of the many fun science projects for kids.
©2007 Publications International, Ltd.

Science is all about understanding the world in which we live, and our fun science projects for kids are a great way to do just that. You'll be amazed and entertained by the various projects -- everything from learning how to make invisible ink to creating "killer slime" to grossing out family and friends with virtual vomit and pseudo snot.

There are great ways to get your hands icky and sticky, as well as less messy projects, like creating your own legends or starting a rock collection. Most of the projects use common items (just open the kitchen cupboard or the refrigerator), so you won't have to run to the store before you can get started.

Advertisement

Adult help or supervision is required for some projects, but each one is fun for kids. Get ready to create, invent, and learn about your world.

Do You Drink Acid?

If you drink soda, you do drink "acid." See how this affects your teeth.

Top Secret Invisible Ink

Here's a great way to send a secret message. Learn the special formula.

What a Relief!

A relief map shows the high and low areas of a landscape. Find out how to make one.

Water Clock Estimation

Learn how to track time when you make a water clock.

Attack of the Killer Slime

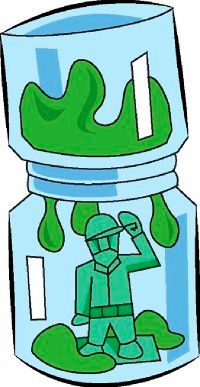
Create a slime chamber to attack a toy soldier. See how slimy this really is.

Be a Rock Hound

Want to get started with a rock collection? Now you can learn how to do it.

It Is Absorbing

Use a disposable diaper to perform a magic trick. Find out all about it.

Moo Glue

Make your own glue from milk. It really works -- see for yourself!

Virtual Vomit

It's ultra-icky and super-gross. Find out how to make this "pukey" solution.

What Was That?

Use your imagination to create a legend. See how to get started.

Pseudo Snot

Expect people to offer you a tissue when they see this goo. Learn how to make it -- and gross out your friends.

Gloop

Defy the laws of gravity with gloop. Find out how to make it.

Hollow Strength

Bones can be hollow, but they're still strong. Try this experiment.

Gunk

Check out this solution that has properties of both a liquid and a solid. Amazing -- but true.

Before you sit down with a cold soda, you might want to check out this first project. Do you drink acid? Keep reading to find out.

For more exciting science projects, check out these:

Advertisement
Do You Drink Acid?

Do You Drink Acid?
The acid content in your favorite soda is not teeth-friendly.
©2007 Publications International, Ltd.

If someone were to ask, "Do you drink acid?" you might laugh and say, "Of course not!" But guess what? If you drink soda pop -- whether it's diet or filled with sugar, with caffeine or caffeine-free -- you're drinking acid ... or at least, you're drinking an acidic liquid.

And although you may think your favorite soda is great, your teeth aren't as happy with it as you are. Because soda pop is an acidic beverage, it's bad for your teeth -- the acid can dissolve calcium. And that's bad because calcium keeps your teeth strong.

Advertisement

Try the following experiment to see if your favorite soda (and other liquids) are acidic.

What You'll Need:

  • Milk
  • Yellow soda (such as Mountain Dew)
  • Club soda
  • Lemon juice
  • 4 test tubes
  • pH indicator strips (available in hobby shops)

Step 1: Pour 1 milliliter each of milk, yellow soda, club soda, and lemon juice into separate test tubes.

Step 2: To find out if the liquids are acidic, neutral, or alkaline, dip a separate piece of pH paper into each.

Step 3: Compare the color of the papers or solutions to the pH indicator chart on the side of the container. Write down the pH of each solution.

What Happened?

Some liquids are acidic and others are alkaline. Milk is alkaline; it contains a lot of calcium. Soda and lemon juice are acidic, in part because both contain citric acid. Don't stop here -- find the pH of other drinks.

When you've finished testing the lemon juice, you can use it to create secret messages. Keep reading to find more fun science projects for kids.

For more exciting science projects, check out:

Advertisement

Top Secret Invisible Ink

Top secret invisible ink
Lemon juice plus a light bulb equals invisible ink!
©2007 Publications International, Ltd.

It's easy to send secret messages to your friends when you write them in top secret invisible ink. The "secret" is in the combination of lemon juice and heat from a light bulb or an iron. The heat causes a chemical change in the lemon juice and makes it appear darker on paper.

It can be a little tricky to write with the "ink" -- it's invisible, after all -- but once you get the hang of it, it's a fun way to share secrets with your friends. Make sure an adult is nearby when you get to the part of the project that uses heat, but as for the secret messages -- those are all yours. Here's how to get started:

Advertisement

What You'll Need:

  • Toothpick
  • Lemon juice
  • Paper
  • Heat source, such as a light bulb or iron

Step 1: Dip the round side of a toothpick into lemon juice, and write a secret message with it on a piece of paper. Use lots of lemon juice for each letter you write.

Step 2: Allow the paper to dry until you can't see the writing any more.

Step 3: Now move the paper back and forth over a heat source. As the ink gets warm, your message is revealed.

What Happened?

The acid in the lemon juice breaks down the cellulose of the paper into sugars. The heat supplied tends to caramelize the sugars, making them brown and revealing the secret writing. Repeat this activity with vinegar or milk to find out which makes the best invisible ink.

Ready to get your hands messy? Keep reading to learn how to make a relief map from plaster of Paris in fun science projects for kids.

For more exciting science projects, check out:

Advertisement

What a Relief!

What a relief
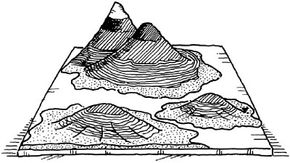
A relief map shows the high points and low points of a certain area.
©2007 Publications International, Ltd.

What kind of map will earn you comments like, "What a relief"? A relief map! This special kind of map points out the different highs and lows of Earth's landscape. It's like a small model that shows mountains, hills, and valleys.

Whether you create a map of your back yard or the whole United States, you'll find high points and low points. To get started, find a sturdy piece of plywood -- that makes a good base for your map.

Advertisement

What You'll Need:

  • Plywood,
  • Plaster of Paris or modeling clay
  • Paints

Step 1: Draw an outline of the area you're going to map on a piece of plywood.

Step 2: Use plaster of Paris or modeling clay to fill in the outline. Pile up the clay to show the high places.

Step 3: If you're mapping a large area, such as the state you live in, you'll need to look at a map that shows mountains and valleys. If you're mapping a small area such as your backyard, just map what you see.

Step 4: After your map dries, paint it. Use different colors to highlight the highs and lows. For example, you could paint the highest mountaintops white like snow, and the valleys green like plants.

How long did it take you to make your map? You could have timed yourself with a water clock. Keep reading to learn how in fun science projects for kids.

For more exciting science projects, check out:

Advertisement

Water Clock Estimation

Water clock estimation
Learn to mark time with a water clock.
©2007 Publications International, Ltd.

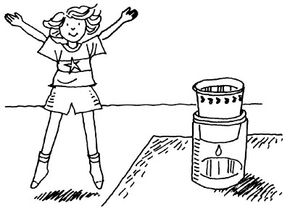
How can water help you mark the time? You'll find out when you use a water clock estimation. It's not a clock like the one that hangs in your kitchen, of course, but it can help you to "tell time" when you check on the water level of this special kind of clock.

Sound complicated? It's not. Here's how to begin making your time-telling tool, a water clock:

Advertisement

What You'll Need:

  • Paper cup
  • Straight pin
  • Cylinder-shaped jar
  • Pin
  • Water
  • Pitcher
  • Permanent marker
  • Digital clock

Step 1: To make the clock, pierce a hole in the bottom of the paper cup with a straight pin.

Step 2: Set the cup in the jar so it rests in the rim -- the bottom of the cup should not touch the bottom of the jar.

Step 3: With a digital clock or a watch with a second hand nearby, fill the cup with water.

Step 4: Using a permanent marker, record the water level reached at 1-minute intervals on the outside of the jar. Mark off each minute for 15 minutes.

Step 5: Then empty the cup and the jar, and get ready to use the water clock for estimation challenges.

How many minutes does it take you to brush your teeth? How long does it take to make a peanut butter and jelly sandwich or to do 25 jumping jacks?

Make an estimate, fill the glass with water, do the task, and test your estimate.

You can also make another clock for tracking time for longer periods. Use a larger jar, and this time, mark the water level reached at 15-minute intervals. You might want to use a kitchen timer to remind you when to record the 15-minute intervals.

How long would you estimate it would take to "slime" a toy soldier? Learn all about it on the next page of fun science projects for kids.

For more exciting science projects, check out:

Advertisement

Attack of the Killer Slime

attack of the killer slime
The poor toy soldier is defenseless against killer slime.
©2007 Publications International, Ltd.

It's not a monster movie, but the "Attack of the Killer Slime" is just as entertaining. The "victim" is a toy soldier, and the slime is actually a corn syrup concoction.

In this project, you'll create a slime chamber for the unfortunate toy solder, and in the process, you'll learn something about "viscosity." Viscosity is the way a liquid will resist flowing -- viscous liquid is sticky and slow-moving. For example, motor oil in cars has a high viscosity. It sticks to the metal parts and prevents wear and tear on the engine that would otherwise occur due to friction.

Advertisement

You'll need to ask an adult for help with some of this project, such as the drilling and gluing. And be sure to wear goggles when you drill, even if you have adult help.

attack of the killer slime 2
The slime flows slowly onto the toy soldier because the slime has a high viscosity.
©2007 Publications International, Ltd.

What You'll Need:

  • 2 baby food jars with lids
  • Strong glue
  • Small plastic toy soldier
  • Goggles
  • Drill, with 1/4-inch drill bit
  • Light corn syrup
  • Green food coloring
  • Spoon

Step 1: Glue the tops of the baby food jar lids to each other, flat side to flat side. Glue the plastic soldier to the inside bottom of a baby food jar. Let the glue dry.

Step 2: Put on the goggles. Ask an adult to help you drill a hole through the 2 lids.

Step 3: Fill the jar without the soldier with corn syrup. Stir in green food coloring until you have the perfect shade of green for your slime.

Step 4: Screw the attached lids onto the jar with the green slime; then screw the jar with the soldier onto the other side of the lids.

Step 5: Flip the jars so the soldier is standing up. The slime will flow from the top jar to the bottom jar to cover the soldier. Flip over the jars for the slime to return to the first jar.

Find the Slime Time

How long did it take for the slime to flow from jar to jar? Put the jars in the refrigerator for 30 minutes to see if temperature affects Slime Time.

What Happened?

The corn syrup flowed slowly through the hole and onto the toy soldier because corn syrup has a high viscosity -- liquids with a high viscosity flow slowly.

Ready for something less gooey? Keep reading to learn about becoming a rock hound in fun science projects for kids.

For more exciting science projects, check out:

Advertisement

Be a Rock Hound

Be a rock hound
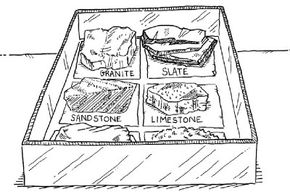
Keep your rock collection in a box and label the types of rocks.
©2007 Publications International, Ltd.

Do you know what it means to be a rock hound? A rock hound is someone who enjoys collecting rocks and minerals. Rock collecting is a fun hobby that will keep you entertained for years to come.

It doesn't matter where you live -- rocks can be found almost everywhere -- but different parts of the country do have different kinds of rocks. In some regions, you can find tons of granite; in other regions, most of the rock is sandstone or limestone.

Advertisement

Rocks are made out of minerals, so the kinds of rocks you find in a region depend on what kinds of minerals are found there. It also depends on what geologic events have happened in the area. For example, if a volcano ever dumped molten lava in your area, you'll find lots of igneous rocks.

If your region was once under water, you'll find sedimentary rocks (rocks made when mud, sand, and minerals settle and harden). And if the Earth has buckled, you'll find metamorphic rocks (rocks that have been changed by pressure and/or heat). All rocks fall into one of these three basic categories.

Here's how to get a good start to being a rock hound:

What You'll Need:

  • Rocks
  • Rock-identifying books
  • Box

Step 1: Take a hike through your neighborhood and see how many different kinds of rocks you can find.

Step 2: Look along roads, streams, lakes, and excavations for rocks of different colors and different textures (smooth or rough, shiny or dull).

Step 3: See if you can identify your rocks.

One way to identify rocks is to use a book that shows the different kinds. Check out a book from your library, and match your rock samples to pictures and descriptions in the book. The book will probably also tell you what minerals are in each kind of rock and how it was formed.

Another way to identify your rocks is to go to a rock shop. There, you'll see samples of all different kinds of rocks, labeled with their names. Which ones look like rocks you found?

Step 4: Keep your rock collection in a box.

Step 5: Glue each rock to the box and label it, or make a compartment for samples of each kind of rock. Keep expanding your rock collection as you find new and unusual rocks.

One substance you won't find on your rock hunt is super-absorbent polymer. Keep reading to find out how you can do a magic trick with it.

For more exciting science projects, check out:

Advertisement

It is Absorbing

It's Absorbing
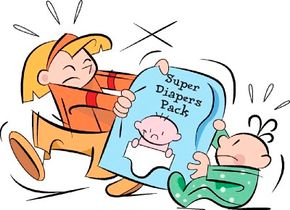
Baby's diapers contain a substance that creates a cool magic trick.
©2007 Publications International, Ltd.

What's one thing you should know about super-absorbing polymer? It is absorbing! What's another thing? It's used in diapers. Now, you can take this knowledge and perform a magic trick.

The chemical name for super-absorbing polymer is sodium polyacrylate. Its chemical structure allows it to absorb a lot of liquid.

Advertisement

Ask an adult to help with this activity. The super-absorbing polymer can cause drying and irritation of the eyes and inner nose, so wear goggles when you use this material. And although it may look like Nerds or Pop Rocks, don't put any of it in your mouth -- it can be harmful if swallowed.

What You'll Need:

  • Goggles
  • 2 clean, unused disposable diapers
  • Scissors
  • Dark sheet of paper
  • 2 foam cups
  • Graduated cylinder (or small measuring cup with milliliter marks)
  • Water

Step 1: Put on the goggles. Cut open the part of a clean diaper that absorbs the baby's urine.

Step 2: Gently run your fingers over the cotton surface. Powder and crystals will fall out -- catch them on the dark sheet of paper. This material is the super-absorbing polymer. Don't rub your fingers too roughly over the diaper surface -- you want to collect the crystals, not the cotton. Put the super-absorbing polymer crystals into the bottom of a foam cup.

Step 3: Measure 2 milliliters of water, and pour it into the cup. Keep doing this until the polymer doesn't hold any more water. Calculate the total amount of water that the super-absorbing polymer from one diaper holds.

Step 4: Now here's the cool part: Repeat steps 1 and 2; then gather your audience for your magic trick. Don't let them know you have anything in the cup. Take the amount of water that the super-absorbing polymer can hold (you calculated this in Step 3), and slowly pour it into the cup.

Step 5: Talk to your audience for a minute as the water is being absorbed. Then dramatically turn the cup upside down. To the amazement of all, no water will come out.

Ever wonder why there's a picture of a cow on your bottle of white glue? Keep reading fun science projects for kids to learn the answer.

For more exciting science projects, check out:

Advertisement

Moo Glue

Moo glue
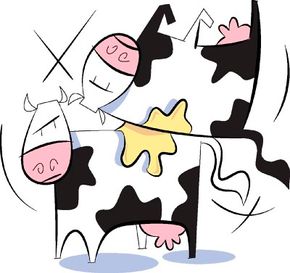
Your school glue is made from milk -- that's why there's a cow on the label.
©2007 Publications International, Ltd.

When you read through the directions for this project, it'll be easy to understand why the end result is called "moo glue" -- the sticky stuff you'll be making uses milk as the main ingredient.

For this project, you'll need to have an adult nearby, just to be safe while you're using the stove. You'll also need to wear goggles throughout the entire activity.

Advertisement

What are you waiting for? Get a moo-o-o-ve on!

What You'll Need:

  • Goggles
  • Skim milk
  • Measuring cup and spoons
  • Saucepan
  • Vinegar
  • Mixing spoon
  • Cheesecloth
  • Water
  • Baking soda
  • Glass
  • Borax
  • Paper

Step 1: Put on the goggles. Warm 1 cup skim milk on a stove. (Don't heat the milk to a boil.) Stir in 2 teaspoons vinegar. The milk will separate into solid chunks.

Step 2: Filter the chunks using a piece of doubled cheesecloth. Rinse the chunks with water to wash off all the acidic vinegar.

Step 3: Sprinkle 1 teaspoon baking soda on top of the chunks to neutralize any remaining acid.

Step 4: . Put 2 tablespoons warm water in a glass. Add 1/2 teaspoon borax. Stir and dissolve the borax as much as possible.

Step 5: Add the chunks of milk to the glass with the borax solution. Let stand overnight.

Step 6: Now your glue is ready. Try it out on some sheets of paper. Use the glue for a few days, and then discard unused glue.

What Happened?

When the acidic vinegar is added to the warm milk, it causes the milk to curdle. The protein in the milk unravels and forms new connections. When proteins change shape like this, chemists say they have become denatured. The borax causes the long protein strands to form chemical bonds between them, which makes the solution sticky. This results in white glue.

And now for a project that's a little less useful -- but a lot of fun. Keep reading fun science projects for kids to learn how to make something that is guaranteed to gross out your friends in fun science projects for kids.

For more exciting science projects, check out:

Advertisement

Virtual Vomit

virtual vomit
Virtual vomit looks real enough to gross out just about anybody.
©2007 Publications International, Ltd.

Guaranteed to gross out just about anyone, here's a project that uses things you can find in the kitchen cupboard to make ultra-icky virtual vomit.

Virtual vomit looks very realistic -- that's what makes it fun to use as a joke -- but be careful where you place it; your virtual vomit could stain cloth or wood surfaces. And it's best not to set it in a warm place -- one of the ingredients is gelatin, which may melt if it is warmed, making a huge mess.

Advertisement

Make sure you have an adult nearby (this project requires working with the stove), and then get ready ... get set ... get gross.

What You'll Need:

  • Measuring spoons and cups
  • Oatmeal
  • Water
  • Saucepan
  • Applesauce
  • 1 packet gelatin
  • Powdered cocoa
  • Breakfast cereal flakes
  • Nonstick frying pan
  • Wooden spoon
  • Plastic spatula

Step 1: Place 1 teaspoon oatmeal and 2 tablespoons water into a saucepan. Turn heat on low. Heat for 2 minutes.

Step 2: Stir 1/3 cup applesauce into the saucepan. Add gelatin, 1/3 teaspoon powdered cocoa, and about 10 broken cereal flakes.

Step 3: Stir a few times, but it is best to have the mixture be a bit lumpy. Turn off the heat, and allow it to cool for a few minutes. Pour the mixture into a nonstick frying pan. With a wooden spoon, shape it into the desired vomit shape. Let it cool completely.

Step 4: Use the plastic spatula to lift the virtual vomit out of the pan, and place it on a plastic table, counter top, or concrete sidewalk where it will gross out somebody. Watch people's reactions as they see this super-icky solution.

What Happened?

The water in the applesauce and the water you added dissolved the powdered gelatin. The solution was created with the addition of the heat. When the heat was removed, the solution cooled and the gelatin formed into a solid. Now that is gross!

Ready to use your imagination? Keep reading to learn about an age-old tradition in fun science projects for kids.

For more exciting science projects, check out:

Advertisement

What Was That?

Imagine if hearing a clap of thunder or seeing a bolt of lightning caused you cry out, "What was that?" In ancient times, people didn't know anything about thunder and lightning or how they were caused. So they made up stories to "explain" these mysteries.

One Native American tribe believed that thunder and lightning were the signs of gods attacking evil men on Earth. In fact, most ancient people thought thunder was the sound of gods either talking or fighting, and lightning flashes were their spears.

What You'll Need:

  • Paper
  • Pen or pencil
  • Markers

Step 1: Imagine that you lived long before modern science. Make up your own legend to explain thunder and lightning -- or any other weather phenomenon.

Step 2: Write out your legend (or type it on your computer and print it out); then, draw pictures to illustrate it.

You don't need much imagination to know that the stuff that comes out of your nose is pretty gross. Keep reading to find out more in fun science projects for kids.

For more exciting science projects, check out:

Pseudo Snot

Pseudo snot
Eeewww! That's gross -- but it's only pseudo snot.
©2007 Publications International, Ltd.

Want to use chemistry to gross out your family and friends? Make some pseudo snot. You might already know that "pseudo" (say "soo-doe") means artificial or pretend, but you may be surprised by how real the pseudo snot will look.

You'll need to wear goggles to make the solution. And while it may seem obvious, do not eat the pseudo snot or drink the borax solution. When you're finished playing your joke, put your pseudo snot in a plastic bag and toss it in the trash -- don't pour it down a sink; it will clog pipes.

What You'll Need:

  • Goggles
  • Borax
  • Measuring cup and spoons
  • 3 small bowls
  • Water
  • Yellow (or green) food coloring
  • White glue
  • Mixing spoon

Step 1: Put on the goggles. Dissolve 1/2 teaspoon borax into 1/4 cup water in the first bowl.

Step 2: Put 3 teaspoons water in second bowl, and add 1 drop yellow

food coloring.

Step 3: Put 1 teaspoon white glue into the third bowl. Stir 1/2 teaspoon yellow water into the glue. Pour 1 teaspoon of the borax solution over the glue, but don't stir it.

Step 4:. Put your fingers into the center of the solution, and pull out a nice long strand of pseudo snot. Find a friend to gross out, and pretend to sneeze -- hold the pseudo snot near your nose. Yuck! You have enough borax solution and yellow water to repeat this five more times. Experiment with different colors to find the perfect snot color.

What Happened?

White glue is made of long strands of proteins. The borax causes these long strands to bond together more tightly, so when you pull the mixture up it looks like a long strand of snot.

What type of solution acts like a liquid and a solid at the same time? Learn all about it on the next page of fun science projects for kids.

For more exciting science projects, check out:

Gloop

gloop
Is it a liquid or a solid? It's both -- it's gloop.
©2007 Publications International, Ltd.

If Sir Isaac Newton, the British scientist who gave us the theory of gravity, were alive today, he just might be confused by gloop. Gloop, a solution that behaves a little like a solid and a little like a liquid, seems to defy the laws of gravity.

When gloop is molded into a ball, it stays that way for a short time, but then gravity pulls it down -- and it becomes a liquid. Amazing!

What You'll Need:

  • Borax
  • Teaspoon
  • Glass
  • Measuring cup
  • Water
  • Mixing spoon
  • White glue
  • Bowl

Step 1: Mix 1 teaspoon borax with 1/3 cup warm water in a glass. Stir well.

Step 2: Mix 1/6 cup white glue with 1/6 cup water in a bowl. Stir well.

Step 3: Mix 3 to 4 teaspoons borax solution into the glue. Using less borax makes a slightly stickier gloop. When the gloop gets thick, knead it with your hands.

Step 4:. Play with the gloop, and discover its properties. Notice how far it can be stretched. Mold it into a ball. Put the ball in the center of your palm. Observe how the ball becomes a liquid and drips between your fingers.

Safety reminder: When you're finished experimenting with your gloop, place it in a plastic bag and toss it in the trash. Don't pour it down a sink; it will clog pipes. And as with other chemistry activities, don't eat anything you make.

Did you know that your bones are strong because they're hollow? Keep reading fun science projects for kids to learn more.

For more exciting science projects, check out:

Hollow Strength

fun science projects hollow strength
Your bones have hollow strength -- they're strong, even though they're hollow.
©2007 Publications International, Ltd.

Did you know that many of the long bones in your body are hollow? You might say they have "hollow strength," because even though they're hollow inside (or filled with soft tissue), they're still able to support the weight of your body.

Being hollow means that they're lightweight, so it takes less energy to move them. (Imagine trying to walk or run if you had bones that were solid all the way through. It'd be like moving your legs with weights attached.) Having a hollow center gives them a better design and makes them stronger.

Confused? Give the following project a try, and you'll see what is meant by "hollow strength."

What You'll Need:

  • Notebook paper
  • Tape
  • Paper plate
  • Measuring cup
  • Wooden blocks or other weights

Step 1: Roll up a sheet of notebook paper into a tube about 1 inch wide. Tape the tube closed so it doesn't unroll. Repeat twice more so you have three paper "bones."

Step 2: Stand the bones up on their ends. Put a paper plate on top of the three rolls. The hollow rolls will support the plate.

Step 3: Now start adding wooden blocks to the plate. Count how many blocks the plate can hold before it collapses the bones. These bones are strong, so they might be able to hold quite a few blocks.

Step 4: Roll three more sheets of paper as tightly as you can, so there are no hollow sections. These bones use the same amount of paper, but they are much thinner. Stand them on end, and put the plate on top of them. Put blocks on the plate until these bones collapse.

Bones have amazing properties, but so does gunk. Keep reading fun science projects for kids to find out about one more project that defies logic.

For more exciting science projects, check out:

Gunk

Here's a substance -- we call it "gunk" -- that's easy to make and very entertaining. It's made with cornstarch and water, and that's reason it's so much fun: Cornstarch mixed with water has properties of both a liquid and a solid. Impossible, you say? No, it's science.

What You'll Need:

  • Water
  • Measuring cup
  • Bowl
  • Cornstarch
  • Spoon

Step 1: Pour 1 cup of water into a bowl.

Step 2: Add cornstarch a little at a time, stirring as you go. You will need about 1-1/2 cups of cornstarch. Keep adding until it gets difficult to stir.

Step 3: When it is perfect, you can hit the solution with your hand, and it will not splatter.

Have fun with the gunk. Scoop some up, and let it dribble back into the bowl. Try to form some into a ball.

Have a friend take a look. Slap your hand into the bowl, and watch as your friend jumps back, expecting a splash -- but no splash happens.

When you've had enough fun with the gunk, throw it in the trash -- don't pour it down the drain, as it may clog the pipes.

For more exciting science projects, check out:

ABOUT THE CONTRIBUTING WRITER:

Do You Drink Acid? by Peter Rillero, Ph.D.

Attack of Killer Slime by Peter Rillero, Ph.D.

It's Absorbing by Peter Rillero, Ph.D.

Moo Glue by Peter Rillero, Ph.D.

Virtual Vomit by Peter Rillero, Ph.D.

Pseudo Snot by Peter Rillero, Ph.D.

Gloop by Peter Rillero, Ph.D.

Peter Rillero, Ph.D., is Department Chair of Secondary Education and Associate Professor of Science Education at Arizona State University in Phoenix. He is the author of Time for Learning: Science; Time for Learning: The Human Body, and Totally Creepy Bugs and the co-author of the best-selling high school biology textbook in the United States. Rillero has conducted two program evaluations of the world's largest science fair, the Intel International Science and Engineering Fair. His Web site is www.west.asu.edu/rillero.

Advertisement

Loading...