Ultimate Guide to Recycled Tin Can Crafts

Turning old tin cans into clever crafts is fun and easy.
iStockphoto.com/Simon Smith

Airtight, colorful and darn near unbreakable, the humble tin can celebrates its 200th anniversary in 2010. When Englishman Peter Durand invented the tin can in 1810, the cans were handmade and individually soldered shut by craftsmen. At the time, scientists didn't even know why heat-sealing worked to preserve food.

Since then, of course, there's been a little event called the Industrial Revolution. Now the world has millions of mass-produced tin cans -- and thousands of crafters and artisans eager to recycle them into objects of beauty and utility.

Advertisement

Tin cans are sturdy. They can be tossed between shipping palettes and stacked high on storage shelves, and they're exactly the thing you want in a lifeboat emergency kit or a fallout shelter. Tin is resilient enough that a green-minded Argentine designer used flattened cans as siding to weatherproof an entire two-story house [source: Alvarado].

"Tin" is actually something of a misnomer. The cans on the shelves of your pantry have only a thin coating of tin. Most of the can is made of steel. The coating of tin protects the steel from the acids in the food, which would otherwise eat into the metal.

Steel, an alloy of iron, is what gives tin cans their strength, but it's also what gives them their tendency to rust -- a tendency that all tin can crafters must deal with one way or another. Some crafters like the look of aging metal; some want to keep the shiny surface intact. All tin can crafters should recognize that untreated tin cans have the potential to stain objects around them.

This article explores a number of ways to repurpose the versatile tin can, including household containers and garden lights. We'll start with the easiest possible project: turning a coffee tin into a storage container. Read on.

Advertisement
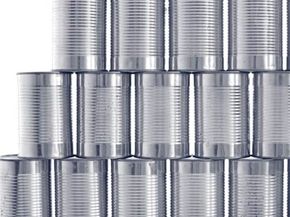
Recycled Coffee Tin Storage Containers

A coffee tin is already a storage container, so recycling it is mostly a question of, cleaning it, deciding what you want to put in it and making sure it's in appropriate shape for that use. For example, if it's going to come into contact with water or dampness -- and most kitchen and workshop containers will, sooner or later -- you might want to coat it, inside and out, with a spray enamel to prevent rusting.

Coffee tins can be useful in workshops for containing hazardous materials, such as paint thinner and other solvents. The plastic lid protects against spills and keeps the potentially harmful vapors from escaping.

Advertisement

In the kitchen, you can use a recycled coffee tin to recycle another resource: pan drippings. Drippings -- the fat left over from cooking meat -- are loaded with flavor, and cooks have been using them for centuries to give savory weight to dishes. But it can be a messy process without a good container. The coffee tin makes it easy. Set a coffee filter over the opening of the tin. While pan drippings are still hot, pour them through the coffee filter into the tin. (The filter removes the large particles of food, which will scorch if cooked later.) Put the lid on the coffee tin and pop it into the freezer so that the grease solidifies. The next time you need a bit of cooking fat, you can easily scoop it out.

Coffee tins are, naturally, terrific food storage containers, especially for dry goods. They're lightweight, they stack well and the plastic lids provide a good barrier against pathogens and staleness. If pantry organization is a problem, you could use coffee tins -- painted in different colors and labeled -- to create a bright, modular set of storage bins for baking ingredients. Coffee tins are also a useful way to manage any food that typically comes in an unstackable sack: dry beans, rice, popcorn, bulk cereals.

Chances are that the kitchen isn't the only area where you have a lot of loose things you'd like to contain. On the next page, we'll look at how to use cans to organize your office.

Advertisement

Recycled Tin Can Pen Holders

Before you spend money on a matching desk set, remember that you might already have one in your pantry. Tin cans are the perfect size to contain pens, pencils, scissors and other office supplies. You could even turn a shallow tuna can into a paper clip dish.

Wash the can thoroughly in hot, sudsy water, to get rid of traces of food. Since your hands will come into frequent contact with the pen holder, remove or cover all sharp edges. A sanding wheel attached to a power drill or rotor tool will smooth out rough spots. You can also finish the top edge by folding a piece of ribbon lengthwise over the rim. (You might also want to look for a side-cutting can opener, which doesn't leave a sharp edge.)

Advertisement

Before you decorate a pen holder, think about where you plan to place it. Will you be looking down into it? If so, decorate the inside as well as the outside. A bit of contrasting color can be a lovely addition to your desk.

Spray enamel is the easiest way to add color to a tin pen holder. Paint markers will also work. If you're interested in something a bit more elaborate, wrap multiple cans in coordinated pieces of wallpaper. (To find old samples of wallpaper, ask local interior decorators for their discards, or find a Creative Reuse Center.) A small amount of epoxy will make almost anything adhere to metal.

If you have a number of different art supplies or hand tools to organize, you can use numerous recycled tin cans to create a supply rack. Decorate the cans in complementary colors -- or color-code them so you can tell at a glance which is which. If you want a wall-mounted rack, attach the cans (with screws or epoxy) to a plain wooden coat rack. You can use the hooks on the coat rack to hang tools such as tongs and scissors, or to keep power cords hung without tangling.

Alternatively, if you need work-surface organization, you could affix the tins to a lazy Susan for your workbench or art table. If you put the lazy susan on casters, you'll always be able to roll your supplies to the place on the table where you're working.

If you're ready to take your cans outdoors, keep reading for a great craft for your garden or patio.

Advertisement

Recycled Tin Can Lanterns

You probably already have the tools to turn an empty can into a hanging lantern. You'll need a hammer and nails, wire (or a light, strong chain) and wire cutters, pliers and a freezer. You may also want oil-based primer and enamel paint, but that's up to you.

To start, fill a clean, empty can with water and place it in the freezer. When the water has frozen solid, remove the can.

Advertisement

Use the hammer and nails to punch patterns into the sides of the can. The ice keeps the tin from denting. You can create any pattern you want. If you're skilled with a blowtorch or rotor tool, you can go even further.

The more holes you make, the more light your lantern will produce, but the more its structural integrity may be compromised. Sometimes designers do that deliberately. Using tin snips, some crafters make parallel vertical cuts in the sides of a can to create a fluted section. The lantern can then be vertically compressed to create sides that bell out. Use safety gloves when you try this -- the metal will be sharp.

Punch holes in the top of the can to attach the wire or chain. Use the pliers to secure the lantern to its hanger. The length of the hanger is up to you, but if the lantern will be outdoors, you may want to keep hangers short to reduce wind hazards. Conversely, if the lantern has a short hanger, you'll need to avoid hanging it from flammable structures.

Drive a short nail up through the bottom of the can. You'll use this nail to secure the candle. Push the candle down onto the nail to anchor it.

If you want your lanterns to be colorful, as well as a bit more waterproof, paint them first with primer and then with a rustproof outdoor enamel paint. If you plan to paint your lantern, you may want to start by punching holes that are a bit larger -- layers of paint can obscure details.

If you're looking for a bigger challenge, try flattening the cans and assembling them in panels.

On the next page, we'll look at a related craft -- candleholders.

Advertisement

Recycled Tin Can Candleholders

A tin can candleholder works in exactly the same way as a lantern, except it isn't suspended from anything. At night, the patterns in a punched tin candleholder spring to life -- the perforations will send beautiful light over any nearby surface. Even short, squat tins can enjoy a second life as the bases for tea lights.

Of course, you may be using a candleholder indoors, where the rusticated-and-rusted aesthetic may not work so well. You might have to put a bit more energy into decorating it, so as not to convey the impression that you've left kitchen trash all over the place. You'll also want to be especially vigilant about rust sealants, as an indoor candleholder may come into contact with tablecloths, furniture and other surfaces that you'd rather not stain.

Advertisement

As before, you'll be freezing the can and then punching holes into it. For a really easy option, use a can opener to make wedge-shaped perforations. If a tin is painted with a design, leave the design on for color and vintage charm. Experiment with punching out patterns that coordinate with the painted design, so that the candleholder is attractive even without emitting light.

Metal can heat up, so make sure you put the tin can candleholder on a heatproof surface. Two beautiful options are stone and ceramic tile. Visit a local flooring supplier for remnants. An unadorned piece of slate or shale can be a strikingly modern way to display a candle.

If you do want a rustic look for an indoor candleholder, go all the way. Spray the can with several layers of enamel in gradations of black, brown and rust red, so you can achieve the color of rust but still have a can that's safe to handle. Mount it on reclaimed wood or naked stone. The important thing is to make the rustication look deliberate, as opposed to the simple product of household neglect.

Many tin can crafts add color and warmth to a room, but on the next page, we'll look at a way to use cans to actually create color: green. Read on.

Advertisement

Recycled Tin Can Flower Pots

As any gardener knows, a container garden can get expensive in a hurry. Turning old tin cans into flowerpots can help you alleviate that expense. You can use small cans to start seedlings. Large cans can be lasting planters.

There's not much work involved -- after all, a tin can is already a container. You'll need to poke a few holes in the bottom for drainage. Again, filling the can with water and freezing it will help you poke those holes without creating dents.

Advertisement

A flower pot is going to come into contact with a great deal of water, so unless you like the look of aging, rusting metal, you may want to coat your tin can flower pot with enamel. If you don't want to use a spray enamel, start with gesso or primer.

Spray the can with a clear polymer sealant if you like the look of naked metal but don't want rust. If you're feeling especially arty -- and you have some time on your hands -- you can use a power drill with sanding disks and a wire brush attachment to create a brushed metal look. You'll need to seal that surface well, though, as even light condensation can rust it. Use safety goggles; wire brushes routinely lose bristles.

Because of the stain risks of rust and water, it's a good idea to place a tin can flower pot -- even an enameled one -- on a base of some sort. Clear plastic plant bases are readily available. If you'd like to avoid buying new plastic, head to a thrift store or garage sale and buy an assortment of colorful dinner plates to use under your new planters.

You can also hang a tin can flowerpot. Punch three holes, evenly spaced, near the lip of the can. Attach a length of chain to each hole, and then join the chains over the center of the pot with a loop and an S-hook. Remember, the chains must bear the weight of soil and water, not just the can. Make sure they'll be up to the task.

Between the lanterns and the flowerpots, you may never come inside to enjoy your pen containers and candleholders.

To learn more, visit the links on the next page.

Advertisement

Lots More Information

Related HowStuffWorks Articles

Sources

  • Alvarado, Paula. "Designer Covers Mountain House with Recycled Tin Cans in Patagonia." Treehugger. March 17, 2009. (Accessed 4/15/09) http://www.treehugger.com/files/2009/03/designer-covers-mountain-house-with-recycled-tin-cans-patagonia.php
  • Apartment Therapy. "DIY: Candle Holders." August 27, 2008. (Accessed 4/16/09) http://www.apartmenttherapy.com/la/diy/diy-candle-holder-060844
  • Barnes, Karen. "Recycled Tin Can Flower Pots." Associated Content. August 13, 2008. (Accessed 4/15/09) http://www.associatedcontent.com/article/921481/recycled_tin_can_flower_pots.html?cat=32
  • Beal, Susan. "Recycle Your Tin Cans into Mini Planters." CraftStylish. April 5, 2009. (Accessed 4/15/09) http://www.craftstylish.com/item/44766/recycle-your-tin-cans-into-mini-planters
  • Brown, Ellen. "Tin Punch Lantern." Thrifty Fun. July 12, 2005. (Accessed 4/16/09) http://www.thriftyfun.com/tf697105.tip.html
  • Chaska Herald. "Recycled Tin Can Lanterns." February 11, 2009. (Accessed 4/15/09) http://www.chaskaherald.com/community/cre8tivegang/recycled-tin-can-lanterns-great-valentines-day-gift
  • DIY Network. "Funky Tin-Can Crafts." DIY Network. (Accessed 4/16/09) http://www.diynetwork.com/diy/ls_basic_construction/article/0,,DIY_14084_2273930,00.html
  • Encyclopedia Britannica. "Canning: Food Processing." Encyclopedia Britannica Online. 2009. (Accessed 4/16/09) http://www.britannica.com/EBchecked/topic/92715/canning#ref=ref135266
  • Encyclopedia Britannica. "Environmental Works (Civil Engineering): Recycling." Encyclopedia Britannica Online. 2009. (Accessed 4/16/09) http://www.britannica.com/EBchecked/topic/189203/environmental-works/72394/Recycling#ref=ref593325
  • Encyclopedia Britannica. "Metallurgy: Corrosion Resistance." Encyclopedia Britannica Online. 2009. (Accessed 4/16/09) http://www.britannica.com/EBchecked/topic/377665/metallurgy/81911/Corrosion-resistance#ref=ref622750
  • Formaro, Amanda. "Tin Can Herb Pot." DIY Life. (Accessed 4/15/09) http://www.diylife.com/2008/03/18/tin-can-herb-pots/
  • Lenoir, Twila. "How to Make Tin Can Storage Containers." All Free Crafts. (Accessed 4/15/09) http://www.allfreecrafts.com/recycling-crafts/tin-can-storage.shtml

Advertisement

Loading...