Ultimate Guide to Recycled Aluminum Can Crafts

Smashed recyclable soda cans.
Don’t just smash ‘em and stash them in the recycling bin. Instead, repurpose aluminum cans into creative crafted items.
iStockphoto.com/Marcelo Wain

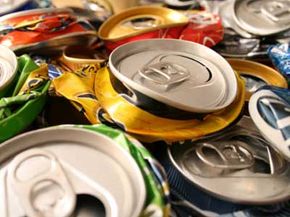
You probably feel a twinge of eco-guilt every time you have to throw away an aluminum can. Aluminum recycling is notable for its efficiency. Recycling one can saves about 95 percent of the energy that would be used in producing a new can [source: City of Newton].

Next time, hang onto that can. You might not have to send it back to the factory to repurpose it. Just explore the startlingly beautiful world of recycled aluminum can crafts.

Advertisement

Aluminum is lightweight, heat-resistant and flexible. Whether it's polished to a shine or scuffed to a distressed finish, it has a luminous, silvery beauty. Thrifty crafters take advantage of these qualities to make jewelry, household decorations and more.

You don't need much to get started in recycled aluminum can crafts. You'll need a strong pair of craft scissors. You may also want to have a sharp-pointed craft knife. Since the cut edges of aluminum are sharp, you should have a pair of safety gloves -- gardening gloves will probably work. You'll also need a sanding block and sandpaper, so that you can dull those edges.

If you decide to paint your aluminum can projects, you'll run into a challenge: Untreated aluminum doesn't hold paint well. Use sandpaper first to roughen the surface. A spray-on primer for metal can help you fix the problem. A beautiful -- but more involved -- approach uses a thin coat of bitumen, spray paint and turpentine for color and texture [source: Reef]. Once you've prepped the surface, almost any acrylic paint will do.

Before you start any project, wash out the can in hot, sudsy water to get rid of any lingering traces of what was in it before. You don't want your new home decorations to attract bugs.

In this article, we'll look at a few ways to turn that most disposable of objects -- the beverage can -- into a lasting source of beauty. We'll start with a simple first project: the holiday ornament.

Advertisement

Recycled Aluminum Can Ornaments

Because aluminum is light and reflective, it's an ideal material for holiday ornaments. Aluminum ornaments sparkle in the Christmas lights, and you can hang them almost anywhere without worrying about whether they're too heavy.

In addition to craft scissors and safety gloves, you'll need a nail and a ballpoint pen or dull pencil. (If you have one, you may want to use an embossing tool, but the pen will do the trick.) You'll also need a way of hanging the finished ornament. Ribbon can be beautiful, but a partially unfolded paper clip also works.

Advertisement

To make an ornament, cut the top and bottom off the can, and make a vertical cut all the way down one side. You should be able to flatten out the sides of the can into a single rectangular sheet.

You can use this sheet to create almost anything you can imagine. Use the pen or pencil to score an outline into the metal before you cut out a shape. You can use the same technique to emboss details or create fold lines on the shape. You can keep the ornament flat, or bend it into a three-dimensional shape. You can cut strips and weave an airy lattice, or even make them into leaves [source: Little House in the Suburbs]. It's up to you.

Use the nail to poke a hole for hanging in the top of the ornament. Once you're done embossing and poking, sand the whole thing to remove sharp spots and get an even finish. Sanding will also get rid of the color from the can's previous life as a beverage container and prep the surface for painting, if you want to paint. Thread your ribbon or paper clip through the nail hole, and you're done.

Don't throw away the bottom of the can! It's a beautiful reflective disk. Use the nail to punch a snowflake design into it, smooth out the edges, and turn it into a second ornament.

Decorating the house is fun, of course, but on the next page, we'll look at a way to decorate yourself with aluminum can jewelry. Read on.

Advertisement

Recycled Aluminum Can Jewelry

To turn aluminum cans into necklaces, bracelets, brooches and earrings, you'll need a few supplies:

  • Jewelry findings, such as pin backs, clasps, wire, jump rings (the rings that attach pendants to chains), pendant chains and earring hooks and backs (available at most craft stores)
  • Needle-nose pliers to attach the findings to the cans and each other
  • A hole-punch tool

You may also want to play with eyelets or rivets, for which you'll need a riveter or eyelet setter. To create circular pieces of aluminum or to cut perfectly round holes, you may want to invest in a metal disc cutter, which can double as a hole punch. Aluminum discs can turn into pendants, earrings, charms on a bracelet ... the possibilities are endless.

Advertisement

Almost any part of a can can be turned into jewelry. Designs range from the low-budget and funky to the avant-garde. Crafters have linked together pop-tabs into a modified chain, played mischievously with the can's familiar pop graphics and icons, turned the can's natural curve into a cuff bracelet and reshaped the metal into delicate floral earrings [sources: UrbanWoods, FunkyRecycling, D-Licious, Ramsay]. You might want to start with a simple design and work your way up. As you get a feel for the material and the tools, you'll be able to experiment more.

Because jewelry comes into contact with clothing and skin, you must be extra careful to finish every edge and remove all sharp spots and snags. One crafter presents a clever alternative: using the manufacturer's design on the aluminum to add color, and mounting the aluminum on a precut metal disc with duller edges [source: The New New].

If you decorate your jewelry with paint, seal it with a clear lacquer or sealant. Unsealed color can easily rub off onto skin and clothes. Spray lacquer will give you a light matte or glossy finish. Use a sponge brush to apply brush-on lacquer, which provides a thicker (and sometimes more "vintage-y") finish.

You may be tempted to sell your work. If you've come up with your own designs, go for it! If you've been closely imitating another artist's designs, though, you may want to read about the ethics of DIY design and copyright infringement [source: Jewelry Making].

On the next page learn how to put the "can" in "candleholder."

Advertisement

Recycled Aluminum Can Candleholders

The bottom of an aluminum can is sturdy, so you can use it to bear the weight of a candle. For each candleholder, you'll need a nail. You'll drive this up through the bottom of the can -- it becomes the spike on which you secure the candle. You'll also need a piece of wood or other secure mount for the candleholder. To make wooden mounts, find a dowel of a circumference that supports a soda can, and cut it crossways into thick disks.

The simplest candleholder uses only the bottom of the can. Cut it off right at the point where the can's sides meet the angled bottom rim. Finish the edges and drive the nail in upward. The angled rim becomes the wax catcher. This candleholder is simple and silvery; you can mount it on virtually any material to create a striking candlestick.

Advertisement

To make a flower-shaped candleholder, cut off the top half of a can and then make parallel vertical cuts down its sides, all the way around the can. The cuts should run from the top edge to about one-half inch (1 cm) from the bottom. These vertical strips turn into the petals of the flower. Use scissors to round their edges. Carefully peel each petal out and down to open the flower. Finish the edges, add the nail and mount the candleholder on a piece of wood.

Use the inverted bottom of a can to create a pedestal holder for small tea light candles. Cut off the bottom so that about one-half inch (1 cm) remains of the sides. Finish the cut edges so that they're even and the bottom, inverted, sits evenly on a flat surface. If you want, decorate the sides.

You can combine and mount your aluminum can candleholders in virtually endless ways:

  • Cut an arc from the side of a much larger tin can. Finish the edges so that it stands as a rainbow-style bridge. Arrange candleholders along it at varying heights.
  • Affix nine candleholders to a piece of reclaimed wood to create an eco-conscious menorah.
  • Cluster flower-style candleholders in the middle of the dinner table as a centerpiece.
  • Instead of flattening out some of your cans, use the natural curve of the aluminum to create ornate decorative curlicues and scrolls.

Between the ornaments, the gifts and the candles, you should be ready for just about any holiday that comes your way. Who knew your soda habit could be so useful?

To learn more, visit the links on the next page.

Advertisement

Lots More Information

Related HowStuffWorks Articles

Sources

  • Aluminous Publishing. "Presenting the E-Book: Crafting Aluminum Art." 2002. (Accessed 4/12/09) http://www.aluminouspublishing.com/
  • City of Newton, Kansas, Department of Sanitation. "More Recycling Facts: Aluminum." (Accessed 4/12/09) http://www.newtonkansas.com/dep/san/page14.html
  • Craft Bits. "Soda Can Tab Belt." (Accessed 4/13/09) http://www.craftbits.com/viewProject.do?projectID=820
  • Esprit Cabane. "Crafty 'Can'dleholders." 2007. (Accessed 4/13/09) http://en.espritcabane.com/recycling-crafts/crafty-candleholders.php
  • Jewelry Making. "Mailbag: Ethics of Jewelry Design." July 23, 2008. (Accessed 4/13/09) http://www.bloglander.com/jewelrymaking/2008/07/23/mailbag-ethics-jewelry-design/
  • Little House in the Suburbs. "Aluminum Can Ornaments." December 11, 2008. (Accessed 4/12/09) http://www.littlehouseinthesuburbs.com/2008/12/aluminum-can-ornaments.html
  • The New New. "From Aluminum Cans to Jewelry." The New New: Independent Etsy Artists + Designers of the Metro NY Area. April 10, 2008. (Accessed 4/12/09) http://thenewnew.blogspot.com/2008/04/from-aluminum-cans-to-jewelry.html
  • Reef, Gary. "How to Collage and Paint Aluminum Foil." Wonder How To. September 12, 2008. (Accessed 4/13/09) http://www.wonderhowto.com/how-to/video/how-to-collage-and-paint-aluminum-foil-247561/
  • Willhite, Nikki. "Homemade Christmas Ornaments." All Things Frugal ezine. (Accessed 4/12/09) http://www.allthingsfrugal.com/x_ornmts.htm

Advertisement

Loading...