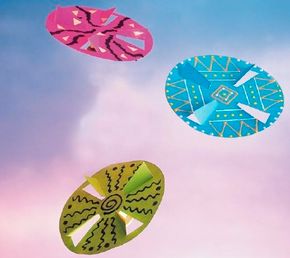
Pull the string and watch the Paper Flying Disc whiz and spin through the air.
You can design all kinds of different flying discs and have your friends help you launch them. You can fly these discs inside or outside -- anywhere they can take flight and soar through the air.
Advertisement
What You'll Need:
- Blue glitter glue pen
- Small wooden thread spool
- 36 inches blue crochet thread
- Magenta pony bead
- Scissors
- Ruler
- Craft knife
- Craft glue
- Tracing paper
- Pencil
- Cardstock (optional)
Note: Adult help needed.Step 1: Cut out the disc pattern and ask an adult to help you cut the straight lines with a craft knife and ruler. Do not cut along the dotted lines -- these are fold lines. Download Paper Flying Disc pattern.
(Note: If you think you may want to make more than one Paper Flying Disc, ask an adult to help you make a copy of the pattern using tracing paper and cardstock.)
Step 2: When the glue is dry, fold along the dotted lines so the flaps bend up a little bit.
Step 3: Decorate the disc base using the glitter glue pen. Make sure you decorate both the top and bottom of the Paper Flying Disc. Let dry. Glue the spool to the middle of the disc. Let dry completely.
Step 4: Tie the pony bead to the end of the thread. Wrap thread tightly around the spool, leaving the bead free at the end.
Instead of using glitter glue, you can use colored paper and a glue stick to decorate the spinner. You can also draw a design with some felt-tip markers, use dimensional paint, or apply your favorite stickers.
Advertisement
