How to Make Greeting Cards

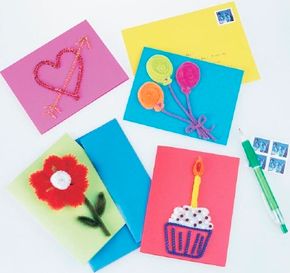
Fuzzy Greeting Cards are a fun way to show how much you care.

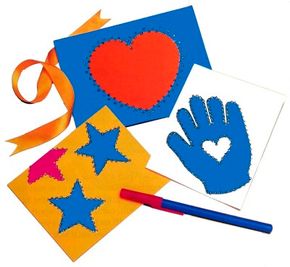
After you learn how to make greeting cards, you can express your heartfelt sentiments with style. Friends and family always are touched by the thought and effort that a homemade greeting card communicates.

Making greeting cards is a great activity for parents and kids to share. It's fun, creative, and produces sentiments the whole family will love.

Advertisement

On the following pages, you will learn how to make greeting cards for every occasion. Have fun creating cards with your whole family.

A Hug for You Card

This winning greeting card design is sure to put a smile on someone's face -- especially if it's accompanied by the real thing! See more here.

Card Cutups

Learn how to make vibrant greeting cards, or create a collage to preserve birthday memories. Read about versatile Card Cutups on the next page.

Cookie Cutter Cards

These creative cards come in all shapes and sizes. Learn how to make them for the holidays, or just for fun.

Cross-Stitch-Look Christmas Card

This traditional holiday card will touch the heart of anyone who receives it. Find out how to make this heartfelt card.

Fuzzy Greeting Cards

Have fun when you design your own Fuzzy Greeting Cards. These three-dimensional greetings will thrill friends and family. See more here.

Naturally They're Nature Cards

Capture the beauty of nature with these delicate greeting cards. Find out how to create classic natural designs on this page.

Paper Pockets

You can fill Paper Pockets with just about anything. They're a greeting card that's also a gift! Get directions on how to make Paper Pockets.

Stained Glass Heart

Show that special someone you care when you make a delicate Stained Glass Heart. Find out how to express your tender feelings.

A Hug for You Card is perfect for anyone in your family who needs a hug. Learn how to make this creative greeting card on the next page.

Learn to make everything you need to package and send gifts. Read:

Advertisement

A Hug for You Card

A Hug for You Card is a clever way to share your feelings.

Teach your kids how to make dad A Hug for You Card. Tell them to give him a double hug -- one for real and one he can carry around with him all day.

How to Make A Hug For You Card

What You'll Need:

Advertisement

  • Construction paper
  • Scissors
  • Markers
  • Craft glue

1. To make the card, cut out a large plate-sized head shape and draw on hair and a face so that it looks like you. Cut out an 18x4-inch rectangle. This will be the arms. Glue the head to the middle of the arms.

2. Now trace around your hands on a separate sheet of paper, and cut out the hand shapes. Glue a hand to the end of each arm. Fold the arms in so that the hands overlap.

3. Inside the arms write a message for Dad, such as "Here is a big loving hug for you on Father's Day!"

The only thing he could like better than this card is a real hug to go along with it!

Card Cutups are a great way to create beautiful images with just scissors and glue, especially for those who aren't skilled at drawing. Learn how to make Card Cutups on the next page.

Learn to make everything you need to package and send gifts. Read:

Advertisement

Card Cutups

To make Card Cutups, it's best if you have saved birthday or holiday cards. Use them to create a memory collage, new greeting cards, or special decorations.

How to Make Card Cutups
What You'll Need:
  • Old Greeting Cards
  • Blunt Scissors
  • Glue
  • Construction Paper
  • Markers

1. Remember your birthday with a memory collage. Cut out the cover designs and inside greetings from old birthday cards. Glue them in a random pattern on a piece of construction paper. Write the date of your birthday on the collage.2. To make new greeting cards, fold a piece of construction paper in half. Cut pictures from old greeting cards. Glue them to the front of the construction paper. Then write your own greeting inside.

Advertisement

3. To make a holiday decoration, cut different pictures from several holiday cards. For example, cut a picture of Santa Claus from one card, a picture of presents from another card, and a tree from a third card. Then glue them together on a piece of paper to make a picture of Santa putting presents under the tree.

Teach your kids how to make greeting cards with interesting shapes. Find out how to make Cookie Cutter Cards on the next page.

Learn to make everything you need to package and send gifts. Read:

Advertisement

Cookie Cutter Cards

You can create Cookie Cutter Cards for any holiday.

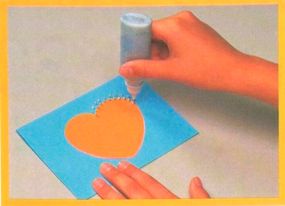
When you and your kids make Cookie Cutter Cards, they can use Mom's cookie cutters to create quick and easy notecards for a friend. Dots of silver add extra sparkle!

How to Make Cookie Cutter Cards
What You'll Need:
  • Brightly Colored Cardstock
  • Brightly Colored Paper
  • Assorted Cookie Cutters
  • Silver Glitter Paint
  • Pencil
  • Tracing Paper
  • Scissors
  • Cardboard
  • Craft Glue
  • Craft Stick

1. Cut cardstock to desired size. Fold the sheet in half.

Advertisement

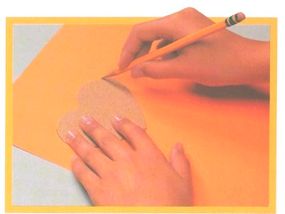
2. Place cookie cutter on top of colored paper and trace around it. Cut out shape.

Trace your pattern onto the card.

3. If you don't have cookie cutters, you can trace or photocopy these patterns and make templates out of cardboard. Trace around the templates onto the colored paper and cut out.

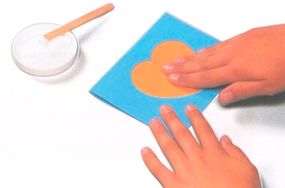
4. Using the craft stick, spread glue on the back of cutout shape. Glue shape to the front of the card. Let glue dry.

Glue the shape onto the front of the card.

5. With silver glitter paint, make small dots around outline of shape. Let paint dry completely.

Use glitter paint to decorate the card.

Cross-Stitch-Look Christmas Cards look just like needlepoint patterns. Learn how to make these unique Christmas cards on the next page.

Learn to make everything you need to package and send gifts. Read:

Advertisement

Cross-Stitch-Look Christmas Card

Practice drawing X's on the cloth before you begin.

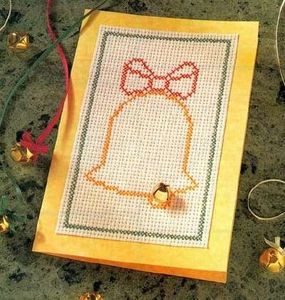
When you send out the Cross-Stitch-Look Christmas Card, everyone on your list will be touched by the nostalgic beauty and your crafting skills.

How to Make a Cross-Stitch-Look Christmas Card
What You'll Need:
  • 3-7/8 x 6 inches (42 x 65-squares) White 11-count Aida Cloth
  • Fine Line Fabric Markers: Gold, Red, Green
  • 4-3/4 x 7-inch Parchment Card and Envelope
  • One 5/8-inch Gold Jingle Bell

1. The distinctive look of cross stitch is usually made with needle and floss on fabric that has a weave made to look like squares. Instead of using a needle and floss, you will use fabric markers to make the X's, carefully drawing from one corner of the square diagonally to the opposite corner.

Advertisement

Then make the another line crossing over the first, being careful to draw from corner to corner. Practice making X's on extra aida cloth before beginning this project.

2. Following this graph, and with the help from an adult to get started, make X's on the aida cloth to create a gold bell. Counting the rows of squares (over and down, etc.) on the graph and then on your cloth will help you find your starting place.

You'll want to be extra careful not to smudge any of the ink. After the bell is completed, make the red bow and green border.

3. To mount the aida cloth on the parchment card, apply a thin line of glue along the edges of the back of the aida cloth. Position the cloth on the center front of the card.

Use a glue gun to mount the gold bell on the card.

4. Using the glue gun, place a small amount of glue on the clapper of the bell you have drawn on the cloth. Position the gold jingle bell top-side down in the glue.

Fuzzy Greeting Cards are a fun, creative way for your kids to express their feelings all year round. Find out how to make them on the next page.

Learn to make everything you need to package and send gifts. Read:

Advertisement

Fuzzy Greeting Cards

Have fun creating Fuzzy Greeting Cards in all shapes and sizes.

Give your family and friends Fuzzy Greeting Cards that you and your kids design together. Find creative ways to say Happy Birthday, Get Well Soon, Thanks, or I Love You. Your friends and family will agree that a handmade card is the best kind of card!

How to Make Fuzzy Greeting Cards
What You'll Need:
  • Construction Paper
  • Scissors
  • Glue
  • Chenille Stems
  • Poms
  • Glitter
  • Anything else you'd like!

1. Use your imagination and chenille stems to make greeting cards for every occasion! Bend, fold, twist, and coil chenille stems into all sorts of fun shapes and designs, and glue them onto construction paper or cardstock.

Advertisement

2. Be generous with your glue, and let it dry completely.

3. Get really creative embellishing with poms, gems, dimensional paint, or anything else you can dream up.

Naturally They're Nature cards are collages that use the beauty of nature to express tender sentiments. Read about these delicate cards on the next page.

Learn to make everything you need to package and send gifts. Read:

Advertisement

Naturally They're Nature Cards

The tissue paper makes dried flowers look more delicate.

Naturally They're Nature Cards are both beautiful and easy to make. A frosty layer of tissue gives these greeting cards the look of handmade paper. You'll love sending them to friends on birthdays and holidays.

Don't be surprised if they save your card because of its beauty!

Advertisement

How to Make Naturally They're Nature Cards
What You'll Need:
  • Colored Construction Paper
  • Pressed Flowers and Leaves
  • White Facial Tissue
  • Ruler
  • Scissors
  • Tacky Glue
  • Toothpick
  • Spoon
  • Bowl
  • Paintbrush

1. Measure, cut, and fold a piece of construction paper to make a blank card the size you want.

2. Arrange pressed flowers and leaves on the front of your card to make a pretty design. Glue them in place with tiny drops of glue and a toothpick.

3. Mix a spoonful of glue with a spoonful of water in a bowl. Lay your card flat on the work table and brush some of this watery glue on the paper around your pressed flowers and leaves.

4. Unfold a tissue and pull the 2 layers of the tissue apart. Place a layer on top of your card.

5. Gently drip and brush watery glue over the tissue so it sinks down onto the flowers and leaves. Set the card aside to dry.

6. When your card is completely dry, use scissors to trim extra tissue from the edges. Fold the card again and write a message inside.

Paper Pockets are colorful cards that you can use to store things inside. Find out how you and your kids can make Paper Pockets on the next page.

Learn to make everything you need to package and send gifts. Read:

Advertisement

Paper Pockets

Paper Pockets are perfect for Valentine's Day.

Learn how to make Paper Pockets, the greeting card that's also a gift. If you want your holiday or birthday cards to be really special, tuck a sweet treat along with your messages inside a playful paper pocket.

How to Make Paper Pockets
What You'll Need:
  • Pencil
  • Poster Board
  • Blunt Scissors
  • Hole Punch
  • Ruler
  • Yarn or Ribbon
  • Markers
  • Valentine Candy

1. Draw a heart shape on a piece of poster board. Cut it out and trace another heart on the poster board. Cut the second piece out.

Advertisement

2. Punch holes around the sides and bottom of both cards, making sure the holes line up with each other. The holes should be about 1/2 inch apart.

3. Thread yarn or ribbon through the holes to stitch the pieces together. Tie a bow at each end.

4. Decorate the outside of the pocket with markers and fill it with valentine candy.

A Stained Glass Heart is a colorful, creative way to show someone that you care. Find out how to make one on the next page.

Learn to make everything you need to package and send gifts. Read:

Advertisement

Stained Glass Heart

A Stained Glass Heart is an ideal way to show someone you care.

The Stained Glass Heart is a delicate design that will show someone how much you care. The contrast between a black background and colored tissue paper makes your design pop out.

How to Make a Stained Glass Heart
What You'll Need:
  • Black construction paper
  • Light-colored pencil or chalk
  • Scissors
  • Colored tissue paper
  • Craft glue

1. Fold a piece of black construction paper in half. Using a piece of chalk or a light pencil, draw half of a heart shape along the fold. Draw shapes inside the heart to cut out.

Advertisement

2. Cut out the heart shape as well as the inside shapes, then glue different colors of tissue paper on the back of the paper to cover the inside cut-out shapes.

3. Hang this "stained glass" paper heart in a window so that light shines through it. You can also make stained-glass paper snowflakes using this technique.

Learn to make everything you need to package and send gifts. Read:
ABOUT THE CRAFT DESIGNERS

Cross-Stitch-Look Christmas Cards by Cindy Groom Harry and StaffNaturally They're Nature Cards by Janelle Hayes and Kim Solga

Advertisement

Advertisement

Loading...