Tree Crafts for Kids

preserving leaves
Learning how to preserve leaves is just one tree craft for kids.
©2007 Publications International, Ltd.

There's no better way to connect with nature than to get up close and personal with a tree -- and the tree crafts for kids found on the following pages are a great way to get started.

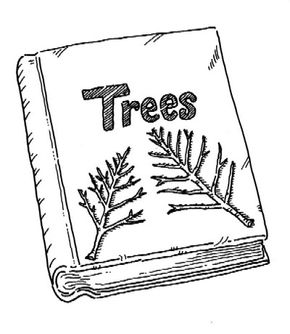
You'll find a variety of different techniques for learning about trees and creating fun and interesting crafts from bark, leaves, and wood. Whether you're starting a wood collection or making a trivet, crafting a book cover or learning the meaning of "leaf skeleton," the crafts described on the following pages are enjoyable for kids of all ages.

Advertisement

Check out these great crafts:

Bark Casting

Bark casting is a way to capture an impression of tree bark. Find out how it's done.

Leaf Skeleton

No, a leaf doesn't have bones, but it does have a skeleton. Learn how to use it for a decoration.

Wood Collection

Every type of tree has a different pattern of wood. Check out how to start a collection.

Preserving Leaves

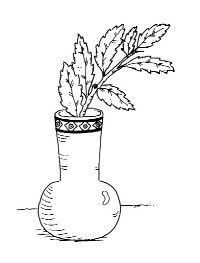
Preserved leaves have a beautiful bronze color. Find out how to create the look.

Leaf Batik

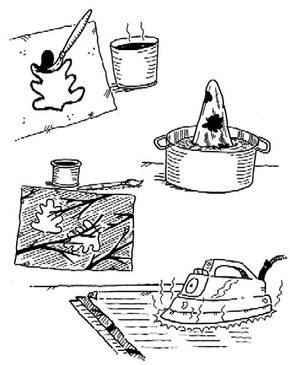
Learn to batik -- a centuries-old craft that uses wax and dye on fabric. Leaf shapes inspire the batik of this project.

Terrific Twig Trivet

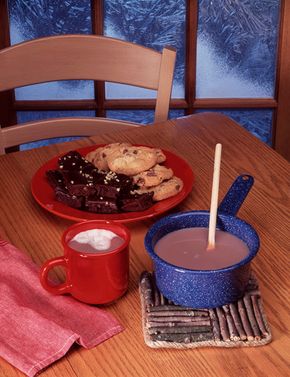
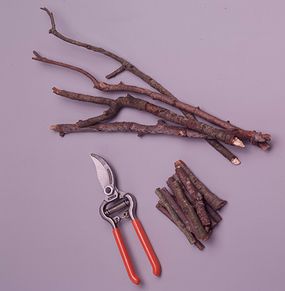
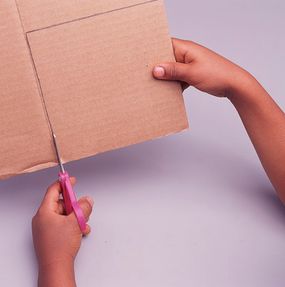
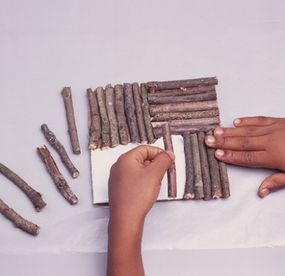
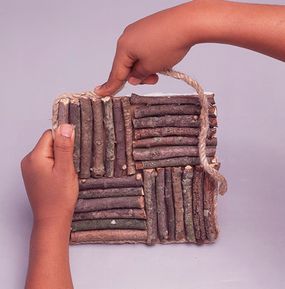
Gather twigs from outside and make a twig trivet for your house. Find out how.

Leaf People

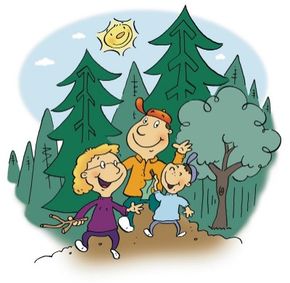
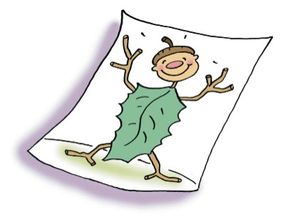
Plan a family outing and then create leaf people. See how to make them.

Start the fun with bark casting -- a way to capture the impression of tree bark. Keep reading to learn how.

For more fun nature activities, check out:

Advertisement

Bark Casting

Bark casting is a way to capture an impression of tree bark. A "casting" is something that's set (or "cast") into a mold. In this craft, the mold is made from clay. Bark casing is a great way to record and compare the bark patterns of different trees.

What You'll Need:

  • Modeling clay
  • Rolling pin
  • Self-hardening clay

Step 1: Roll out a piece of modeling clay into a flat sheet.

Advertisement

Step 2: Press the clay onto a tree trunk -- press hard enough for the bark to create an impression in the clay.

Step 3: Carefully peel the clay off the tree, keeping the molded texture intact.

Step 4: To make a permanent cast of the tree bark, roll out a piece of self-hardening clay. Flatten it into a sheet the same size as the modeling clay impression you made.

Step 5: Place it on top of the modeling clay, and gently press it onto the ridges so that it captures all the textures but does not erase them.

Step 6: Gently lift off the clay and let it dry for two or three days. Do this for several types of trees, and compare the different textures.

Did you know that tree leaves have skeletons? Keep reading to learn a fun craft you can do with leaf skeletons.

For more fun nature activities, check out:

Advertisement

Leaf Skeleton

Leaf skeletons
Leaf skeletons are fun to make for collections or for decorations.
©2007 Publications International, Ltd.

Creating a collection of leaf skeletons is a fun craft for kids of all ages. A leaf's skeleton has nothing to do with bones, of course; it's simply the leaf's framework -- the veins and ridges that run through the leaf.

Leaf skeletons also look great when glued to brown paper and used as a cover for a nature book or tree manual. Try the following method to get to the leaf skeleton:

Advertisement

What You'll Need:

  • Tree leaves
  • Newspaper
  • Old shoe brush
  • Brown paper
  • Craft glue

Step 1: Collect fresh tree leaves.

Step 2: Place an entire newspaper on a table and put the leaf on top of it.

Step 3: Pound with an old shoe brush. Don't pound so hard that you tear the leaf -- just enough to wear away the soft green material between the leaf veins.

Step 4: Allow the skeleton to dry. Then mount it in a scrapbook or use it for a book-cover decoration.

While you're collecting leaves, you might look for fallen limbs too. It's a great way to start a wood collection. Keep reading to learn more.

For more fun nature activities, check out:

Advertisement

Wood Collection

Learn about the beauty of wood by creating a special wood collection. Every type of tree has a distinctive pattern to its wood, and collecting many different types of wood will show you just how varied and special each one is.

Begin by collecting wood in a nearby forest or woodlands. Use only fallen branches, and choose solid branches that are about two to three inches in diameter. Check the leaves remaining on the branch -- that will help you to determine the kind of tree the branch came from.

Advertisement

What You'll Need:

  • Saw
  • Brush
  • Varnish
  • Branches or scraps of wood from lumber store
  • Sturdy vise
  • Sandpaper

Step 1: Ask an adult to saw off a six-inch length of the branches you find. Allow the wood to dry for about two weeks.

Step 2: You also can ask at the lumber store for small scraps of wood from trees that may not grow in your area. Try to get scraps about two inches square and six inches long.

Step 3: Put your branch or wood scrap upright in a sturdy vise. Ask an adult to help you make a two-inch deep lengthwise cut down the middle. Make a second cut crosswise until your saw meets the base of the first cut. Remove the piece of wood.

Step 4: Sand the cut surface until smooth, then ask an adult to help you varnish it. This will beautifully highlight both the lengthwise grain and the cross-grain.

For an interesting decoration, try preserving leaves. Find out how to get started on the next page.

For more fun nature activities, check out:

Advertisement

Preserving Leaves

preserving leaves
Preserving leaves gives them a beautiful bronze color.
©2007 Publications International, Ltd.

Preserving leaves from your trees or shrubs is an easy and fun way to make beautiful decorations for your home. The preserved leaves turn a bronze color and look very pretty arranged in a vase.

Be sure to ask an adult's permission before you cut any branches from trees or shrubs. You also might use the branches that are cut off when pruning the shrubs in your yard.

Advertisement

What You'll Need:

  • Branch cut from a leafy shrub
  • Jar or bucket
  • Glycerin (available at drug, farm, and garden stores)

Step 1: With an adult's help, mix a solution of one part glycerin and two parts hot water. The amount you mix up depends on how many branches you want to preserve, but you should make enough to cover the bottom of your jar or bucket several inches deep.

Step 2: Cut branches about 18 inches long. Trees or shrubs with firm, waxy leaves work the best.

Step 3: Carefully crush the cut ends of the branches with a hammer, peel away the bark, and stand the branches in the glycerin mixture.

Step 4: Let them sit about three weeks. The branches will absorb the glycerin slowly through the miniature pipelines in their stems. The leaves will turn a bronze color and feel slightly greasy when preservation is complete. Wipe off the ends of the branches, and arrange in a pretty vase.

Another interesting craft that uses leaves is a leaf batik. Keep reading to learn how to create this centuries-old craft.

For more fun nature activities, check out:

Advertisement

Leaf Batik

Leaf Batik
Creating a leaf batik takes a few steps, but the result is well worth the effort.
©2007 Publications International, Ltd.

Create a leaf batik and use it for a decorative and interesting wall hanging in your room. Batik is a centuries-old craft that uses wax and dye to create patterns on fabric. The shapes of leaves inspire batik designs in this project.

This is a great craft for kids and adults to work on together. There are more steps to this craft than with some others; a few of the steps are best left to grown-ups, but kids will have fun working on the craft too.

Advertisement

What You'll Need:

  • Leaves
  • Green crayons
  • Cans
  • Pan
  • Water
  • Old paint brushes
  • Fabric
  • Cold water dye (in two colors that can mix)
  • Paraffin wax
  • Newspaper
  • An iron

Step 1: Gather several leaves with interesting shapes.

Step 2: Use a green crayon to trace the shape of the leaves onto a piece of fabric.

Step 3: With help from an adult, put some peeled, broken green crayons in a can. Then put the can in a pan of boiling water to melt the crayons. Never melt wax or crayons directly on a stove burner. They can catch fire.

Step 4: Using an old paintbrush, spread melted crayon into the leaf shape on your fabric. Coat it completely; then give it time to dry.

Step 5: Mix a light-colored cold-water dye with water, according to the instructions on the package.

Step 6: Crumple your fabric and dip it in the dye. Allow it to dry.

Step 7: Melt paraffin wax in a can in boiling water. Paint branch shapes or any other shapes you like with the paraffin onto the fabric.

Step 8: Crumple your fabric and dip it into a darker dye. Allow it to dry.

Step 9: Roll your fabric hard in your hands to break up the wax and peel off as much as you can.

Step 10: Place the fabric between several sheets of newspaper and ask an adult to help you iron it. The iron will melt the wax, which will be absorbed by the newspaper. Replace the newspaper often, until most of the wax is gone.

What can you do with a small twigs and sticks? Find out on the next page.

For more fun nature activities, check out:

Advertisement

Terrific Twig Trivet

twig trivet
A twig trivet is a unique gift that you can make yourself.
©2007 Publications International, Ltd.

If you want to make a special gift, a terrific twig trivet is a great choice. It's a functional gift -- it helps to protect the table from hot pans or dishes -- and it will be especially appreciated because you made it yourself.

You'll need an adult's help to use the pruning shears or craft knife, but the rest of the project is easily accomplished by most kids. Get started by gathering a lot of sticks and twigs.

Advertisement

What You'll Need:

  • Lots of sticks, about 1/4 inch in diameter
  • Corrugated cardboard
  • Natural jute, 4-ply, #72 (optional)
  • Pruning shears or sharp craft knife
  • Ruler
  • Pencil
  • Scissors
  • Waxed paper
  • Craft stick
  • Tacky glue

Step 1: Ask an adult to help you use pruning shears (or a sharp craft knife) to cut the sticks into three-inch lengths. Use sticks that are as straight as possible. You will need about 25 to 30 pieces.

twig trivet 1
You'll need lots of twigs and a pair of pruning shears.
©2007 Publications International, Ltd.

Step 2: Measure and cut a piece of cardboard into a 6-inch square.

twig trivet 2
Cut a piece of cardboard into a 6-inch square
©2007 Publications International, Ltd.

Step 3: Place the cardboard square onto waxed paper. Scoop glue from bottle with the craft stick and spread glue in a thick layer over entire cardboard surface.

Step 4: Lay the sticks in a parquet pattern (see photograph, below). Place the sticks as close to each other as possible. Let glue dry completely.

twig trivet 3
Lay the sticks in a parquet pattern.
©2007 Publications International, Ltd.

Step 5: Squeeze a thick line of glue around the outside edge of the trivet. Starting in the center of a side, place the jute in the glue and press firmly to the edge of the trivet.

Twig Trivet 4
Glue the jute around the edges.
©2007 Publications International, Ltd.

When you reach the beginning of the jute, overlap the ends slightly. Let the glue dry.

Ready for a walk in the woods? Gather some leaves while you're there. Keep reading to learn a fun craft that uses leaves.

For more fun nature activities, check out:

Advertisement

Leaf People

leaf people
Plan an outdoor expedition to collect leaves.
©2007 Publications International, Ltd.

Plan a family excursion into the woods and gather the materials for creating leaf people. Collecting the natural materials you'll need for this craft is just as much fun as making the leaf people. Once you're in the great outdoors, see how many different leaves and other natural items you can locate.

And don't stop with just making leaf people -- you can expand the activity to create all sorts of things with the natural items. Make buildings, animals, cars -- the possibilities are endless.

Advertisement

What You'll Need:

  • Leaves, twigs, flowers, and other outdoor items
  • Construction paper
  • Craft glue
  • Crayons
  • Markers
  • Paint
  • Paintbrushes

Step 1: Glue a leaf on a piece of paper with the stem pointing to the top of the paper.

Step 2: Using crayons, markers, and paints, turn the leaf into a person. You can draw a head at the top of the stem and use the leaf as the body.

Step 3: Glue on small twigs, flower petals, blades of grass, acorn caps, seed helicopters, and other items you collected outdoors to dress up your leaf people.

Leaf People 1
Creating leaf people is a great way to remember your family outing.
©2007 Publications International, Ltd.

Step 4: Use the markers, crayons, and paint to add more details to your people.

For more fun nature activities, check out:

ABOUT THE CRAFT DESIGNERS

Terrific Twig Trivet by Janelle Hayes, Kim Solga

Advertisement

Advertisement

Loading...