Insect Experiments

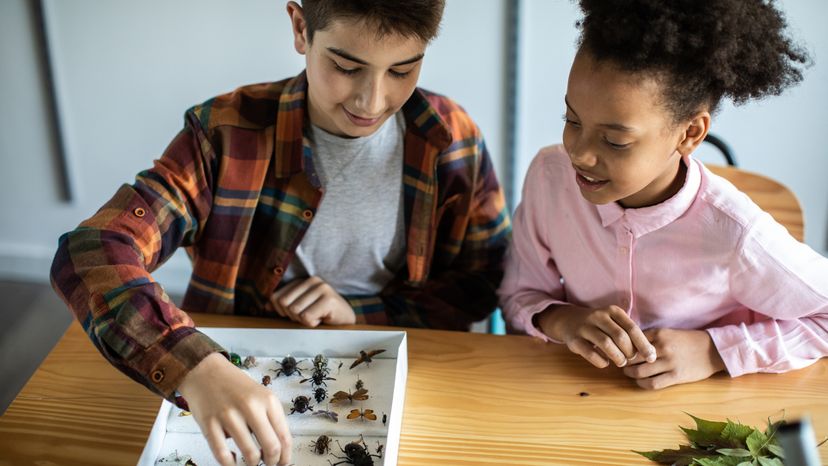
School kids compiling a collection of insects for a biology science project.
Letting kids experiment with insects is a great way for them to learn about their natural environment. miodrag ignjatovic / Getty Images

Insect experiments for kids are an excellent way to learn about the natural world. Any number of creepy crawlie bugs are outside your door, in your house, or available at the store, waiting for kids' observational skills to take root.

Entomologists study bugs for a living. Kids can pretend they are also bug experts in these insect experiments. Not only will they have fun, kids will learn a ton too.

Advertisement

Follow the links to explore the creepy cool world of bugs:

Be an Isopod Expert

Learn what makes roly-polies tick in this insect experiment.

Cold-Blooded Insects

In this activity, find out how temperature effects insects.

Creepy Bloodworms

A little red dye turns mealworms into creepy bloodworms.

Buggy Shape Changers

Bugs like to change shape. Watch in wonder with this experiment.

Night Crawlers

Some bugs only come out at night, here's your chance to see them.

Goldenrods with Gall

These plants have bugs growing on them! Take a look inside.

Jumpin' Snow Fleas!

Some bugs just like to jump. Study them to learn something new.

Preying on Flies

Watch the fascinating praying mantis feed in this experiment.

Warm Bugs, Cold Bugs

Observe bugs to see what kind of weather they prefer.

Buggy Decomposition

Thanks to insects, fruit will change right before you eyes.

Get ready to play around with roly-polies in the first experiment.

For more crafty fun and animal-related activities:

Advertisement

Be an Isopod Expert

One very interesting insect experiment you can do is to be an isopod expert. Whether you call them pill bugs, sow bugs, or potato bugs, isopods are fun to observe.

What You'll Need:

  • Jar for collection
  • Garden gloves
  • Foil
  • Lamp
  • Black paper
  • Small desk lamp
  • Sand
  • Two teacups
  • Water

How to Be an Isopod Expert:

Step 1: Take a jar and collect a dozen or so isopods. Wearing gloves, look under flowerpots, beneath big rocks, under logs or boards, and in compost heaps. Put some damp soil or rotted wood in the jar for the insects to hide in.

Advertisement

Step 2: Make an isopod runway. Cut a large piece of foil and fold it in half for strength. Fold it into box shape measuring about eight inches long, two inches wide, and two inches deep.

Step 3: Now experiment to see what kind of environment isopods prefer. Test one factor at a time to decide what factors are most important to the insects. When you are done with the experiments, return the isopods where you found them.

Test #1: Light vs. dark. Cover one-third of the length of the runway with black paper. Shine a small desk lamp on the other end. Place the isopods in the middle and see which end they settle down into.

Test #2: Dry vs. wet. Put dry sand in one end of the runway. Put wet sand in the other end. Put the isopods in the middle and see which end they prefer.

Test #3: Cold vs. warm. Fill one teacup with hot water and the other with cold. Set the runway on the two teacups, one at each end. Put the isopods in the middle and see which end they prefer.

Find out what effect temperature has on insects in the next experiment.

For more crafty fun and animal-related activities:

Advertisement

Cold-Blooded Insects

In this experiment you'll be testing the effects of temperature on cold-blooded insects. Do bugs like the heat or do they like the cold?

What You'll Need:

  • Bug net
  • Tall clear plastic cup
  • Thermometer
  • Mesh
  • Paper
  • Pencil
  • Refrigerator

How to Do Cold-Blooded Insects Experiment:

Step 1: Use your bug net to capture an insect.

Advertisement

Step 2: Place your insect in a tall clear plastic cup. Place a thermometer in the cup, and cover the cup with mesh.

Step 3: Record the temperature, and observe the activity of the insect.

Step 4: Put the cup in the refrigerator until it is 15 degrees Fahrenheit cooler than the first temperature. Observe the behavior of the bug. Has it changed?

Step 5: Repeat the entire process at a temperature 15 degrees cooler.

Step 6: Put the insect (still in the cup) back into its home environment.

Step 7: Remove the plastic lid. Observe how long it takes for the insect to leave the cup.What Happened?

Step 7: Remove the plastic lid. Observe how long it takes for the insect to leave the cup.What Happened?

Insects do not maintain a constant body temperature, as people and other mammals do.

For example, people maintain a 98.6 degrees Fahrenheit temperature. This temperature is fairly constant, even in cold or warm weather. For this reason, we are called warm-blooded, or endothermic.

The body temperatures of insects, however, are highly influenced by their environments. If the weather is warm, their body temperatures are warm. If the weather is cold, so are they. When their bodies become cold, they slow down and may even stop. Insects and reptiles are cold-blooded, or ectothermic.

Create some creepy bloodworms in the next insect experiment.

For more crafty fun and animal-related activities:

Advertisement

Creepy Bloodworms

Kids can make their own creepy bloodworms in this insect experiment. Just grow some mealworms, feed them red food, and watch what happens!

What You'll Need:

  • Mealworms
  • Red food coloring
  • Small and large bowls
  • Water
  • Measuring cup
  • Spoon
  • Wheat bran or other cereal
  • Cookie sheet
  • Plastic or glass container
  • Apple or potato
  • Plastic knife

How to Make Creepy Bloodworms:

Step 1: Obtain mealworms from a pet store or from a biological supply company.

Advertisement

Step 2: Make red mealworm chow. In a small bowl, mix red food coloring with 1/2 cup water until it is very red. Then pour 1/2 cup bran in a big bowl. Stir in the red dye solution, and mix until the red color is uniform.

Step 3: Spread the red bran on a cookie sheet to dry. (Keep this sheet indoors so other insects don't invade.) If you live in a very humid area, place it in the oven on the "warm" setting (around 200-250 degrees) for about 20 minutes.

Step 4: Place the dried red bran in a plastic container, and add some young mealworms. Every few days cut a thin slice of apple or potato, add a drop of food coloring to each side, and put the slice into the mealworm container.

Step 5: Set up a comparison group. Add young mealworms to regular bran. Every few days, cut a thin slice of apple or potato without food coloring and place it in the not-red mealworm container.

Step 6: Compare the mealworms every few days to see if the mealworms that have eaten red food turn red themselves.

Safety Tip: Kids should use the oven only with adult assistance, and have an adult help cut the apple or potato slices.

What Happened?

The diet of the red mealworms contained red dye. This was absorbed into the body of the mealworms, making them red.

Watch mealworms change their shape in the next experiment.

For more crafty fun and animal-related activities:

Advertisement

Buggy Shape Changers

Make your own buggy shape changers in this insect experiment. You'll watch mealworms change shape and form right before your eyes. What will they be next?

What You'll Need:

  • Mealworms
  • Large plastic container
  • Bran meal
  • Ruler
  • Plastic knife
  • Potato
  • Paper plate

How to Make Buggy Shape Changers:

Step 1: Purchase mealworms from a pet store or from a biological supply company. Pet stores sell them inexpensively as food for reptiles.

Advertisement

Step 2: In a large plastic container, pour in 1 inch of bran meal. With help, cut a 1/4-inch-thick slice of potato and place it into the container.

Step 3: Add mealworms to the container, and watch them crawl around. Now, pick up a mealworm. Don't worry -- it won't hurt you. How does it react when you pick it up? What does it feel like?

Step 4: Place a mealworm on a plate, and blow on the worm. How does it respond? Put a drop of water on the worm. What does it do?

Step 5: Every few days, throw away the old potato and add a new slice.

Step 6: In about a week, the mealworms will seem to have shrunken in size and curled up into waxlike tombs. All the living mealworms will eventually enter this state. In another week, start looking for what emerges out of the waxy tombs. It will be a good surprise!

Safety Tip: Adults should cut the potato.

What Happened?

Your mealworms eagerly explored their new home when they arrived, but they were a bit skittish. If you blow on a mealworm, it will probably freeze and not move. Mealworms don't appear to like water; when a drop falls on one, it moves away quickly.

When you lift a mealworm, it may wiggle a bit, but it will soon rest calmly in your hand. It feels a little hard on the outside, due to its exoskeleton, but it is actually soft. When it moves, a mealworm may tickle your hand a little bit.

You may notice, when you look at your mealworms, that some are on the potato. The potato adds some nutrition to their diet, but more important, it acts as a source of moisture.

When the mealworms enter the "waxlike tomb" state, they have become pupae. As mealworms, they aren't really worms -- they are insects in the larva stage. After a while, larva forms pupa.

What emerges from the pupa? A black beetle -- the adult form of the mealworm! The beetles lay eggs, and the cycle of larva to pupa to adult repeats.

Next, find out which bugs are afraid of the dark.

For more crafty fun and animal-related activities:

Advertisement

Night Crawlers

Which insects are the real night crawlers? Some bugs like the light, some like the dark. Do this insect experiment to find out what bugs prefer.

What You'll Need:

  • Sheet of acetate (used for transparencies)
  • Ruler
  • Tape
  • Mesh
  • Safety scissors
  • Clear tape
  • Dark paper

How to Make Night Crawlers:

Step 1: Roll up the sheet of acetate into a tube about 2 inches in diameter. Tape it together in the middle to keep it from unrolling.

Advertisement

Step 2: Cut 2 squares of mesh, each large enough to cover the ends of the tube. Tape mesh to one end to close it off.

Step 3: Put dark paper over half of the tube. Tape it so it surrounds the acetate roll.

Step 4: Put some insects inside. These can be insects you catch or buy, such as crickets, fruit flies, ladybugs, or mealworms. Close the other end of the tube with mesh and tape.

Step 5: Every 15 minutes, count how many bugs are in the dark and how many are in the light areas.

Step 6: After 1-1/2 hours, count the number of insects in both the light and dark areas.

Safety Tip: Do not investigate insects that bite!

What Happened?

How organisms react to their environments determines their behavior. Many bugs seem to have a preference for either light or dark. Some bugs, such as pill bugs and crickets, prefer dark conditions. Other bugs are attracted to light.

Check out what insects and goldenrods have in common next.

For more crafty fun and animal-related activities:

Advertisement

Goldenrods with Gall

What is inside goldenrods with gall? Insect larvae live inside the ball-like growths on the plants.

Fly and moth larvae frequently infect goldenrod plants, producing large shapes (like balls or ovals) called galls. To visualize this, think of larva entering your arm and swelling it to the size of a football!

Advertisement

What You'll Need:

  • Field with goldenrod plants
  • Safety scissors
  • Tweezers
  • Nylon mesh
  • Rubber bands

How to Make Goldenrods with Gall:

Step 1: Go into a goldenrod field, and observe the galls. Count how many are on a plant and how many plants are infected.

Step 2: Using a pair of scissors, cut open a gall and try to find the large cream-colored larva. When you find one, pull it out with tweezers. It will wiggle. Put it in the freezer for a few hours, and remove it. The larva mass won't move at first, but after warming up, it will wiggle again.

Step 3: Put nylon mesh around the gall. For round galls, do this in April or May; for oval galls, do it in August or September. Attach the mesh above and below the gall with rubber bands so that an insect cannot leave the netting after exiting the gall. Check your mesh net every week. What type of insect emerged from the gall?

Safety Tip: The gall should only be cut with adult supervision.

What Happened?

You will usually find only 1 gall on each plant. The number of infected plants varies from place to place. Since females lay about 70 eggs, the number of plants infected can be high. For example, a scientist collected 1,000 plants and found 264 with ball-shape galls.

The type of insect inside depends on the shape of the gall. Round galls contain fly larvae, while oval galls hold moth larvae. The larvae can withstand freezing because they have glycerol in their blood, which acts like antifreeze.

In the next experiment, study some bugs that jump.

For more crafty fun and animal-related activities:

Advertisement

Jumpin' Snow Fleas!

Study those jumpin' snow fleas and start to get an inside view of why some animals like to jump in this insect experiment. Most insects don't like cold weather, but snow fleas love it!

What You'll Need:

  • Snow fleas
  • Paper
  • Pen
  • Reference books

Have you ever been out on a winter day and seen what looked like pepper sprinkled on the snow? Have you seen that pepper start to jump up and down? If so, you've seen snow fleas.

Advertisement

The good news is, snow fleas aren't really fleas. But it's easy to see how they got their name, since they look like tiny fleas when they bounce around in the snow.

Snow fleas are also called springtails, and that's an even better name for them. You see, they have a tail-like feature that works like a pogo stick. You might say that springtails have a built-in ejection seat!

How to Study Jumpin' Snow Fleas:

Step 1: If you've never seen snow fleas, look for them under trees on sunny winter days. Just look for what looks like specks of pepper that are jumping up and down!

Step 2: Why do you suppose snow fleas act that way? Make a list of other creatures that jump up and down. Although these creatures share the same behavior, they may jump up and down for different reasons.

Step 3: Look up the creatures on your list in a reference book. Then make a chart of the information you find. Remember to include the type of creature, the origin, and the size, as well as the reasons behind the jumping behavior. You may even want to draw pictures to go along with your chart.

Next, insects don't have to go to church to start preying.

For more crafty fun and animal-related activities:

Advertisement

Preying on Flies

A lot of insects practice preying on flies, but only in this insect experiment can kids watch the totally weird-looking praying mantis hunt down and gobble up fruit flies!

What You'll Need:

  • Praying mantis egg cases
  • Wingless fruit flies
  • Fruit fly food
  • Small aquarium or plastic container
  • Soil
  • Branch
  • Seeds (optional)
  • Small disposable cup
  • Ruler
  • Safety scissors
  • Water

How to Do Preying on Flies:

Step 1: Order praying mantis egg cases, wingless fruit flies, and food from a biological supply company.

Advertisement

Step 2: Place a 1-inch layer of soil in the aquarium. Place the branch so the praying mantis can walk and hang from it.

Step 3: At the back of the tank, you may want to plant some seeds. When they grow, they will add background to the tank and give the mantises more options for hunting and hiding. Follow the instructions on the seed packet for how to plant them and give them enough water and light. (Make sure the plants don't get too tall, or they can push the lid off the tank.)

Step 4: Mantises need living food. In this project, they will eat fruit flies. You will need a soft, flexible disposable cup (not a hard, clear plastic one) in which to place the flies. Cut the cup so that it is 1-1/4 inches tall. Place the cup in a corner of the aquarium.

Step 5: Move the soil away, and place the bottom of the cup on the bottom of the tank. Move the soil back so that it surrounds the cup.

Step 6: When the package from the supply company arrives, add a plastic vial of fruit fly food to the plastic cup in the aquarium. Then add a vial of water to the cup.

Step 7: Hang the mantis egg case from the glass in the aquarium or from a branch. Cover the aquarium with a screen. Be sure that it fits tightly, or the mantises will escape!

Step 8: From the plastic container containing the fruit flies, pour 8 fruit flies onto the fruit fly food in the plastic cup in the aquarium. The flies will eat (and lay eggs inside) the food.

Step 9: The eggs will hatch into larvae, which will eat the food and then climb the walls of the cup and aquarium to become non-moving pupae. The pupae will turn into adult fruit flies.

Step 10: The fruit flies will be a constant food supply for the mantises. Keep the original plastic container with the fruit flies; you may need to add more flies to the aquarium to ensure enough food.

Step 11: When a mantis egg case hatches, the baby emerges headfirst. The babies will be soft until they grow exoskeletons.

Step 12: You may get from 50 to 100 hatchlings! If you get this many, move some (after a few days) to other containers. If conditions get too crowded, you will see mantises eat other mantises -- a very creepy sight.

Step 13: Observe the mantises. Do their bodies differ from those of other insects? Observe their hunting and feeding behaviors. As the mantises grow, catch bigger insects (small crickets, for example) to feed them.

Safety Tip: Be careful when using scissors.

What Happened?

The praying mantis is a great "sit and wait" hunter. Its triangle-shape head has big eyes. It can turn its head 180 degrees to keep track of what is going on. It will stay very still, wait for its prey, and attack with lightning speed. With a quick thrust, it uses its front legs to capture and eat its meal. The front legs are similar to arms.

If you have a good source of fruit flies, your mantis will grow, and, in about two weeks, will shed its exoskeleton and grow a new one. This is called molting.

For more crafty fun and animal-related activities:
Advertisement

Warm Bugs, Cold Bugs

As the temperature changes, warm bugs and cold bugs behave differently. This outdoor insect experiment studies how insects respond to warm and cold weather.

What You'll Need:

  • Sunny flower border
  • Outdoor thermometer
  • Notebook
  • Pencil

If a sunny flower garden is in your yard or a nearby park, you can easily discover what effects temperature has on insects. Spring is a good time to do this, because the temperature can be warm one day and cold the next.

Advertisement

How to Do Warm Bugs, Cold Bugs:

Step 1: On a warm day, check an outdoor thermometer to see the temperature. Take your notebook and sit near the flower border where you can see insects.

Step 2: Pick a patch of flowers about a yard square. Every few minutes, count how many insects fly around in the flowers.

Step 3: On a cold day, repeat the experiment. Watch the same flowers and count the number of flying insects. On which day were the insects most active? How could this affect the plants in the border if those insects pollinate some of the flowers?

Next, watch fruit disappear with the help of bugs.

For more crafty fun and animal-related activities:

Advertisement

Buggy Decomposition

In this insect experiment, kids get to watch fruit undergo some buggy decomposition. All you have to do is throw some pears in a jar and let the insects do all the work.

What You'll Need:

  • Pear
  • Plastic knife
  • 3 jars with lids
  • Nylon screen
  • Rubber band

How to Do Buggy Decomposition:

Step 1: Cut a pear into 3 equal pieces. Put each section into a jar.

Step 2: Leave 1 jar uncovered, put nylon screen over the second jar and attach it with the rubber band, and screw the lid tightly on the third.

Step 3: Put these jars outside in the same place. Observe the jars every day for a few weeks. Where do the bugs congregate?

Safety Tip: An adult should help cut the pear. Do not touch, eat, or smell the pears after the experiment begins. At the conclusion of the experiment, put lids on the jars and throw them in the trash!

What Happened?

You probably found that the fruit in the jar with no lid rotted the fastest. Insects, bacteria, and fungus easily enter open jars and cause decay.

The fruit in the jar with the lid on it rotted the slowest; the lid blocked decay organisms from coming in. But because the fruit already had some organisms on it, the fruit still slowly decayed.

The jar with the nylon screen prevented most decay organisms from entering, so the fruit did not decay as quickly as did that in the open jar.

For more crafty fun and animal-related activities:

ABOUT THE EXPERIMENT CREATORS

Be an Isopod Expert by Maria Birmingham, Karen E. Bledsoe, Kelly Milner HallsWarm Bugs, Cold Bugs by Maria Birmingham, Karen E. Bledsoe, Kelly Milner Halls

Advertisement

Loading...