How to Make Paper Masks

A kid with a playful paper mask
For most kids, though, masks are just plain fun -- and they aren't just for Halloween. Renphoto / Getty Images

Masks have a long history in our culture -- in social and religious celebrations and in theater performances. For most kids, though, masks are just plain fun -- and they aren't just for Halloween. Masks add to the enjoyment of any game of make-believe.

The following articles offer instructions for making a variety of paper masks for kids. Some are meant to be worn for playtime, and some are works of art to be displayed. They all have one thing in common, though -- they're sure to be a hit with kids and adults alike.

Advertisement

Papier-Mache Mask

Quick, Cool Masks

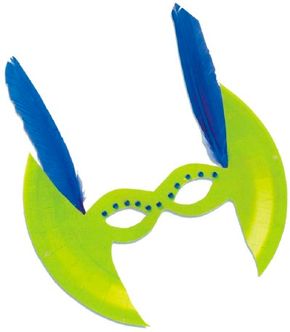
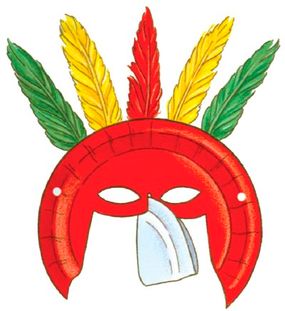
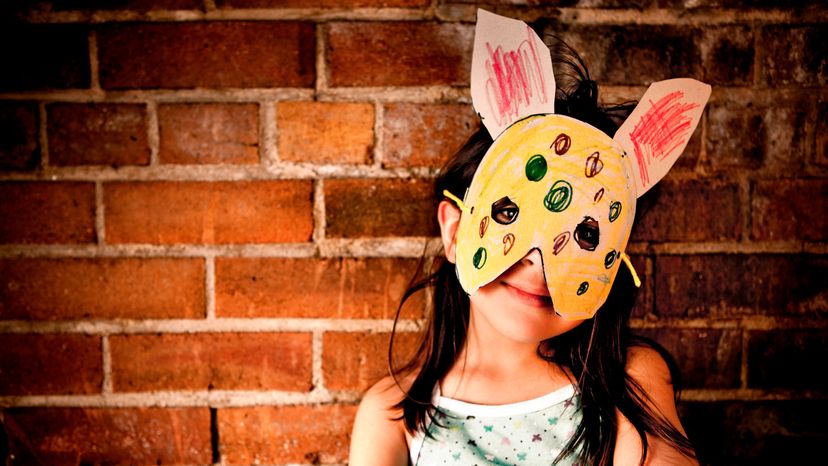
A paper plate, some feathers, a few sequins -- you can quickly make a really cool mask.

Funny-Face Mask

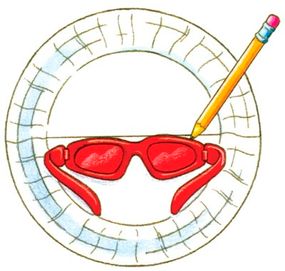
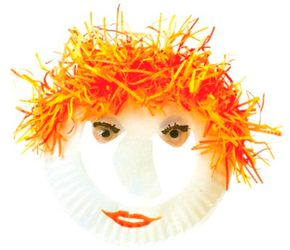
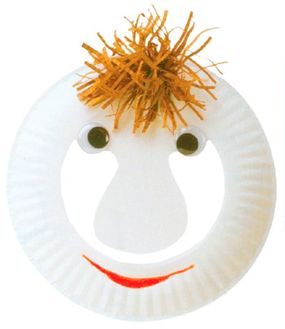
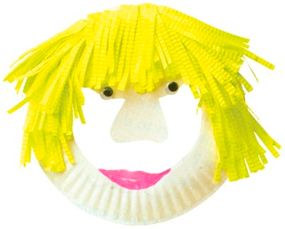
No one will recognize you behind your funny-face plate mask. What a wacky look! Learn how to get it here.

Mood-Reader Mask

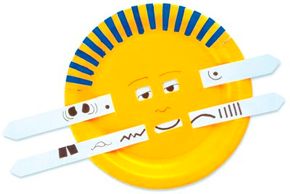
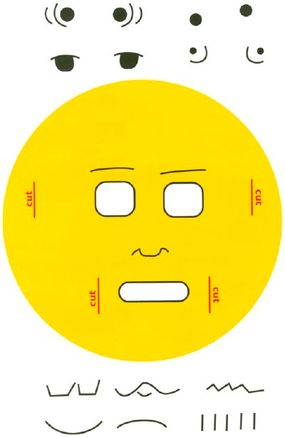
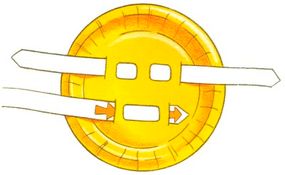
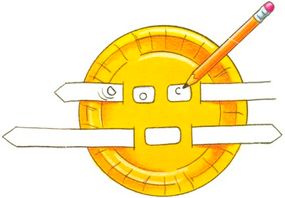
Let people know how you're feeling without saying a word. A mood-reader mask says it all. Find out more about the mood-reader mask.

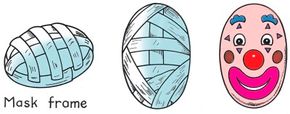
Get started making masks with a papier-mache work of art. Keep reading to find out how.

For more fun crafts and activities, check out:

Advertisement

Papier-Mache Mask

Make a half-oval as the mask frame by stapling bands of newspaper together.

When you make a papier-mache mask, it can be a work of art. But don't plan on wearing a papier-mache mask for Halloween or playtime -- it's a creation that should be displayed. (And it probably would be uncomfortable to wear!)

If you've ever worked with papier-mache, you know it can be a little messy -- it's created out of newspaper strips and paste -- but most kids enjoy that! This is a fun project for adults and kids to work on together.

Advertisement

What You'll Need:

Newspaper cut into 1x4-inch strips

Scissors or craft knife

Stapler and staples

Masking tape

Flour and water (for paste)

Paintbrush

Acrylic or poster paints

Acrylic sealer

How to Make a Papier-Mache Mask

Step 1: Cover your work surface with newspaper. Fold several sheets of newspaper into long bands. Using the illustration as a guide, make a mask frame (an oval half) with bands of newspaper stapled together.

Step 2: Mix flour and water together to make a paste. (Use 1 cup of flour for each cup of water.) Blend until the paste is smooth.

Step 3: Dip a strip of newspaper in the paste. Rub the strip between your fingers to remove any extra paste. Put the strip over the mask frame and smooth it in place. Repeat until the mask is covered with four or five layers of strips.

Step 4: To add more dimension to your mask, tape on projections before you add the last layer of newspaper strips. Use paper rolls or cones for horns, ears, and a nose. Let the mask dry overnight.

Step 5: Cut out the eyes and mouth (this is best done by the adult); then paint the mask and let it dry completely. To make your mask shiny, apply a coat of acrylic sealer.

For fun masks you can wear, try the quick, cool masks on the next page. Keep reading to learn how to make them.

For more fun crafts and activities, check out:

Advertisement

Quick, Cool Masks

You can make a cool mask -- and make it quick!

Create a quick, cool mask from a paper plate and become your favorite superhero -- or a bird-person! Get creative and turn yourself into anything you can imagine.

It's a good idea to have an adult help to cut the eye holes or other shapes from the paper plate, but kids will love decorating the mask in a variety of different looks.

Advertisement

What You'll Need

Paper plate, 9 inch

Decorative items (craft feathers, faux gems, sequins, poms, etc.)

Elastic cording

Pencil

Eyeglasses

Scissors

Craft glue

Paper punch

How to Make Cool, Quick Masks

Step 1: Mark a line halfway down the back of a 9-inch paper plate. Position a pair of eyeglasses just below the line. Trace along the top and bottom of the glasses, and draw eye openings in the eye areas.

Step 1: Trace eyeglasses for an easy way to make eye holes.

Step 2: Sketch an outline around the plate of what you want the mask to look like. Carefully cut along the mask outline and eye openings. Glue decorative items and trim to the front of the mask; let dry.

Step 3: Make a hole with a paper punch on each side of the mask close to the edge of the plate. Cut a length of elastic cording to fit around your head, leaving at least 6 inches extra. Thread the cording through each hole, and tie off on each side.

You can add a nose or beak to any mask with a 6-3/4-inch paper plate.

Step 1: Cut the plate in half, fold one piece in half, and staple it together.

Use a smaller plate to make a nose or beak for your mask.

Step 2: Cut a 1/2-inch slit at the very top of the nose curve on the mask plate.

Step 3: Run a bead of glue in this cut, and insert the rim of the folded plate into the slit. Prop the beak/nose against something to hold it in place until the glue sets.

Become someone crazy or kind of wacky with funny-face masks. Find out how to make them on the next page.

For more fun crafts and activities, check out:

Advertisement

Funny-Face Mask

No one will recognize you behind this mask!

Express yourself with a funny-face mask. These funny faces are a little wacky, and they're fun to make. Match your mask to a favorite crazy outfit -- or match the outfit to the mask.

This type of costume accessory is safe for kids because you don't wear the mask attached to your head -- you simply hold the mask in front of your face. Then pull it away to reveal who you are (or when walking!).

Advertisement

What You'll Need

White paper plate, 9-inch

Thin paper or tissue paper in assorted colors

2 large wiggle eyes

Glitter glue

Large craft sticks

Pencil

Scissors

Paper crimper

Craft glue

How to Make a Funny-Face Mask

Step 1: Sketch an outline of the shape you want to make, using the inside edge of the rim as a guide for the bottom of the face. (See photo for ideas.) Cut along sketch lines.

Sketch your shape before cutting the plate.

Step 2: To make hair, cut paper into a rectangle about 2 or 3 inches wide and 2 to 18 inches long. Put this shape through a paper crimper if you want to make the hair even wilder. Fringe the rectangle to within 1/2 inch of the long edge. Cut the fringed rectangle into smaller pieces, and glue pieces around the top of the plate. Let dry.

Go a little wild with fringed-paper hair.

Step 3: Glue wiggle eyes onto the eye shapes, and add a mouth with glitter glue. If you'd like, fringe two small pieces of black paper, curl each around your finger, and glue them above the eyes to make eyelashes.

Step 4: Attach a craft stick to the bottom of the plate with craft glue. When it dries, use the stick as a handle to hold your mask.

Let people know how you're feeling with a mood-reader mask. Keep reading to find out how.

For more fun crafts and activities, check out:

Advertisement

Mood-Reader Mask

A mood-reader mask lets everyone know how you're feeling.

Let everyone know how you feel with a mood-reader mask. What's your mood? Are you feeling a little silly? A little grumpy? A little sleepy? When you hang a mood-reader face on your wall or on your door, everyone will know what kind of mood you're in.

Kids will need to ask a grown-up for help with part of this craft -- the craft knife used is best left to an adult -- but everyone will have fun creating this special mask.

Advertisement

What You'll Need

Paper plate, 6-3/4 inch

White card stock

Acrylic paint

Sharp pencil

Craft knife

Black permanent marker

Scissors

Ruler

Paintbrush

How to Make a Mood-Reader Mask

Step 1: Follow the pattern below to draw the open space for eyes and mouth on a paper plate; draw on the cut lines. Cut out out the eyes, mouth, and cut lines with a craft knife. (The pattern also includes ideas for drawing eyes and mouths -- that comes later.)

Step 1: Cut out the eyes, mouth, and cut lines.

Step 2: Draw eyebrows and a nose on the plate using black permanent marker.

Step 3: Using scissors, cut two 11×3/4-inch strips out of white card stock, and cut each end into a point. Slide one strip into the left-side eye slit from the front to the back, and then push it up through the right-side eye slit. Repeat with the other strip for the slits beside the mouth.

Step 3: Slide the strips through the openings.

Step 4: Pull the top strip through the eye slits until just 1 inch sticks out from the left side. Using a pencil, sketch funny eyes (or copy some of our ideas). Pull the strip from the left until you see only white space in the eye area, and sketch another set of eyes; repeat until you reach the end of the strip. Make each set of eyes different. (There is room to draw four sets of eyes.) Remove the strip, and trace over the pencil lines with black marker.

Step 4: Draw the eyes and mouth on the paper strips.

Step 5 Repeat this process with the mouth strip. (There is room for six mouths on the strip.)

Step 6: Fringe the top of the plate, from the edge to the inside of the rim. Paint every other piece of fringe the color of your choice. Let dry.

For more fun crafts and activities, check out:

Advertisement

Advertisement

Loading...