Science Projects for Kids: Nutrition and Health

good taste
The Good Taste project checks your threshold for sweetness or saltiness.
©2007 Publications International, Ltd.

Maybe you usually wouldn't pair the words "fun activities" with "nutrition and health," but get ready to change your mind about that. These science projects for kids: nutrition and health are great activities that expand your knowledge while providing hours of entertainment.

Whether you're learning why your head hurts after eating too much sugar or discovering what causes a ball to have a high bounce, you're sure to enjoy finding out more about your world through the projects on the following pages.

Advertisement

Sugar Buzz

If you eat foods that are high in sugar, you might get an unpleasant "sugar buzz." Find out why this happens.

Spit Don't Quit

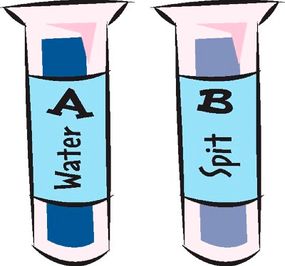
Go ahead -- spit. It's the only way to check the enzymes in your saliva. Check out this cool project.

Good Taste

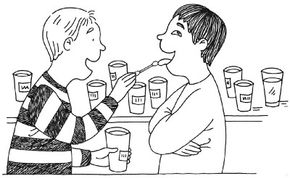
Do you prefer salty things or sweet things? Learn how to test your taste threshold.

Path of a Ball

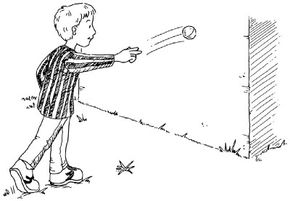
How can you know in which direction a ball is going to bounce back at you? Find out the way to tell.

High Bounce

First, gather lots of balls. Then, try this project to see which type of ball bounces the highest.

So you think you want that extra piece of candy? Keep reading science projects for kids: nutrition and health to learn what can happen if you eat too much sugar.

For more fun and exciting science projects, check out:

Advertisement

Sugar Buzz

Have you ever noticed that if you eat a lot of candy or other food that contains sugar, your head feels a bit odd or achy? Some people call this a sugar buzz. When you get a sugar buzz, it puts your body to work, removing the sugar from your blood. And when all of the sugar is removed, you feel hungry again.

Starches, though, don't rush into the blood as quickly as sugar does -- carbohydrates are absorbed into the blood at different rates. Here's an interesting project that demonstrates this idea.

Advertisement

What You'll Need:

  • 2 glasses
  • Corn syrup
  • Red food color
  • Measuring spoon
  • Sugar
  • Flour

Step 1: Fill two glasses halfway with corn syrup.

Step 2: Add two drops of red food color to each glass to make artificial blood.

Step 3: Place 1 teaspoon of sugar on top of the liquid in one glass and 1 teaspoon of flour on top of the liquid in the other glass.

Step 4: Watch how long it takes for the liquid to absorb the sugar and flour.

What Happened?

Sugar is made of small molecules that dissolve faster than the large starch molecules in flour, so sugar is absorbed faster than the flour. When we eat sugar, these small molecules quickly pass into our blood. When we eat starches (such as something made from flour) the molecules take longer to pass into our blood.

You may have been taught that it's not nice to spit, but keep reading science projects for kids: nutrition and health to find out about a project that encourages spitting. (It's okay -- it's for science.)

For more fun and exciting science projects, check out:

Advertisement

Spit Don't Quit

Spit Dont Quit
You'll learn about the enzymes in your saliva. Go ahead and spit!
©2007 Publications International, Ltd.

Mom might have told you "No spitting" when you were little, but now that you're older, it's "Spit, don't quit" -- at least, it is if you want to try this cool project. In the process, you'll learn something about enzymes.

Make sure you wear goggles when using iodine. Iodine will stain skin, as well as clothes, tables, and countertops, so be careful! Also, remember that spit may contain germs, so don't touch someone else's spit. Wash your hands after collecting spit and after cleaning up.

Advertisement

What You'll Need:

  • Goggles
  • Cornstarch
  • Plate
  • Iodine (available from drugstores)
  • Water
  • 2 test tubes (or similarly shaped glasses)
  • Measuring spoon
  • 2 science stirrers (or coffee stirrers)

Step 1: Put on the goggles. Place a pinch of cornstarch on the plate. Add a drop of iodine. Notice the blue-black color that is produced. Iodine turns this color when starch is present.

Step 2: Put 2 milliliters water into test tube A.

Step 3: Gather your spit. Put 2 milliliters spit into test tube B. (Spit-gathering is easier if you think about lemons.)

spit don\'t quit 2
How can you spit enough to fill a test tube?
©2007 Publications International, Ltd.

Step 4: Mix 1/10 teaspoon cornstarch into each solution. Stir each solution. (Be sure to use a different stirrer for each test tube.)

Step 5: Place the test tubes in a warm place. Stir each test tube every 5 minutes. After 20 minutes, go on to Step 6.

Step 6: Add two drops of iodine to each test tube. Compare the test tubes.

Record your observations.

What Happened?

Test tube A turns a blue-black color, while test tube B has less of a color change. This shows that test tube A has more starch than test tube B. Spit, also known as saliva, contains the enzyme salivary amylase, which digests starch into sugars. This tells you that there is less starch in test tube B.

Don't get too used to spitting -- you'll need your sense of taste for the next experiment. Keep reading science projects for kids: nutrition and health to learn about your taste threshold.

For more fun and exciting science projects, check out:

Advertisement

Good Taste

good taste
Check your taste threshold for sweetness and saltiness.
©2007 Publications International, Ltd.

Did you know that everyone has a taste threshold for certain types of taste? It may be a good taste or a bad taste, but regardless, when you reach your threshold, you're likely to say "Enough!" Your taste threshold is the point at which you decide that something you've tasted is too sweet, for example, or too salty.

Now try this fun project that tests your sweetness and saltiness threshold. You can do it by yourself, but it's more fun with a partner.

Advertisement

What You'll Need:

  • Measuring cup
  • 11 plastic cups
  • Water
  • Sugar
  • Salt
  • Paper towels
  • Cotton swabs
  • Paper and pen
  • Tape

Step 1: Mix 1-2/3 cups water and 1/4 cup sugar -- this will make a 12.5% sugar solution. Pour this into a plastic cup labeled "12.5% SUGAR."

Step 2: Add 1/2 cup of this solution to 1-1/2 cups water -- this will make a 3.1% sugar solution -- and label it "3.1% SUGAR."

Step 3: Add 1/2 cup of the 3.1% SUGAR solution to 1-1/2 cups water -- this will make a 0.78% sugar solution -- and label it "0.78% SUGAR."

Step 4: Add 1/2 cup of the 0.78% SUGAR solution to 1-1/2 cups water -- this will make a 0.19% sugar solution -- and label it "0.19% SUGAR."

Step 5: Make a series of salt solutions, following the above directions but using salt instead of sugar.

Step 6: Rinse your mouth with water, and dry your tongue with a paper towel.

Step 7: Keeping the solutions out of your sight, have a partner place a clean cotton swab in one of the solutions and then put it on the middle of your tongue.

Step 8: Tell your partner if you can taste the solution and if it is sweet or salty. Your partner should write down whether or not you could taste the solution.

Step 9: Rinse your mouth and dry it, and have your partner try a different solution and record your response. Keep doing this until all the solutions are tested. Switch roles with your partner and let him or her do the tasting.

Which solutions could you taste, and which could you not taste? Was salt harder or easier to detect than sugar?

Ready for an outdoor activity? Find out how to determine the path of ball. It's all on the next page of science projects for kids: nutrition and health.

For more fun and exciting science projects, check out:

Advertisement

Path of a Ball

path of a ball
You can determine the return path of a ball by the angle at which you toss it.
©2007 Publications International, Ltd.

Why should you learn the path of a ball? Because tossing and catching a ball can be good exercise, and it's something that's fun to do even if you're by yourself. Just find an outside wall at which you can toss the ball so that it will bounce back for you to catch.

But in order to catch the ball, you need to know where that returning ball is going to bounce. So how do you find out? A ball will bounce off a wall at an angle equal to the angle at which it struck the wall.

Advertisement

What You'll Need:

  • Small ball
  • Wall

Step 1: Take a small ball with a good bounce, and throw it straight at a smooth wall. Watch the ball carefully. If it hits the wall straight on, it will bounce straight back to you.

Step 2: Now move to the side so you can throw the ball so that it hits the wall at an angle. Watch the ball carefully. It will not bounce back to you; instead, it will bounce off the wall at an angle equal to the angle at which it struck the wall.

Step 3: Move to another spot where you can throw the ball so that it hits the wall at an even sharper angle. Again watch the path of the ball. It will be equal to the sharp angle at which the ball struck the wall.

You can use your ball -- and a variety of others -- for a project that demonstrates how gravity plays a part in ball bouncing, next in science projects for kids: nutrition and health.

For more fun and exciting science projects, check out:

Advertisement

High Bounce

You already know that the force of gravity is what causes a ball to drop to the ground -- but did you know that same force can give the ball a high bounce? That's because the force of gravity can be converted to energy.

When a ball strikes the ground, the downward force from gravity is converted into upward force, which then works against gravity to send the ball up in the air.

Advertisement

As you'll see, different materials and sizes of the balls affect how well each one converts the energy into upward force -- and that affects how high each ball will bounce.

What You'll Need:

  • Balls of various sizes and materials
  • Pencil
  • Graph paper
  • Large sheet of cardboard
  • Tape measure

Step 1: Collect some different balls, such as a tennis ball, beach ball, softball, rubber ball, football, basketball, and golf ball.

Step 2: Make a graph that lists the names of the different balls across the bottom and that lists the height in feet along the sides.

Step 3: Test the different balls to see which one bounces best on a concrete floor, porch, or driveway.

Step 4: Set the cardboard sheet against a wall, or ask two friends to hold it upright. Then drop the balls, one at a time, from the same height, in front the sheet of cardboard.

Step 5: Mark on the cardboard how high each one bounced.

Step 6: Measure each bounce, and indicate it on your graph.

For more fun and exciting science projects, check out:

ABOUT THE CONTRIBUTING WRITER:

Spit Don't Quit by Peter Rillero, Ph.D.

Peter Rillero, Ph.D. is the Department Chair of Secondary Education and associate professor of science education at Arizona State University in Phoenix. He is the author of Time for Learning: Science; Time for Learning: The Human Body, and Totally Creepy Bugs and the co-author of the best-selling high school biology textbook in the United States. Rillero has conducted two program evaluations of the world's largest science fair, the Intel International Science and Engineering Fair. His Web site is: www.west.asu.edu/rillero

Computer Illustration by: Rémy Simard

Advertisement

Advertisement

Loading...