Easy Nail Art for Kids

Make the express yourself nail art design.

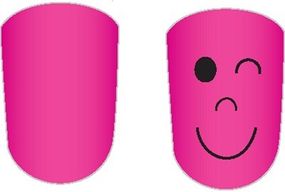
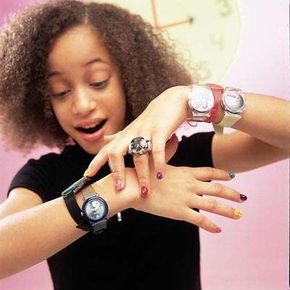
Looking for a great wearable craft for kids? Look no further than your fingertips. Patterns and step-by-step instructions in this article result in easy nail art for kids. There are everyday designs and even special designs for the holidays.

These easy nail art designs are simple enough for kids, although they might require a few tries to get right. Kids will love showing off their artistic skills with this wearable craft. They might even be inspired to create their own nail art designs.

Advertisement

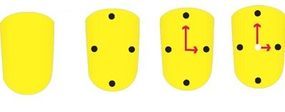
Follow the links below to get started on this fun wearable craft:

Twinkle Toes Nail Art

Express Yourself Nail Art

Independence Day Nail Art

Time on Your Hands Nail Art

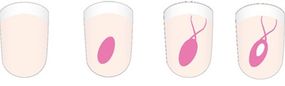
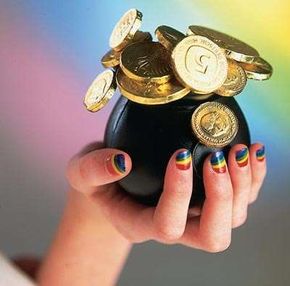
Radiant Rainbows Nail Art Design

Lighten Up Nail Art Design

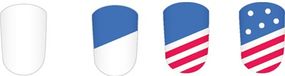
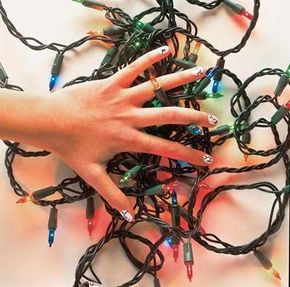
Everything you need to express holiday cheer is in this nail art idea, which includes several holiday-themed variations.

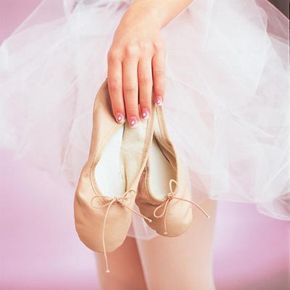
Put on your dancing shoes and try the nail art designs in the next section. Keep reading to learn how to create the twinkle toes nail art design.

Looking for more fun kids' craft projects? Try:

Advertisement

Twinkle Toes Nail Art

Twinkle toes nail art is pretty in pink.
Make the twinkle toes design in four easy steps.

Keep on your toes with twinkle toes nail art. This easy nail art design features pretty-in-pink ballet slippers.

How to paint the twinkle toes nail art design:

Step 1: Paint nails any color. Pictured here is an American manicure, which is similar to a French manicure but looks more natural. Let dry.

Advertisement

Step 2: Using pink paint, paint a long, narrow oval on a diagonal in the center of the nail.

Step 3: Using the same color paint, paint a wavy-lined X coming out from the top of the slipper. Let dry.

Step 4: Using white paint, paint a small oval at the top of the slipper.

Wear your feelings on your fingertips with the express yourself nail art design. Keep reading to learn how to create this easy nail art craft.

Looking for more fun kids' craft projects? Try:

Advertisement

Express Yourself Nail Art

Express yourself nail art.
Express yourself in two easy steps.

If you're happy and you know it, paint your nails with an express yourself nail art flair. You can let everyone know how you're feeling with this expressive, easy-to-make nail art design.

How to create the express yourself nail art design:

Step 1: Paint each nail a different color. Let dry.

Advertisement

Step 2: Using black paint and a toothpick or the tip of a tiny brush, paint eyes, nose, and mouth. Be as creative as you want in drawing faces with different expressions.

The nail art in the next section is great to show off on the Fourth of July -- or any day you want to feel patriotic. Keep reading to learn more.

Looking for more fun kids' craft projects? Try:

Advertisement

Independence Day Nail Art

Make Independence Day nail art.
Patriotic and pretty -- finish this design in four steps.

Borrow from the flag and paint your fingers with Independence Day nail art. Kids and grown-ups alike will want to show their patriotic spirit with this great nail art design.

How to create the Independence Day nail art design:

Step 1: Paint nails white. Let dry.Repeat.

Advertisement

Step 2: Paint the top left one-third of the nail bright blue. Let dry.

Step 3: Using red paint, paint thin, diagonal stripes over the white area.

Step 4: Using white paint and a toothpick, paint white dots in the blue area to create the stars.

Any time is the right time to try to the nail art in the next section. Keep reading to learn about the time on your hands nail art.

Looking for more fun kids' craft projects? Try:

Advertisement

Time on Your Hands Nail Art

Have time on your hands with this nail art.
Put time on your hands in four steps.

Clocks get colorful with this time on your hands nail design. Time will fly while you create this fun, easy nail art.

How to create the time on your hands nail art design:

Step 1: Paint each nail a different color. Let dry.

Advertisement

Step 2: Using black paint and a toothpick, add four dots on the nail. Place one dot at 12:00, the next at 3:00, the next at 6:00, and the last at 9:00.

Step 3: Using red paint, paint two lines to represent the hands of the clock. Paint one line longer than the other, just like a real hour hand and minute hand. Add arrows at the ends of the lines.

Step 4: Add a small gem at the spot where the two hands touch in the center of the clock.

The colors of the rainbow come alive with radiant rainbow nail art. Check out this easy nail art for kids in the next section.

Looking for more fun kids' craft projects? Try:

Advertisement

Radiant Rainbows Nail Art

Create radiant rainbows nail art.
Radiant rainbows are easy to paint.

Radiant rainbows nail art bursts with color. If you're lucky, you'll find the pot of gold at the end of this rainbow. Check out the nail art variations below for ideas on other options for this great design.

How to make the radiant rainbows nail art design:

Step 1: Using red paint, paint a gently curved diagonal stripe in the bottom corner of the nail. Let dry.

Advertisement

Step 2: Following the same curve, fill in the nail with stripes in the following colors: orange, yellow, green, blue, and purple. Make sure you paint the rainbow colors in this order, and let each color dry before you begin the next color.

Step 3: The finished nail will be completely covered with the colors of the rainbow.

Your holiday outfit won't be complete without the nail art in the final section. Keep reading to learn about the light up nail art.

Looking for more fun kids' craft projects? Try:

Advertisement

Lighten Up Nail Art

Make the lighten up nail art.
Pick a holiday to celebrate on your nails.

Your nails will sparkle with holiday cheer when you paint them with lighten up nail art. Check out the nail art variations below for ideas on other options for this great holiday design.

How to create the lighten up nail art design:

Step 1: Paint nails white, or choose your favorite holiday color. Let dry.

Advertisement

Step 2: Using black paint and a toothpick or the tip of a tiny brush, paint a line curving from nail to nail. Let dry.

Step 3: Using gold metallic paint, paint several small dots touching the line. Make sure to space them evenly so the lights look balanced. Let dry.

Step 4: Using a variety of your favorite bright colors, paint an oval-shaped light bulb on the end of each gold dot.

Looking for more fun kids' craft projects? Try:

Advertisement

Advertisement

Loading...