How to Make Paper Purses

Home is where the paper purse is at.

It's hard to go wrong when you make paper purses for kids. Kids will love the opportunity to turn this paper craft into a functional everyday item that can carry around everything from colored pencils to a snack.

Paper purse crafts combine the ease of working with paper and the endless decorative possibilities of scissors and glue. Paper comes in many different colors and is a great, affordable craft material.

Advertisement

The following paper purse projects will help get you started:

House Tote

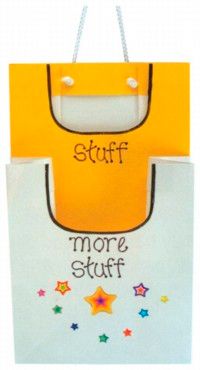
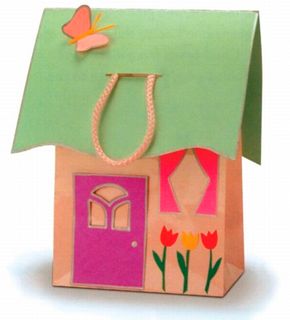
You can store your keepsakes in this House Tote paper purse and take them with you at the same time.

Stuff 'n More Stuff Bags

Paper bags in paper bags create a perfect paper holder. Organize your papers and work with this paper bag filing craft.

Ladybug Paper Purse

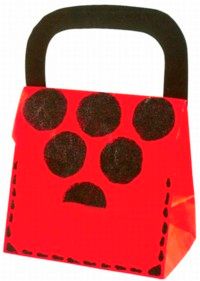
Who says a paper bag has to be boring? Follow this Ladybug Paper Purse craft to create a bright red paper purse that will brighten your day.

Pretty Pouch Purse

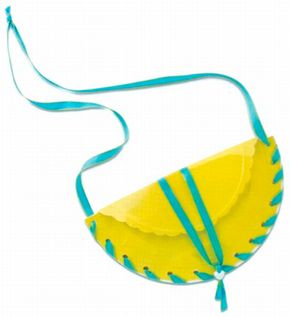
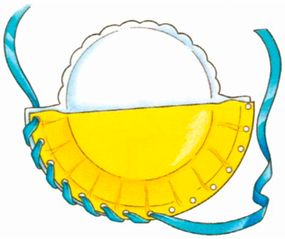
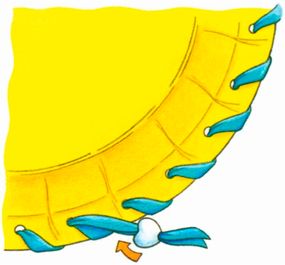
Use ribbon and a paper plate to create a Pretty Pouch Purse that is also a functional craft.

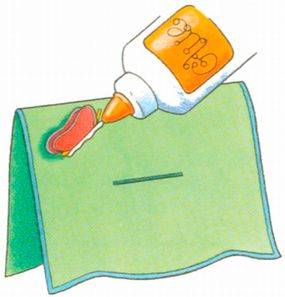
Find out how to make a portable paper purse house with the first paper purse craft.

For more paper-related activities and kids' crafts, visit:

Advertisement

House Tote

Make a portable home with this paper craft.

The House Tote paper purse craft lets you keep all of your treasures in your house and take them with you at the same time. The roof slides right off the handles, so this paper craft is as easy to use as it is to make.

What You'll Need:

  • Gift bag with cord handles
  • 8-1/2x11-inch piece card stock
  • Colored paper or card stock
  • Pencil
  • Scissors
  • Silver medium-tip marker
  • Craft knife
  • Craft glue

How to Make House Tote:

Step 1: Fold the 8-1/2x11-inch piece of card stock in half widthwise. Draw a wavy line across the bottom, and cut through both layers of paper along this line. Unfold, and outline the shape with silver marker.

Advertisement

Step 2: Cut slits through the middle of both sides of the roof with a craft knife.

Step 3: Trace the door and curtain patterns onto colored paper. Outline in silver, and cut out.

Step 4: Cut out the windows in the door with the craft knife. Outline them with silver marker. Draw a doorknob on the door. Glue the door and curtains to the bag.

Step 5: Draw 3 tulips on various colors of paper, and cut slivers of green paper for stems and leaves. Glue the flowers under the window.

Step 6: Draw a butterfly on colored paper; outline in silver, and cut out. Fold in half to crease the wings. Glue only the fold of the butterfly to the roof.

Glue the butterfly to the roof.

Step 6: Slip the handle of the bag through the slits in the roof.

Next, get ready to make a pretty paper bag to stuff papers in.

For more paper-related activities and kids' crafts, visit:

Advertisement

Stuff n' More Stuff Bags

Stuff n' More Stuff Bags

The Stuff n' More Stuff Bags paper craft lets you face your fear of having extra stuff lying around -- you can stuff your stuff into this super filing system.

What You'll Need:

  • 2 sift bags with handles
  • Star stickers
  • Pencil
  • Scissors
  • Black permanent marker
  • Craft glue

How to Make Stuff n' More Stuff Bags:

Step 1: Remove both handles from one of the bags and one handle from the second bag.

Advertisement

Step 2: Draw half of a rounded-off rectangle at the top of both bags. Cut both sections out, and outline the openings with marker.

Step 3: Use a marker to print the word "stuff" on the front of the bag with a handle (with the handle in back) and "more stuff" on the front of the other bag. Scatter star stickers across the front of the "more stuff" bag.

Step 4: Slip the "stuff" bag halfway into the "more stuff" bag. The handle should be at the back, and the cutouts should face the front. Glue the back of "more stuff to the inside back of "stuff."

This filing system doesn't have to be limited to two bags. If you have too much stuff to contain in these bags, add as many as you need!

Put a pretty ladybug pattern on a paper purse in the next craft.

For more paper-related activities and kids' crafts, visit:

Advertisement

Ladybug Paper Purse

Ladybug Paper Purse craft

To make a ladybug paper purse for a lovely little lady, follow the directions to this colorful paper craft.

What You'll Need:

  • Red paper bag
  • Black card stock
  • Black glitter or glitter glue
  • Ruler
  • Pencil
  • Scissors
  • Craft glue

How to Make Ladybug Paper Purse:

Step 1: Place the bag flat on your work surface, and measure down 6 inches on each side of the bag. Draw a line across the bag from one mark to the other. Cut along this line and around both short sides, but leave the back uncut.

Advertisement

Step 2: Fold the back of the bag down over the front to form a flap, and cut the flap so it measures 3 inches from the fold line. If you'd like, shape the corners of the flap.

Step 3: Draw a purse handle on black card stock, cut it out, and glue it to the back of the purse.

Step 4: Decorate the purse with glitter designs. Let dry completely.

This is an adorable container in which to tote lunch to school. Just don't pack anything too heavy, like a juice box, as the paper handle may not hold.

Make a pretty paper purse with an easy pouch in the next craft.

For more paper-related activities and kids' crafts, visit:

Advertisement

Pretty Pouch Purse

Use fun colors to make your Pretty Pouch Purse.

Carry treasures with you in this pretty paper purse craft. It's such a snap to make, you'll want one of this paper craft in every color.

What You'll Need:

  • 2 colored paper plates, 9 inch
  • 2 yards ribbon, 1/2 inch wide
  • Heart-shape pony bead
  • Scissors
  • Decorative-edge scissors
  • Craft glue
  • Paper punch
  • Tape measure

How to Make Pretty Pouch Purse:

Step 1: Cut one paper plate in half. Set one half aside; discard the other half.

Advertisement

Step 2: Fold the second plate in half, crease it, and open it back up. Trim the outside rim off one half of the plate using decorative-edge scissors. Discard the plate rim edge.

Step 3: Turn and push the edges of both plates out so the colored surface pops out. Glue the half-plates to the other plate along the bottom, with the colored surfaces facing out; let dry.

Step 4: Using the paper punch, punch holes about 1/2 inch apart along the glued rim of the purse. (Don't punch holes in the trimmed edge.)

Step 5: Starting on one side, and leaving an 18- to 20-inch tail at the start, thread the ribbon through the holes, carrying the ribbon around the outside of the plate's edges as shown. Leave an 18- to 20-inch tail at the end; cut ribbon. Tie the ends of the tails together in a knot or a bow.

Thread the ribbon through the holes.

Step 6: Fold the flap down over the front of the purse; crease to form the closure flap.

Step 7: Measure and cut 24 inches of remaining ribbon. Fold this piece of ribbon in half, and thread the cut ends through the bottom middle hole from the back toward the front. Thread these ends through a heart-shape pony bead, and pull the bead up toward the purse.

Pull the bead up toward the purse.

Step 8: Pull the ribbon loop up along the back of the purse; center it, and glue in place. The rest of the loop will hang free. To close the purse, fold the flap down and pull the ribbon loop under the pony bead.

Pop the edges of the plates out in order to make more room inside the purse.

For more paper-related activities and kids' crafts, visit:

Advertisement

Advertisement

Loading...