Fourth of July Crafts for Kids

Create a patriotic pencil for the Fourth of July.

Fourth of July means picnics, parades, getting together with family and friends, and most of all, fireworks -- but it also means keeping the little ones busy with Fourth of July crafts for kids. It's great to spend a warm summer day playing games, eating good food, and watching the display in the sky at night.

But the Fourth of July -- or Independence Day, as it's also known -- is more than just sparklers and hot dogs. As you probably know, it's the official anniversary of the signing of the the United States' Declaration of Independence.

Advertisement

The Fourth of July has been celebrated since 1776, but it wasn't until many, many years later -- in 1941 -- that it was declared a legal holiday. Today, whether we celebrate with our families or the entire community, most of us will agree that the Fourth is a star-spangled holiday.

In this article you'll find ways to celebrate the Fourth of July with many different activities and games. Check out the following pages for all the Fourth of July fun.

Independent Noses

It's recognition -- by a nose. See if you can tell whose nose is poking through the hole.

Flag Windsock

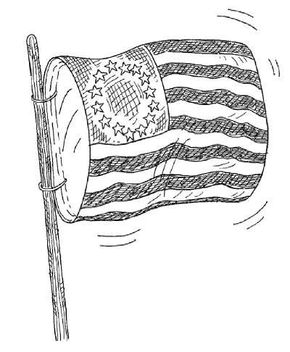
What's another way to recycle plastic bags? Try making a windsock -- just what you need for a holiday celebration.

Fight for Independence Game

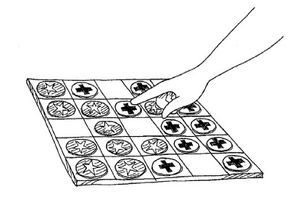
It's a bit like checkers -- with a Fourth of July twist. Choose up sides and have a blast.

Watermelon Slush

When the weather turns hot, a refreshing drink really hits the spot. Perfect for a Fourth of July picnic, watermelon slush hits the spot.

Flying High Rocket

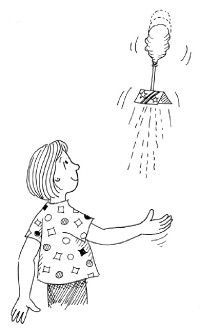
Launch a rocket in your own backyard. It's safe and fun.

Yankee Doodle Bell Game

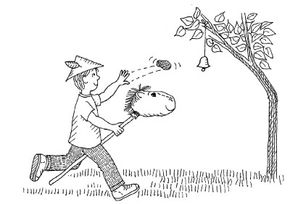
Pretend you're Yankee Doodle, riding on a pony, in a bean-bag toss game.

Patriotic Wiggle Stars

Stars never tasted so good. Make a gelatin treat for your Fourth of July party.

United States Celery

Is your celery patriotic? It can be. Find out how.

Patriotic Eyeglasses

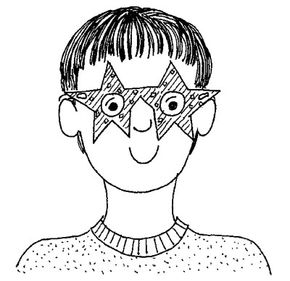
Try looking at the world through patriotic eyeglasses. Make them yourself by following the easy instructions.

Festive Fireworks T-Shirt

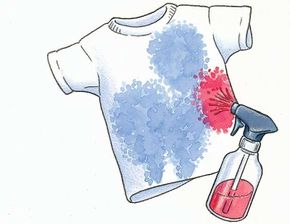
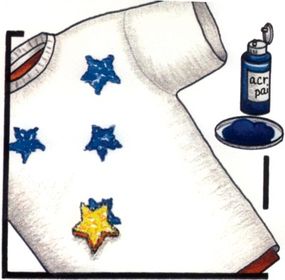
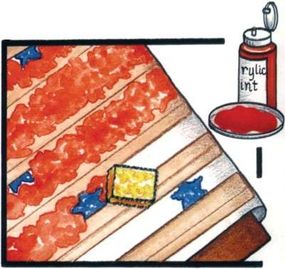
With a little help from an adult, you can create your own fireworks on a shirt you can wear.

Stars and Stripes Pencil Wrap

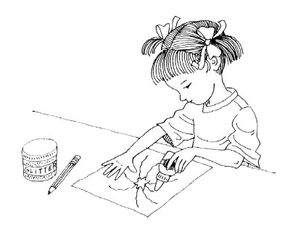
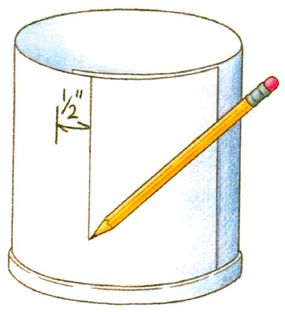
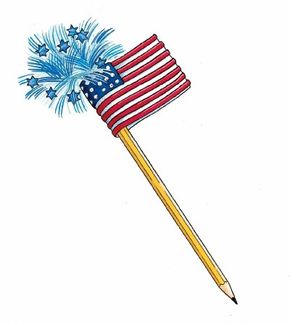
Dress up your pencils -- it's a great Fourth of July idea. Your pencils never looked so patriotic.

Fireworks Picture

A little paper ... a little glue ... a little foil. That's all you need to create an amazing fireworks picture.

Patriotic Collage

Express your patriotism by making a collage. We have tips to get you started.

Glitterworks

Who doesn't like fireworks? You can create a glittery version with a simple and entertaining project.

Patriotic T-Shirt

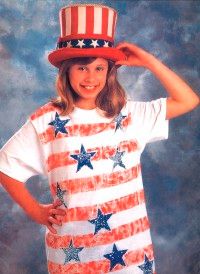
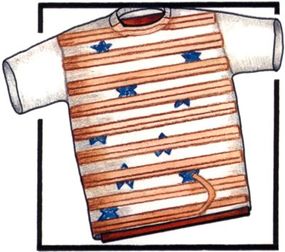
Show off your love for your country with this cool T-shirt.

Uncle Sam's Hat

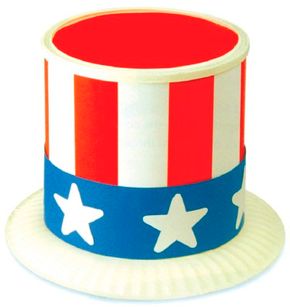
Uncle Sam wants you... for the awesome hat you'll make in this craft.

Ready for some Fourth of July fun? Grab a paintbrush, an old sheet -- and your family and friends. The following game will determine who "nose" who.

For more fun activities and crafts for kids, see:

Advertisement

Independent Noses

The Fourth of July is a good time to get a little nosy -- with the Independent Noses game. It's fun for a big group, and you can play it outside or inside. One small warning: Make sure it's alright to cut a hole in a sheet before you play. Mom and Dad don't want any surprises at bedtime.

What You'll Need:

Old bed sheet (white is best, but any old sheet will work)

Advertisement

Scissors

Red and blue non-toxic face paints

Hang up an old white bed sheet to make a curtain. Have an adult help you to cut a small hole in it (you got Mom's or Dad's approval, right?) about "nose high" for most people.

Then, divide the group into two teams. One team will paint their noses red, and the other will paint theirs blue. Wait until everyone's noses are dry before starting the game.

Have one team stand behind the sheet. The players take turns putting their noses through the hole. The other team tries to guess whose nose it is.

Score three points for each correct guess. When the game is over, add up the score to see who really knows noses.

If it's a breezy day -- or even if it isn't -- the following craft project is a great way to show your patriotism. Find out how to make a flag windsock that's a one-of-a-kind display.

For more fun activities and crafts for kids, see:

Advertisement

Flag Windsock

Catch the wind with a decorative windsock.

There's no better time than the Fourth of July to fly the flag -- or a flag windsock, especially when it has the added advantage of recycling plastic bags. (Just remember to keep the plastic bags away from small children -- plastic can pose a choking hazard.) Your windsock will be tons of fun to play with at your Fourth of July picnic. It looks pretty, too.

What You'll Need:

Tissue paper (red, white, and blue)

Advertisement

Scissors

Glue stick

Large plastic dry-cleaner's bag

Plastic-coated hangers or thick wire

Tape

Pole

Ribbons (optional)

To start, cut out a large square of blue tissue paper. Then draw and cut out stars from white tissue paper, and glue them to the blue background. Glue all of this onto a plastic dry-cleaner's bag.

Cut out red and white tissue-paper stripes, and glue these to the bag to make the American flag.

Have an adult help you with this part: Make a large hoop from a plastic-coated hanger or thick wire. Fold about two inches of the bag over the loop and tape it. Attach the windsock to a pole with loose wire loops so your windsock can change direction in the wind.

Tie long red, white, and blue ribbons to the top of the pole to make streamers if you'd like. This windsock works best on a breezy day, but if you run with it, the bag will fill with air and float as you create your own wind.

When you're tired from running and want a less breezy activity, the board game found on the next page will help you get into the spirit of Independence Day. Find out how to make it -- and then play it with a friend.

For more fun activities and crafts for kids, see:

Advertisement

Fight for Independence Game

Make and play the Fight for Independence game.

Create a Fight for Independence game board, then challenge a friend to play. Choose a side (the U.S. or Great Britain) and "fight" for independence, just like our forefathers did.

What You'll Need:

Thick cardboard

Advertisement

Ruler

Pencil

Paint

Paintbrushes

Thin cardboard

Scissors

To make the game board, cut a piece of thick cardboard into a 20x20-inch square. Mark off 25 squares, 5 across and 5 down, so that the board looks like a checkerboard.

Paint the squares different colors. Then draw and cut 20 thin cardboard circles to use as game markers. They should be a little smaller than the size of a square. Paint 10 markers blue with a white star, and paint 10 markers white with a red cross. The blue markers, which are for one player, represent the United States, and the red markers (for the other player) represent Great Britain.

Players line up their markers in the two rows closest to them. (Unlike checkers, place the markers on each square of the two rows.)

Each player takes a turn, moving one marker at a time. Markers can move forward, backward, and diagonally, but only to an empty square.

If a player's marker is fenced in so it cannot move, the other player gets 5 points. The first player to get his or her markers into the other player's two rows wins 10 points. Play until someone gets 50 points.

Ready for a cool treat? Nothing beats the heat like a watermelon slush. Find out how to make it on the next page.

For more fun activities and crafts for kids, see:

Advertisement

Watermelon Slush

On the Fourth of July, when the sun is hot and everyone is extra thirsty, mix up a batch of watermelon slush.

Watermelon is often a staple at a Fourth of July picnic, but here's an easy recipe that takes watermelon and turns it into something new -- a cool and refreshing beverage that's as fun to make as it is to drink.

Advertisement

What You'll Need:

8 ice cubes

2 cups seedless watermelon

1 teaspoon honey

Blender

Spoon

Measuring cup and spoon

Glasses

Marshmallows

Blueberries

Toothpicks

Put the ice cubes in a blender, put on the lid, and turn the blender on high. Ask an adult to help you get the ice thoroughly crushed by turning the blender off and mixing the ice with a spoon before turning it on again.

Add chunks of watermelon. (Make sure you have taken out all the seeds.) Then add the honey, and blend well.

Pour the blended liquid into tall glasses that you have chilled in the freezer.

Garnish each drink with a marshmallow sandwiched between two blueberries on a toothpick. Lay the toothpick across the rim.

Although some people like to shoot off their own fireworks, it's too dangerous for kids. What can you do to make your celebration a blast? Keep reading to find out how to make a balloon rocket that's fun -- and safe.

For more fun activities and crafts for kids, see:

Advertisement

Flying High Rocket

Launch a balloon rocket.

You can launch a special rocket -- a Flying High Rocket -- in your own backyard on the Fourth of July. It's powered by a balloon and will fly high up into the air. It might not go up as high as fireworks, but then again, your parents will approve of this rocket. Remember, though, that balloons are choking hazards. Keep them away from small children.

What You'll Need:

Plastic drinking straws

Advertisement

Scissors

Long red, white, and blue balloons

Rubber bands

Paper

Markers

Pencil

To make it, cut a straw in half. Fold the tip of one straw and insert it into the end of the other until it is all the way inside.

Slide the neck of a balloon over one end of your double straw, and secure it with a rubber band.

Cut a 3-inch-square piece of paper, and fold it in half. This will be your rocket's fin, which you can decorate with patriotic designs. Then use a pencil to poke a hole through the middle of the fin, and slide it over the double straw.

To make your rocket fly, hold the rubber band around the balloon's neck and blow through the straw. Make sure that no one is in the way, and then when the balloon is full, let go of your rocket.

Your rocket should fly high. Experiment with different shapes and sizes of rocket fins. The fin controls the rocket's path. Get your friends together for some high-flying fun!

While you have your friends together, why not set up a little competition with a patriotic game? The Yankee Doodle Bell game is good exercise and good fun. Find out all about it on the next page.

For more fun activities and crafts for kids, see:

Advertisement

Yankee Doodle Bell Game

Ring the liberty bell as you ride your Yankee Doodle Dandy pony.

The Yankee Doodle Bell game is a great Fourth of July activity. It's fun to dress up as a Yankee Doodle Dandy and to try your skill at ringing the bell -- basically, a bean-bag toss on "horseback." There's a little preparation before you can play, but the fun you'll have is worth it.

What You'll Need:

Paper bag

Advertisement

Old newspapers

Paints

Paintbrushes

Yarn

Scissors

Glue

Old broomstick

Tape

Construction paper

Bell with string attached

Beanbag

Make Yankee Doodle's pony (a hobby horse) by stuffing a paper bag with newspaper and painting on a face. Glue on yarn for the pony's mane, then tape the end of the bag around the broomstick.

Fold a piece of construction paper into a tri-cornered cap, and draw and cut out a feather to stick in it. Then take turns being Yankee Doodle Dandy by wearing the hat while you ride the pony.

Here's the game: Tie the bell to the limb of a tree. As Yankee Doodle Dandy rides by, she or he must try to ring the bell by tossing a bean bag at it without stopping.

Each Yankee Doodle Dandy gets three tries to ring the bell. Two points are awarded each time that anyone rings the bell. Whoever gets ten points first wins the game.

When you're ready for a sweet treat, make some Wiggle Stars earlier in the day. Learn how to make a yummy treat on the next page.

For more fun activities and crafts for kids, see:

Advertisement

Patriotic Wiggle Stars

Patriotic Wiggle Stars are almost too pretty to eat, even on the Fourth of July. You won't be able to resist, though, once you see the shimmering and colorful gelatin stars. They make a wonderfully cool holiday dessert or a mid-afternoon treat.

What You'll Need:

Packages of raspberry and blueberry gelatin

Advertisement

2 mixing bowls

2 glass baking pans

Star cookie cutters

Spatula

Whipped cream (an aerosol can is best)

Large serving platter

Mix up separate batches of red gelatin and blue gelatin, according to package directions for wigglers. (Ask an adult to help you with the hot water.) Pour the liquid gelatin into shallow baking pans.

Set the pans in the refrigerator for several hours until the gelatin is firm. Then, use a star-shaped cookie cutter to make stars. Gently lift the stars out of the pans with a spatula.

Arrange the stars in alternating rows of red and blue stars on a large serving platter. Squirt a button of whipped cream in the center of each star. Serve.

On the next page, learn how to make United States Celery -- another in-the-kitchen project with a dash of patriotism.

For more fun activities and crafts for kids, see:

Advertisement

United States Celery

Show your patriotism on the Fourth of July by creating United States celery. You'll be surprised at how quickly your celery shows its true colors.

What You'll Need:

Celery stalks with white part attached

Advertisement

3 glasses

Water

Red and blue food coloring

Knife

Ask an adult to help you make several slits in the lower part of three celery stalks. (Choose celery stalks that are not much taller than the glasses you are going to use.)

Fill three glasses with water. Put a few drops of red food coloring in the first glass, a few drops of blue in the second, and leave the third glass clear. Place a stalk of celery into each of the glasses. (Use a light-colored, center stalk for the clear glass).

Your celery will help you celebrate Independence Day by turning the colors of the American flag. One celery stalk will turn red, one will turn blue, and one will remain white. When you're done with the experiment, you can have an all-American snack!

Continue the patriotic theme with a pair of special eyeglasses. Your glasses won't improve your eyesight, but everyone who sees you wearing them will know you're expressing your patriotism. Keep reading to learn more.

For more fun activities and crafts for kids, see:

Advertisement

Patriotic Eyeglasses

You'll look great -- and patriotic -- in your glasses.

If you can't decide what to wear for your Fourth of July party, try some patriotic eyeglasses. The red, white, and blue glasses will almost guarantee you'll have an insightfully good time.

What You'll Need:

Ruler

Advertisement

Thin white cardboard

Pencil

Scissors

Red and blue cellophane

Glue

Red and blue markers

White chenille stems

Glitter glue

First, measure the width of your face, and cut out a cardboard rectangle a little longer than that. Your rectangle should be at least 2 inches deep.

Cut your glasses into any shape you want -- circles, squares, triangles, or big Independence Day stars.

Draw two eye holes on the glasses and cut them out. Cut out a piece of red cellophane and a piece of blue cellophane, each a little larger than each eye hole.

Glue a piece of cellophane over the inside of each eye hole to make the colored lenses.

Next, poke a small hole at either end of the eyeglasses, and fasten a chenille stem in each. Hook the free ends of the stems over your ears.

Use red and blue markers to decorate your eyeglass frames. Use glitter glue for sparkly fireworks. These eyeglasses are guaranteed to be a real blast!

What would look great with patriotic eyeglasses? A festive fireworks T-shirt, of course. Learn how to make it on the next page.

For more fun activities and crafts for kids, see:

Advertisement

Festive Fireworks T-Shirt

Make this crafty shirt outside -- it can get messy.

A festive fireworks T-shirt is perfect for the Fourth of July -- or any day you want to celebrate. It's a project that requires help from an adult, and it's not something that can be done quickly. But if you have some time and a little patience, creating a special T-shirt can be lots of fun.

What You'll Need:

Clean, white T-shirt

Cardboard

Scissors

2 spray bottles

Water

Measuring cup

Red and blue fabric paint, 1 ounce each

Paintbrush

Be sure to cover yourself and your work area -- this is a very messy project. You may even want to work outside. Ready? Here's how to begin:

Cut a piece of cardboard so it fits inside the T-shirt, and slide it inside the shirt. This will prevent the paint from soaking through from one side of the shirt to the other. Lay the shirt flat on your work surface.

Add about 1/3-cup of water to each spray bottle. Empty most of the red fabric paint into a spray bottle. Empty most of the blue paint into the other spray bottle. You need to thin the paint just enough so it can be squirted out of the bottle, so you may need to add more water than this -- add just a small amount of water at a time.

Now for the really fun part! Squirt red and blue star-burst designs onto the shirt until it looks the way you want it. Wait for one side to dry -- about one hour -- then flip the shirt over and paint the other side. Let dry.

Apply the finishing touches, and you'll have a wearable work of art.

To finish your shirt, use a paintbrush and the remaining fabric paint that you didn't put into the spray bottles to highlight different areas of your design. Let dry.

Wear your shirt on the Fourth of July -- or any day -- with pride!

To care for your shirt, wash it in cold water and hang it up or lay it flat to dry.

On the next page you'll learn how to make a patriotic pencil. Continue reading to find out how.

For more fun activities and crafts for kids, see:

Stars and Stripes Pencil Wrap

Patriotic pencils are fun to make a write with.

On the Fourth of July, even your pencil can look patriotic when its adorned with a stars and stripes pencil wrap. Making the wrap is so much fun, you just might want to make another. And another. And another. More pencils, please.

What You'll Need:

New pencil

5-inch length of star garland

Craft glue

2-3/4 x 3/4 inch piece of royal blue felt

1-1/2 x 5 inch piece of white felt

Seven 1/8 x 6-inch strips of red felt

White acrylic paint

Toothpick

Pen

Glue one end of the star garland to the metal part of the pencil eraser. Fold the garland over the top of the eraser, forming a loop, and glue down the other end of the garland.

Using a toothpick, dot white acrylic paint onto the royal blue felt to make stars (about three rows, ten dots in each row). Set aside to dry for 30 minutes.

Fold the white felt in half lengthwise, bringing the shortest ends together. Use the pen to mark the halfway point on the inside of the fold. Unfold the felt and lay it flat with the unmarked side facing up.

Glue a red felt strip along the top edge of the white felt piece. Repeat with the other red strips, leaving a little bit of space between the strips so the white felt looks striped. (If you haven't guessed, this is making the red and white stripes on the flag.) Let dry 30 minutes.

The finished pencil features stars and stripes.

Turn over the white felt. Apply glue to the back side, then lay the pencil over the ink mark at the halfway point. Fold both sides of the felt around the pencil, covering up the end of the garland and any metal part of the eraser that's still showing. Match the ends of the white felt and press firmly.

Glue the royal blue felt piece in the upper left corner of the flag, wrapping the ends around to the opposite side. Press firmly to secure.

Your pencil wrap has plenty of sparkle, but for even more, why not try your hand at making a fireworks picture? Keep reading for tips on how to get started.

For more fun activities and crafts for kids, see:

Fireworks Picture

Make a fireworks picture that reflects your favorite fireworks. All it takes is a little paper and glue -- and your imagination.

What You'll Need:

Assorted colors of construction paper

Blunt scissors

Craft glue

Black construction paper

Hole punch

Aluminum foil

Cut building shapes from assorted colors of construction paper. Cut out skyscrapers, small buildings, or houses to match your town.

To make your town's skyline, glue the building shapes along the bottom of the black construction paper sheet.

Use a hole punch to make confetti dots from aluminum foil and assorted colors of construction paper. Glue the colored dots over the nighttime skyline to re-create a magnificent fireworks display.

On the next page, learn how to make a Fourth of July collage.

For more fun activities and crafts for kids, see:

Patriotic Collage

Show what the Fourth of July means to you by creating a patriotic collage. With a stack of old magazines and a pair of scissors, you might be surprised at what you can come up with. Look for pictures that are meaningful to you -- that's what your collage is all about.

What You'll Need:

Old magazines

Blunt scissors

Red, white, and blue fabric scraps

Craft glue

Construction paper

Look through old magazines for pictures of patriotic symbols, such as the American flag, stars, bells, eagles, and historical monuments. You can also look for pictures of people saluting, soldiers marching, or lawmakers speaking.

Cut out the pictures.

Cut scraps of red, white, and blue fabric into stars and stripes. Glue the pictures and the fabric to a piece of construction paper in a random arrangement.

Cover the sheet of paper with the pictures and fabric pieces overlapping. Let the glue dry.

Continue reading to learn how to make glitter fireworks.

For more fun activities and crafts for kids, see:

Glitterworks

Create some fireworks of your own with "Glitterworks."

This Fourth of July, create your own "Glitterworks" -- fireworks that you make with glue and glitter. Capture the feel of nation's celebration when you create a festive work of art.

What You'll Need:

Newspaper

Black construction paper

Pencil

Glue

Glitter

Cover your work surface with newspaper -- glitter can be kind of messy.

Be creative -- try to draw your favorite fireworks display using black construction paper and a pencil. The pencil marks will show only as shiny imprints.

Trace your explosion with a thin line of glue. Sprinkle glitter on the glue and let it dry for about five minutes.

Then, carefully shake the excess glitter off the paper and into the glitter container to recycle it.

Now you have a Glitterworks picture you can be proud of.

See the next page for a shirt that shows off the red, white and blue!

For more fun activities and crafts for kids, see:

Patriotic T-Shirt

Patriotic T-Shirt and Uncle Sam's Hat

This patriotic T-shirt will show everybody you meet how proud you are of your country.

What You'll Need:

White T-shirt

T-shirt board or 18×21-inch piece of stiff cardboard covered with plastic wrap

Acrylic paint: red, blue

Two plastic lids, 4-5 inches in diameter

Sponges: 4-inch star (or cut star shape from 4-inch square sponge using pattern on page 58); 2 × 3-inch rectangle

Launder the shirt before you begin so that the paint will adhere better; do not use a fabric softener. Dry and press the shirt with an iron if necessary. Stretch the shirt onto the shirt board. (This prevents paint from soaking through to the back of the shirt.)

Pour some blue paint onto one plastic lid. Use a paintbrush to spread the paint into a circle about four inches across. Press the star sponge into the paint until the sponge surface is covered with paint, but not saturated; then press the star sponge onto typing paper to practice stamping. Some white should show through the paint for a "sponged" look. Dip the star sponge in the paint before you make each stamp. When you're ready, randomly paint about ten stars on the shirt. Let the stars dry.

Sponge star shapes onto the T-shirt.

Attach a length of masking tape horizontally across the front of the shirt at the top. Overlap three or four more lengths of tape onto the first one until you have a stripe of tape 1-3/4 inches wide on the shirt. Put a light pencil mark on the shirt 1-3/4 inches from the bottom of the tape.

Repeat the taping procedure below that mark. Continue measuring and making 1-3/4-inch stripes of tape this way, leaving 1-3/4-inch stripes of uncovered shirt between them, until you get to the bottom of the shirt.

Prepare the red paint in the other plastic lid as you did with the blue paint. Practice painting with the rectangular sponge until you can do it neatly. Then begin stamping the uncovered bands of shirt between the bands of tape. Paint as close as you can to the blue stars, but be careful not to get any red paint on them. Continue stamping until all the bands of shirt are painted red.

Fill in the gaps between the masking tape with red paint.

Let the paint dry, and then remove the masking tape from the shirt. You can wear the shirt right away, but do not wash it for 48 hours.

You can wear the shirt when the paint is dry.

After you've finished your shirt you can complete the patriotic ensemble with a classic American hat.

For more fun activities and crafts for kids, see:

Uncle Sam's Hat

Uncle Sam's Hat

Show your patriotic spirit with a boldly striped and star-spangled Uncle Sam's hat.

What You'll Need:

2 white paper plates, 9 inches each

Card stock: 12×12 inches each white, red, blue

White plastic lid, approximately 6-1/2 inches (such as from a whipped-topping container)

Tools:

Scissors

Ruler

Pencil

Craft glue

Cellophane tape and double-stick tape

Cut the white card stock into two 6×12-inch pieces. Glue these pieces together to form one long strip. Bend the strip into a tube shape, and set it inside the rim of the plastic lid (with the lid upside down). Mark the overlap with a pencil, and trim away the excess paper from the end so the paper overlaps itself by about a 1/2 inch. Lay the white paper flat.

Trim away the excess paper.

From the red paper, cut seven strips 1-1/2×6 inches and one strip 1×6 inches. Glue the 1-1/2-inch strips onto the white piece, creating stripes. (Tip: As you place the red stripes, use another strip as a guide to keep the space between them consistent.) Glue the one-inch strip on last, at the edge.

Place a piece of red card stock on top of the lid; run your finger around the inside rim to make an impression of the circle, and cut this circle out. Glue the red circle onto the top of the lid; let dry. Turn the lid upside down.

Re-roll the striped paper into a tube, overlapping the ends; set inside the lid, and glue the overlap closed. Tape it together on the inside as well. Tape the tube to the lid in several places, and run a bead of glue all around the edge. Let dry.

Cut a 2-1/2-inch strip of blue card stock to fit around the tube. (If needed, splice two pieces of paper together to make it long enough.) Trace the star pattern onto white card stock six times; cut out. Glue the stars evenly spaced along the blue strip.

Glue two plates together facing the same direction; let dry. With the plates right side up, set the tube in the center, and trace around it. Poke a hole in the center of the plates, and cut a small circle (about two-inch diameter). Make about 25 cuts around the plate starting at this hole and radiating out to the pencil line.

Turn the plate upside down, and center the tube over the inner rim. Fold back the tabs formed in step 6 to the inside of the tube, and glue them in place. Let dry.

Wrap the star hat-band around the hat; glue in place.

Note: Pattern is actual size.

For more fun activities and crafts for kids, see:

About the Craft DesignersIndependent Noses by Lisa Lerner, Kersten HamiltonFlag Windsock by Lisa Lerner, Kersten HamiltonFight for Independence Game by Lisa Lerner, Kersten HamiltonWatermelon Slush by Lisa Lerner, Kersten HamiltonFlying High Rocket by Lisa Lerner, Kersten HamiltonYankee Doodle Bell Game by Lisa Lerner, Kersten HamiltonPatriotic Wiggle Stars by Lisa Lerner, Kersten HamiltonUnited States Celery by Lisa Lerner, Kersten HamiltonPatriotic Eyeglasses by Lisa Lerner, Kersten Hamilton

Advertisement

Loading...