How to Draw Cranes in 10 Steps

Learn how to draw cranes and other construction vehicles with our step-by-step instructions.
Publications International, Ltd.

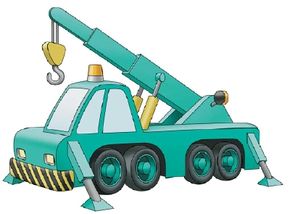
­This handy vehicle, which needs supports to keep it from tipping over, can­ reach really high to help move things from place to place. Unlike other construction vehicles, a crane can swing up and down, and from side to side.

In this article, we'll show you how to draw the above crane. You can draw this construction vehicle freehand while looking at your computer monitor or print out this page to get a closer look at each step.

Advertisement

Follow the red lines in each illustration to learn exactly what to draw in that step. The lines drawn in previous steps are shown in gray. Here, we'll show you an illustration of each step and then give you a description of how to draw it.

Ready to get started? Head over to the next page for the first step.

Advertisement
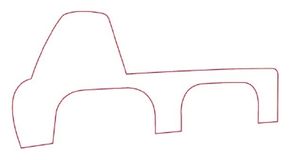
1. Draw the Body

Draw the side of the crane. It is a long shape with rounded cutouts where the wheels will go and a peak near the front for the cab.

On the next page, we'll draw the wheels.

Advertisement

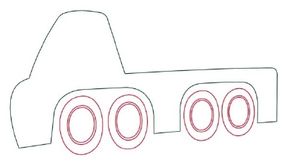
2. Draw the Wheels

Draw four ovals inside the cutouts for the wheels. Within each oval draw two more ovals, one inside the other, so they look like rings.

On the next page, we'll add the wheel hubs.

Advertisement

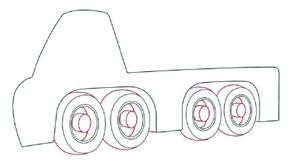
3. Draw the Wheel Hubs

­Make the tires look real by adding width to t­he outside. Finish the wheels by drawing the hubs. Also draw the line in each tire that adds depth to the inside of the wheel.

Draw a short horizontal line on the side of the crane body behind each second tire.

Advertisement

On the next page, we'll learn how to add some depth to the body.

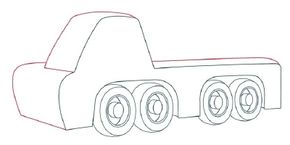
4. Add Depth to the Body

To build the body of the crane, draw the lines shown. Be sure to make the lines curved or straight where shown.

On the next page, we'll work on the windshield and front bumper.

Advertisement

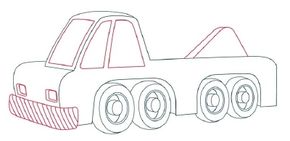
5. Draw the Windshield and Bumper

­Draw a rectangular shape for the front windshield and two odd shapes for the side windows. Then draw and outline two squares for headlights on the front of the c­ab. The front bumper is a long, curved rectangle.

Use a ruler to draw evenly spaced diagonal lines on the bumper. Near the back of the truck draw a triangle with a rounded top. Draw a matching line to add depth.

Advertisement

On the next page, we'll draw the boom.

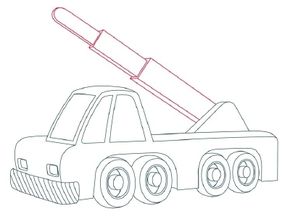
6. Draw the Boom

­Draw the crane arm, which is called the boom. It is made up of three rectangular shapes. Each rectangle is a little shorter and smaller than the previous one. Use your ruler to get the lines straight.

Round the end of the top rectangle. Draw the lines that add depth.

Advertisement

On the next page we'll draw the crane hook.­

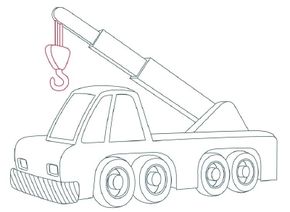
7. Draw the Crane Hook

Draw four lines from the tip of the rounded end of the boom. Draw an upside-down triangle at the bottom of the lines. Add the line to the side of the triangle for depth. Draw the hook below the triangle.

On the next page, we'll draw the crane hydraulics.

Advertisement

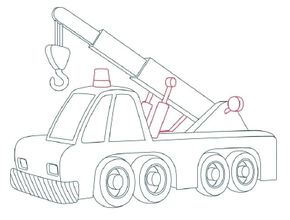
8. Draw the Crane Hydraulics

­

­To finish the boom, draw the two hydraulic cylinders that raise and lower it. Draw the circle that connects the front cylinder to the boom, adding the circular line to provide depth.

Draw a taillight extending from the triangular shape. Draw a back triangular arm support. Add the safety light on the cab's roof.

Advertisement

On the next page, we'll draw the crane supports.

9. Draw the Crane Supports

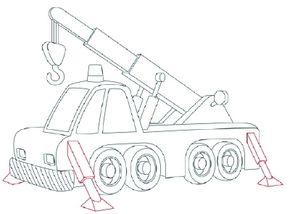
Draw the special supports a crane needs to keep it from falling over when it lifts heavy objects. The supports are rectangular shapes, with pyramid shapes at the ends, near the ground.

We're almost done! Head over to the next page for the final step.

Advertisement

10. Add the Final Touches

­

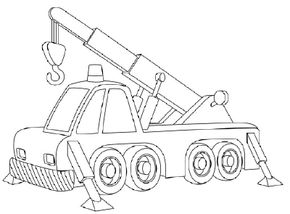
­Use a felt-tip pen to trace over the lines you want to keep, and erase the extra pencil lines.

That's it, you're done! Ready for another? The next construction vehicle may be much shorter than a crane, but it is wide and able to lift heavy loads and deposit them into other heavy-duty construction vehicles.

Continue to the next article to learn how to draw the bulky, yet precise, front loader.

Advertisement

Loading...