How to Draw Front Loaders in 9 Steps

Learn to draw front loaders and other construction vehicles with our easy directions.
Publications International, Ltd.

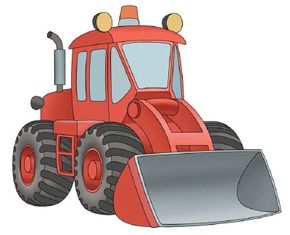
­A front loader can scoop up dirt and other things tha­t need to be moved and taken out of the way. These construction vehicles are famous for their ability to lift materials into other handy construction vehicles. They are even used to shovel snow.


Advertisement

In this article, we'll show you how to draw the above front loader. You can draw this construction vehicle freehand while looking at your computer monitor or print out this page to get a closer look at each step.

Follow the red lines in each illustration to learn exactly what to draw in that step. The lines drawn in previous steps are shown in gray. Here, we'll show you an illustration of each step and then give you a description of how to draw it.

Advertisement
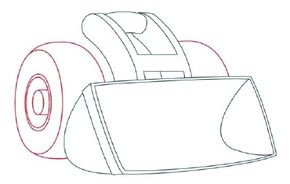
1. Draw the Bucket

­To make the bucket, draw a rectangle. Draw another one outlining the first. At each end of the rectangle, draw a ­half-oval (the one on the left butts out; the one on the right butts in).

On the left edge of the bucket, add a line for depth. To make the arm, make a curved H shape with a bar across the top. Draw thick outlines for depth.

Advertisement

Next, we'll add the two front tires.

2. Draw the Front Tires

Draw the two front wheels. The near side wheel includes the tire and hub, while all that is seen of the far wheel is a curved line.

Up next, we'll add a ladder.

Advertisement

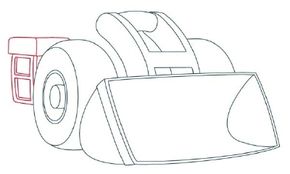
3. Draw a Ladder

Draw the ladder and step used to get into the cab of this construction vehicle. The ladder is made up of square and rectangular shapes. Use a ruler to make all the lines straight.

Next, we'll start work on the cab.

Advertisement

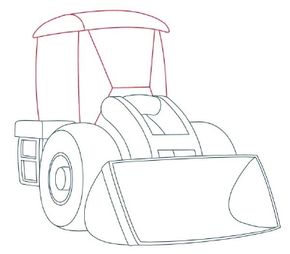
4. Draw the Cab

To make the cab, draw a rectangle for the side of the cab and a partial rectangle for the front. In the front, add lines that create a three-dimensional look. Add the roof as shown.

We'll add the rear tire on the next page.

Advertisement

5. Add the Back Tire

Draw the back wheel, which looks like the front wheel. (Note: There's a tiny line visible through the ladder. Don't forget to draw it.)

We'll add tire treads on the next page.

Advertisement

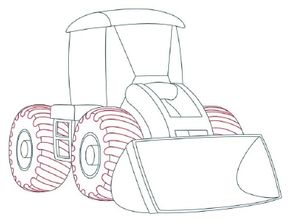
6. Add the Tire Treads

Construction vehicles need large tires with deep grooves so they can drive through mud and dirt. Add tread to the tires as shown, with evenly spaced lines that come together at a rounded end on the outside of the tire. (Be sure to add the tread that's visible through the ladder.)

Next, we'll learn how to draw the windows.

Advertisement

7. Add the Windows

Draw five windows in the cab. Notice how each window has a different shape. Draw a rounded corner behind the cab for the hood. On top of the hood draw the muffler, which is a rectangle with a pipe running through it. Add a circle at the end of the pipe.

Up next, we'll add the lights.

Advertisement

8. Draw the Lights

Draw the back of the taillight on the hood. On the roof, draw a safety light and two headlights. Add outlines to the headlights for depth. Draw a circle on the arm; add an outline for depth.

We're almost done. Check out the next page for the final step.

Advertisement

9. Add the Final Touches

­Use a felt-tip pen to trace over the lines you want to keep, and erase the extra pencil lines.

Now that you know how to draw front loaders, let's try drawing a more specialized construction vehicle -- the grapple skidder. Although this construction vehicle has a funny name, it's a serious piece of equipment for lumberjacks that need help moving heavy trees.

Advertisement

Continue to the next article to learn how to draw the highly maneuverable, and grabby, ­grapple skidders.

Advertisement

Loading...