Animal Crafts

Make an animal litter bag.

Animal crafts for kids are projects designed to keep kids busy. Try the animal crafts in this article to get creative and have fun while exploring the wonder of animals.

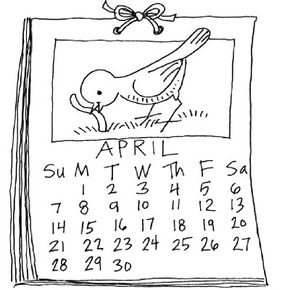
From simple art projects that flex your creative muscles to a wilderness-themed calendar you can enjoy year-round, there are animal crafts in this article for all kinds of animal lovers.

Advertisement

Explore the links below to get started on a great animal craft:

Animal House Nail Design

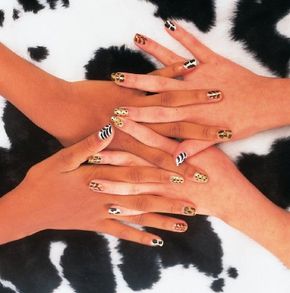
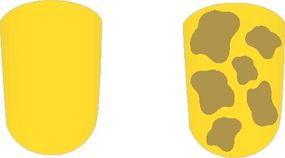
Cows and giraffes pay a visit with this great animal craft. Follow simple instructions to make this cool animal nail design.

Animal Litter Bag Craft

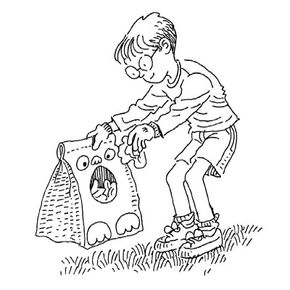
Transform a plain bag into something wild with this fun and simple animal craft.

Animal Track Stamps Craft

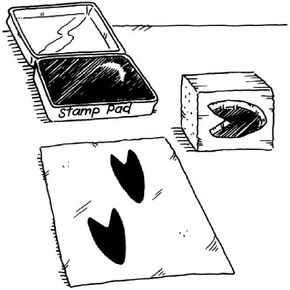
When it comes to animal fun, this craft gets the stamp of approval. Learn how to make your own animal track stamps.

Cardboard Animal Craft

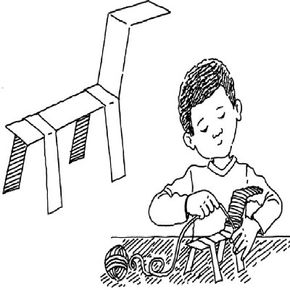
Turn everyday cardboard and yarn into cool creatures.

Crispy Rice Animal Treat

These tasty animal-shape treats are fun to make -- and even more fun to eat.

Floppy Friends Animal Craft

Make adorable animal friends with chenille stems and poms.

Frankenstein's Animals Craft

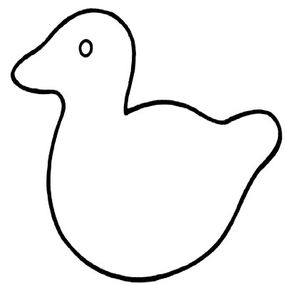
Have a monster of a good time making this monsterous craft. Stretch your imagination to create your own unique animal.

Milk Jug Animal Craft

Transform an ordinary empty milk jug into your favorite animal with this cool animal craft.

Plaster Caster Animal Craft

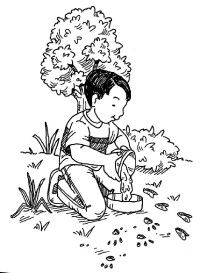
Find a cool animal track? Make a long-lasting plaster cast of it with these easy to follow instructions.

Prickly Pets Animal Craft

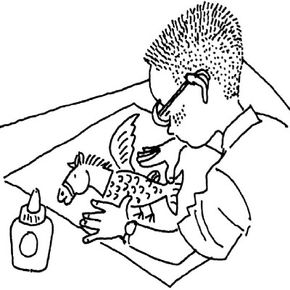
Don't avoid pesky burrs on your next walk in the woods. Use them to make this awesome animal craft.

Rockin' Rock Pet Craft

You don't have to take this pet for a walk. Learn how to make cool rock pets with the simple steps in this article.

Thummies Animal Craft

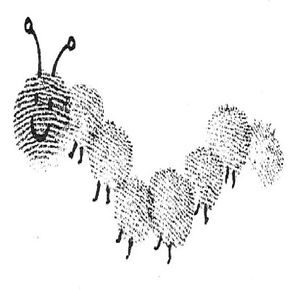
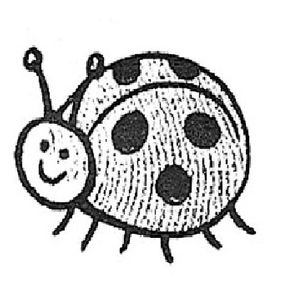
This animal craft gets a thumbs-up. Learn how to make great animal drawings that start with a single thumb print.

Wilderness Calendar Craft

This animal craft is a great way to keep track of all your animal memories.

Animal ABC Book Craft

Chronicle your favorite animals in this A-to-Z animal craft project.

When it comes to cool animal crafts, it all starts with your hands. Check out the wild animal house nail design in the next section.

For more fun activities and crafts, check out:

Advertisement

Animal House Nail Design

Make the animal house nail design.

It's a jungle out there, and this animal house nail design will add a wild touch to your nails. Try this giraffe print, then experiment with other animal prints for your nails.

How to do the animal house nail design:

Advertisement

Step 1: Paint nails dark yellow. Let dry.

Step 2: Using brown paint, add small, random shapes all over the nail to create a giraffe pattern.

Add small, random shapes all over the nail to create a giraffe pattern.

Use your new wild fingertips to make the animal litter bag craft in the next section. Keep reading to learn about this craft.

For more fun activities and crafts, check out:

Advertisement

Animal Litter Bag Craft

Make an animal litter bag.

Feed the animals each time you throw away the trash with these animal litter bags crafts. These handy litter bags are decorated to look like animals. Kids will have a great time decorating these bags with their favorite animal faces.

What You'll Need:

  • Stapler
  • Paper grocery bags
  • Scissors
  • Crayons or markers
  • Construction paper
  • Tape or glue
  • Work gloves

How to make the animal litter bag craft:

Step 1: Staple the top of a large grocery bag closed.

Advertisement

Step 2: On the plain side of the paper bag, cut out a large opening that will be the mouth of your animal. Be sure the mouth is high enough on the bag so it will still hold trash.

Step 3: Color eyes, ears, nose, and feet on the bag to look like any animal you choose. If you'd like, use construction paper and cut out shapes for the body parts. Tape or glue them onto the bag in the proper places.

You can also cut strips of paper for fur or a mane, and glue them to the bag. Use your imagination -- your creation doesn't have to be an animal you've ever seen before.

Step 4: When your animal is completed, put on your work gloves and walk around your yard or neighborhood. Pick up litter, and put it in the bag through the animal's mouth. Don't pick up any broken glass, needles, or other dangerous materials.

You'll become an animal detective after finishing the craft in the next section. Keep reading to learn about the animal track stamps craft.

For more fun activities and crafts, check out:

Advertisement

Animal Track Stamps Craft

Make animal track stamps.

Animal tracks can tell quite a story. They can tell you where an animal has been and where it's going. Tell your own critter tales by completing the animal track stamps craft.

What You'll Need:

  • Small blocks of wood (about 2x2x1)
  • Adhesive moleskin (found in the foot care section of the drug store)
  • Ink pen
  • Field guide to animals
  • Scissors
  • Stamp pad

Step 1: Turn the moleskin to the paper side. With an ink pen, draw the outline of animal tracks. (Use the pictures in a field guide as patterns.)

Advertisement

Step 2: Cut out the shapes with sharp scissors, then peel off the paper backing.

Step 3: Stick the shapes onto a small block of wood. Press your stamp on the stamp pad and stamp away.

Try making a set of tracks that tell a story. You could show one animal following another, or space tracks farther apart to show an animal running. A cluster of tracks in a small area could show that the animal had found something to eat or something else of interest.

Now that you've explored using animal tracks to tell a story, use your creativity to make your own cardboard animal crafts. Learn how in the next section.

For more fun activities and crafts, check out:

Advertisement

Cardboard Animal Craft

Make a cardboard animal craft.

Make a zoo full of animals with this simple, fun cardboard animal craft project. This animal craft uses pieces of scrap cardboard and yarn and -- most importantly -- your imagination.

What You'll Need:

  • Cardboard
  • Scissors
  • Craft glue
  • Yarn
  • Paper scraps

How to make a cardboard animal craft:

Step 1: Cut three strips of scrap cardboard; make two the same length and the other about two inches longer. The longest strip will be the body, neck, and head of the animal. The other strips will be the animal's legs.

Advertisement

Step 2: Make a bend in the longer piece of cardboard, about 1/4 of the way down from an end; make another bend another 1/4 of the way down from the first bend. This is the head and neck of the animal. Your animal should look a bit like a backward Z.

Step 3: Bend the shorter two pieces in half. Fold one over the "shoulders" of the animal, just behind the neck, and the other at the opposite end or "bottom" of the animal. (You'll need to rebend the legs so they lay flat on top of the animal's body.) Glue the legs in place.

Step 4: Wrap your animal's body with yarn. Work your way down the body, circling it again and again with soft, fluffy yarn, passing over the legs at first.

Once the body is covered, slowly work your way back to the legs and start wrapping those pieces of cardboard until they are covered and plump. Work your way back up to the belly of the animal, and tie off the loose end of yarn.

Step 5: Glue on scraps of yarn for ears, a mane, and a tail. Use bits of paper to add animal eyes and other features.

The crispy animal zoo treat in the next section is not only fun to make -- it's tasty, too. Keep reading to learn more about this animal craft.

For more fun activities and crafts, check out:

Advertisement

Crispy Rice Animal Treat

Make a crispy rice animal treat.

Make these delicious crispy rice animal treats, and it won't take long for them to become extinct. But don't worry -- you can always make more.

What You'll Need:

  • Crispy rice cereal
  • Marshmallows
  • Butter or margarine
  • Waxed paper or aluminum foil
  • Plastic sandwich bag

How to make the crispy rice animal treat:Step 1: Make marshmallow treats following the recipe on the box of crispy rice cereal. Step 2: Cover your work surface with a sheet of waxed paper or aluminum foil. Step 3: Coat your hands in butter, or put a plastic sandwich bag coated with butter over your hands.Step 4: While the mixture is still warm be careful, mold it into teddy bears, fish, ducks, and other round animals. Let the treats cool on waxed paper or foil.

Advertisement

You can make a crispy rice animal treat in the shape of a duck.

The floppy friends craft makes a collection of adorable, fuzzy animal friends. Learn how to make this simple animal craft in the next section.

For more fun activities and crafts, check out:

Advertisement

Floppy Friends Animal Craft

You'll flip over the floppy friends animal craft. These adorable, fuzzy animals are fun to make and collect.

Start by making a basic body shape. You can use this basic body shape to make an elephant, polar bear, grizzly bear -- any animal you can imagine.

Advertisement

What You'll Need:

  • Two chenille stems, 6mm each
  • Scissors
  • Pencil
  • One pom, 2 inches
  • Glue
  • One pom, 1 inch

How to make the floppy friends animal craft basic body shape:Step 1: Cut two chenille stems in half to create four 6-inch pieces. Wrap one of these pieces around a pencil to create a tight spiral, then carefully slide it off. Step 2: Repeat with the remaining 6-inch stems.With this basic body shape, you can make almost any animal. Try a Hippopotamus, as in the following instructions, or create your favorite animal.

Floppy Friends Hippopotamus Animal Craft

What You'll Need:

Basic body shape, gray

1 gray chenille stem, 6mm

Scissors

Glue

1 gray pom, 3/4 inch

2 black poms, 5mm

2 wiggle eyes, 6mm each

Nail scissors

2 white poms, 5 mm each

Step 1: Cut two 1/2-inch pieces from the chenille stem. Bend each piece into a semicircle to form two ears; glue them to the head.

Step 2: Add a snout by gluing the 3/4-inch pom to the front of the head. Glue both black poms to this snout to create nostrils. Glue the wiggle eyes above the snout.

Step 3: Use nail scissors to trim a small strip in the shape of a mouth just under the snout, and glue in both white poms to look like teeth.

Cute and fuzzy hippos are fun, but a Frankenstein animal puts a scary twist on the craft. Continue reading to find out more.

For more fun activities and crafts, check out:

Advertisement

Frankenstein&#39s Animals Craft

Make a Frankenstein's animal.

Do you love animals? Make the Frankenstein's animal craft and create a whole new species. Kids love stretching their imaginations with this animal craft activity.

What You'll Need:

  • Blank paper
  • Markers
  • Old magazines
  • Glue
  • Scissors

How to make a Frankenstein's animals craft:

Use animal body parts you find in magazine pictures, mix and match to make a whole new beast.

Advertisement

Think a flying sea horse would be fun? How about a dog with four eyes? Or a turtle with fur? Anything is possible with a little imagination. Once your animal is captured on the page, write a short story about what makes it unique.

Have an ordinary milk jug on hand? You can transform it into a mouse. Keep reading to learn how to do the milk animals craft.

For more fun activities and crafts, check out:

Advertisement

Milk Jug Animal Craft

Make a milk jug animal.

Don't throw away that empty milk jug -- you can use it to make a great milk jug animal craft.

Follow the directions below to create a mouse milk jug animal. Use your imagination to make your own favorite animal. You can create silly features using paper rolls, chenille stems, pom-poms, or yarn.

Advertisement

What You'll Need:

  • Plastic milk jug
  • Pencil
  • Scissors or craft knife
  • Permanent markers
  • Craft glue
  • Black pom-pom
  • Scraps of pink and gray felt
  • Poster board or cardboard

How to make a milk jug animal craft:

Step 1: Draw a cut-line on the jug as shown. Then, cut out the top part of the jug. Leave the handle on to carry your container.

Step 2: Draw on the mouse's eyes and whiskers. Glue on a black pom-pom for the nose.

Step 3: Cut two small semicircles from a scrap of pink felt. Glue one on each ear. Cut a long tail from the gray felt, and glue it to the back of the jug at the bottom.

Step 4: Draw paws on a piece of poster board, and have an adult cut them out. Glue the paws to the bottom of the jug.

Keep reading to learn how to make a cool collection of animal tracks.

For more fun activities and crafts, check out:

Advertisement

Plaster Caster Animal Craft

Make a plaster caster animal craft.

Animal tracks can tell you a lot about the animal that made them. The plaster caster animal craft lets you make you own collection of long-lasting animal tracks.

Kids will love the process of making this animal craft, which involves searching for animal tracks outdoors and making a plaster cast of the tracks.

Advertisement

What You'll Need:

  • Long strip of cardboard
  • Paper clips
  • Plaster of Paris
  • Water
  • Mixing container
  • Spoon
  • Acrylic paint (optional)

How to make a plaster caster animal craft:

Step 1: Find a muddy place where animals often visit. Stream banks and marshes are best since water attracts a wide variety of animals. You can also make a muddy patch in your backyard and bait it with a little food.

Step 2: Once you find a clear track, make a collar of stiff cardboard to fit around it. Paper clip the ends of the cardboard together and push the collar into the mud around the track.

Step 3: Mix plaster of Paris with water until it is pourable but not too thin. Pour about an inch of plaster into the collar. Let it set before removing. Handle the cast gently until you can get it home and let it dry completely.

Step 4: When it is dry, you can paint the track with acrylic paints if you want.

The prickly pets animal craft uses burrs from burdock plants to make cute animal shapes. Check out this animal craft in the next section.

For more fun activities and crafts, check out:

Advertisement

Prickly Pets Animal Craft

The prickly pets animal craft uses the burrs from burdock plants to make adorable animal shapes.

Those big, prickly burrs can be a pain in the neck -- or the foot. Burrs can also be a big pain in the paw for your four-footed friends. So, pick them up off the ground and use them for this great craft.

What You'll Need:

  • Dried burrs from burdock plants
  • Craft glue
  • Twigs
  • Maple wings (optional)
  • Paint

How to make the prickly pets animal craft:

Glue several burrs together to make animal shapes. Add tiny twigs for legs, maple wings (they carry the seeds of maple trees) for wings, and other natural decorations to finish them off. You can use tiny dabs of paint to give them eyes.

Make a whole zoo of burr babies, and keep them up on a shelf, where they won't bite any toes.

Your collection of animals doesn't stop with burr pets. Check out the rockin' rock pets craft in the next section for another great animal craft idea.

For more fun activities and crafts, check out:

Rockin' Rock Pet Craft

Your mom will never need to yell at you to feed these fun rockin' rock pets -- and they won't make any obnoxious noises or messes either. Get creative and make a whole zoo of these great rockin' rock pet crafts.

The instructions below will show you how to make a spider rock pet craft.

What You'll Need:

  • Smooth, round rock
  • Black acrylic paint
  • Acrylic gloss medium (optional)
  • Two black chenille stems, at least 12 inches long
  • Pink dimensional paint (optional)
  • Two wiggle eyes

Tools:

  • Paintbrush
  • Scissors
  • Cool-temp glue gun and glue sticks
  • Waxed paper or newspaper
  • Tacky glue

How to make a rockin' rock pet craft:Step 1: Find a smooth, round rock that fits nicely in your hand. Wash and dry it.

Step 2: Paint the rock with two coats of black acrylic paint. Let paint dry. Then, if you wish, paint on a final coat of shiny acrylic gloss medium.

Step 3: Cut the chenille stems in half so you have four 6-inch pieces. Curl the ends of each piece to make arched legs. Flatten out the middle of the stems so your rock will fit on top.

Step 4: Cover your work surface with waxed paper or newspaper. Hold the four bent stems together. Apply a generous amount of glue to the flat center area. Set the rock on top of the glue, holding it down until the glue cools.

Step 5: Optional: Using the pink paint, add a smiling mouth. Using tacky glue, attach the wiggle eyes to the front of your spider.

Did you know that you can make a great animal craft out of a simple thumb print? Check out the thummies animal craft in the next section to find out how.

For more fun activities and crafts, check out:

Thummies Animal Craft

Make a thummies animal.

For an animal craft with a neat artistic twist, try making a thummies animal craft. With your thumb print as a starting point, you can come up with all sorts of fun animal art creations.

What You'll Need:

  • Water-based ink stamp pad
  • Drawing paper
  • Fine-point felt-tip pen

How to make a thummies animal craft:

Press your thumb on an ink pad, then press it on a piece of paper. With a fine-point felt-tip pen, add details to your thumb print to create an animal, a person, or a silly character.

Draw ears, whiskers, and a tail to make a cat, or add spots, legs, and antennas to make a ladybug. There are so many fun creations you can make.

Add spots, legs, and antennae to make a ladybug.

Try using your pinky or index finger for prints in different sizes and shapes. Or press four or five thumb-prints in a row to make a caterpillar. Use your thumb print animals to decorate greeting cards and stationery or to illustrate a story.

For a great year-round animal craft, check out the wildlife calendar in the next section.

For more fun activities and crafts, check out:

Wildlife Calendar Craft

Make a wildlife calendar.

Create a keepsake of your wildlife explorations by making a wildlife calendar. This animal craft project is a great way to commemorate the animals you've met.

What You'll Need:

  • Newspaper (optional)
  • Paints or colored markers
  • Paintbrushes
  • Drawing paper
  • Colorful magazine pictures of nature scenes (optional)
  • Poster board
  • Ruler
  • Glue
  • Hole punch
  • Yarn or ribbon

How to make a wildlife calendar craft:

Step 1: If you are using paint, cover your work surface with newspaper.

Step 2: With paints or colored markers, make 12 colorful drawings of different wildlife scenes from your neighborhood -- for example, squirrels finding acorns, birds eating from feeders, etc. -- on 12 separate sheets of paper, making one scene per page.

If you don't like to draw or paint, you could cut out colorful magazine pictures of 12 different wildlife scenes.

Step 3: Measure and cut out 12 sheets of poster board that are twice the length of your pictures (all 12 should be the same size).

Step 4: Glue each drawing or picture to the top of a separate sheet of poster board. Draw a 1-month calendar on the bottom of each piece of poster board.

Step 5: Punch 2 holes in the center top of each piece of poster board, and tie all the pages together with a piece of yarn or ribbon.

An animal ABC book makes another great animal keepsake. Learn about this animal craft in the final section.

For more fun activities and crafts, check out:

Animal ABC Book Craft

An animal ABC book makes a great gift -- it's like giving someone a trip to the zoo. Make this animal craft for a friend, or keep one for yourself as a great chronicle of a trip to the zoo.

What You'll Need:

  • Notebook
  • Pen or pencil
  • Camera (optional)
  • Old magazines
  • Scissors
  • Markers

How to make an animal ABC book craft:An ABC book is a book that has one sentence or one page for each letter of the alphabet. A visit to the zoo makes a great topic for an ABC book. The next time you go to the zoo, take a notebook with you. Write down the name of each animal you see. Also write down one interesting fact about each animal. Draw a sketch or bring a camera and take pictures of the animals, too.When you get back home, make your ABC book. For each letter, think of an animal that starts with that letter. Put its picture on the page. If you didn't take photos or draw pictures, you can cut pictures out of old magazines.Then write the animal's name and a fact about the animal. For example, if you saw an aardvark, you might write: The name "aardvark" means "earth pig." If you come to a letter that you don't have an animal for, think of an object at the zoo that begins with that letter. For "H," you could write about the hot dog you had for lunch. Try to think of an animal or a word for every letter of the alphabet. When you're done, you'll have a book about the zoo, from A to Z.For more fun activities and crafts, check out:

How to make an animal ABC book craft:An ABC book is a book that has one sentence or one page for each letter of the alphabet. A visit to the zoo makes a great topic for an ABC book. The next time you go to the zoo, take a notebook with you. Write down the name of each animal you see. Also write down one interesting fact about each animal. Draw a sketch or bring a camera and take pictures of the animals, too.When you get back home, make your ABC book. For each letter, think of an animal that starts with that letter. Put its picture on the page. If you didn't take photos or draw pictures, you can cut pictures out of old magazines.Then write the animal's name and a fact about the animal. For example, if you saw an aardvark, you might write: The name "aardvark" means "earth pig." If you come to a letter that you don't have an animal for, think of an object at the zoo that begins with that letter. For "H," you could write about the hot dog you had for lunch. Try to think of an animal or a word for every letter of the alphabet. When you're done, you'll have a book about the zoo, from A to Z.For more fun activities and crafts, check out:

Advertisement

Loading...