How to Draw World War II Planes in 7 Steps

Draw World War II planes with our step-by-step instructions. See more flight pictures.
­Publications International, Ltd.

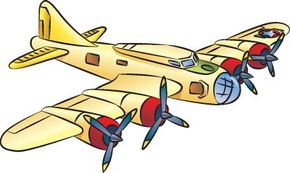
­Draw dogfights in the s­kies with our World War II plane. The step-by-step instructions below make it easy.

In this section, we'll show you how to draw the above World War II plane. Either draw it freehand while looking at your computer monitor or print out this page to get a closer look at each step.

Advertisement

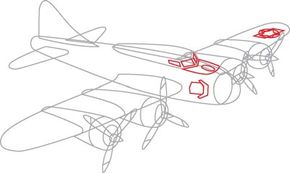
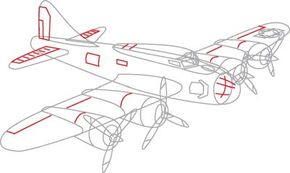
­Follow the red lines in each illustration to learn exactly what to draw in that step. The lines drawn in previous steps are shown in gray. Here, we'll show you an illustration of each step and then give you a description of how to draw it.

Ready to get started? Head over to the next page for the first step.

Advertisement
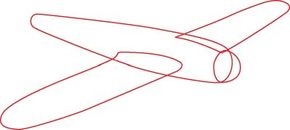
1. Draw the Body and Wings

Draw a long oval for the body of the plane. Add an oval at the front to make the forward bubble window. Sketch the two long wing shapes.

Check out the next page and find out how to draw the tail.

Advertisement

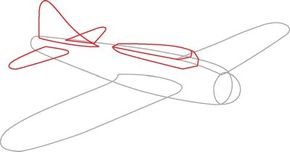
2. Add the Tail and Cockpit

­

­Draw three rounded triangles for the tail. Add a long wedge shape on top of the body for the cockpit.

How is a plane supposed to fly without an engine? We'll take care of that problem on the next page.

Advertisement

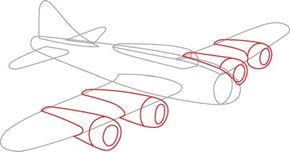
3. Draw the Engines

Sketch two cylinders on each wing to make the engines. Add a circle at the tip of each cylinder. Draw a curved line near the front of each engine to add detail.

In the next step, we'll draw the propellers.

Advertisement

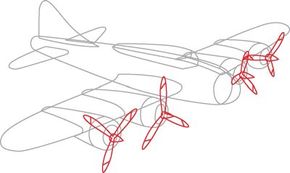
4. Draw the Propellers

Draw a cone in the center of each engine, and add three long, thin ovals coming from each cone to form the propellers. Add a slanted detail line to the tip of each propeller.

We'll work on drawing the cockpit windows on the next page.

Advertisement

5. Add the Cockpit Windows

­

­Draw windows on the cockpit. Sketch body details in front of the windows. Finish with a long rectangle, circle, and star emblem on the far wing.

We'll work on adding detail to the body in the next section.

Advertisement

6. Add Detail to the Body

­

­Add rectangles to the bottom two tail sections. Fill the rectangles in with lines. Draw a rectangle with a corner missing on the top tail section, and add a smaller rectangle inside it. Sketch line details on the wings, engines, and cockpit. Finish with a couple rectangles for hatches on the body side and some details on the front bubble window.

We're almost done! We'll add the final touches on the next page.

Advertisement

7. Add the Final Details

­

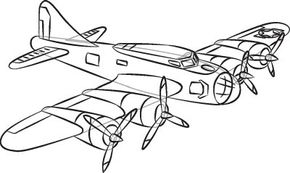
­Trace the pencil lines you want to keep with a felt-tip pen. Erase any extra lines.

And your World War II plan is finished. You can add more elements -- such as clouds -- to your drawings to make them more exciting.

Advertisement

Our next project is the kind of aircraft we're all most familiar with. In the next article, learn how to draw a passenger plane.


See all How to Draw articles.

Advertisement

Advertisement

Loading...