How to Draw a Pansy in 5 Steps

Flower Image Gallery You can learn how to draw this pansy. See more pictures of flowers.
Publications International, Ltd.

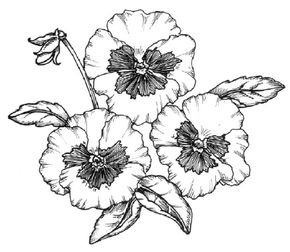
A pansy is a beau­tiful garden flower that actually has a face. This flower rang­es in color from gold and orange to purple, violet, and a blue that almost looks black.

In this section, we'll show you how to draw the above pansy. You can draw this flower freehand while looking at your monitor or print out this page to get a closer look at each step.

Advertisement

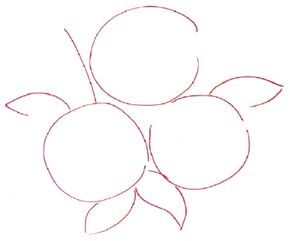
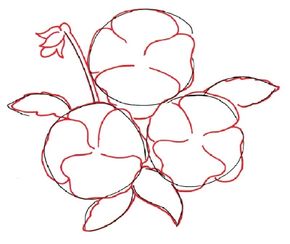
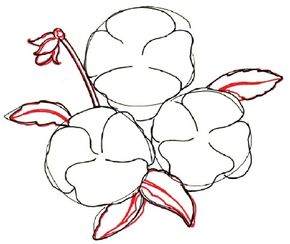
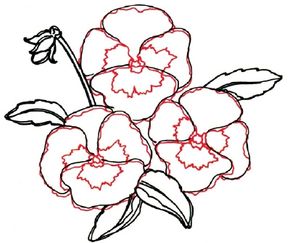
Follow the red lines in each illustration to learn exactly what to draw in that step. The lines drawn in previous steps are shown in gray. Here, we'll show you an illustration of each step and then give you a description of how to draw it. 
1. Sketch the Outline

­

To show the position of each flower, lightly sketch three circles. Next to these circles, show the position of the leaves by lightly sketching curved lines that meet at a point. Use a curved line slanting upward to show the stem.

Advertisement

2. Petals

Lightly sketch in petals using shapes that are roughly triangular with rounded corners. Sketch the other side of the stem and add a bud at the top. Draw the bud in curved arcs.

­Attach the bud to the stem with a semicircle. Scallop some of the edges of the leaves as shown.

Advertisement

3. Leaves

For each of the bottom two leaves, show that the front edge of the leaf is curling upward. Do this by drawing a scalloped line above the smooth bottom line of the leaf.

­Draw center veins in each leaf with two parallel lines. Draw the tips of the bud petals so they curl. Draw two small leaves where the bud is attached to the stem.

Advertisement

4. Irregular Lines

­

Redraw the petals of the flowers with irregular wavy lines. Add another irregular curving line across the center of three of the petals in each flower.

Add a third, small irregular curve near the center of each of the three petals. Leave the top petal plain. Draw an irregular circle for the center.

Advertisement

5. Shading and Detail

­

Darken the area of the petals between the two irregular lines with many lines radiating from the center. Put small dots within the center circle. Shade the outer edges of the petals and the leaves with short parallel lines.

Shade the bud in the same way. Add more short curving lines for the remaining veins in the leaves.

Advertisement

These next flowering plants appear to have faces too, but it's their heart-shaped petals that make these flowers a favorite.

Continue to the next section to learn how to draw a violet.


See all How to Draw articles.

Go to the HowStuffWorks home page.

Advertisement

Advertisement

Loading...