How to Draw a Mouse in 4 Steps

Mammal Image Gallery Learn how to draw a mouse in just four simple steps. Use this article's clear directions and illustrations to guide you through each step. See more pictures of mammals.
Publications International, Ltd.

Although a mouse is small, d­rawing it can still be a challenge. Fortunately, these ­instructions make it easy to sketch this squeaky, cheese-loving animal.

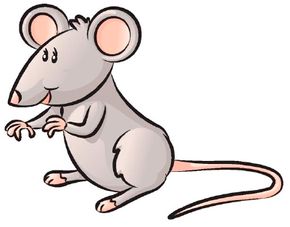
In this section, we'll show you how to draw the above mouse. Either draw it freehand while looking at your computer monitor or print out this page to get a closer look at each step.

Advertisement

Follow the red lines in each illustration to learn exactly what to draw in that step. The lines drawn in previous steps are shown in gray. We'll show you an illustration of each step and then give you a description of how to draw it.
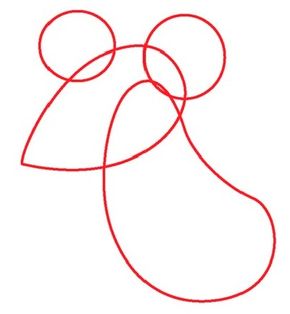
1. Draw the Body and Head

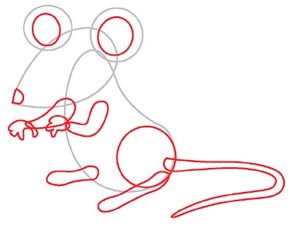
Draw a curved bean shape for the body and a teardrop shape for the head. Add two circles for the ears.

In the next step, you'll complete the rest of the body.

Advertisement

2. Add Legs and Tail

Draw two more circles inside the ears for the inner ears. Sketch a circle towar­d the bottom of the body for the thigh of one leg. Add shapes for both feet.

Draw a curving, snake-like shape for the tail and two more curved shapes for the arms. Add the hands and nose.

Advertisement

There are just a few more details before you have a finished mouse.

­

Advertisement

3. Add the Details

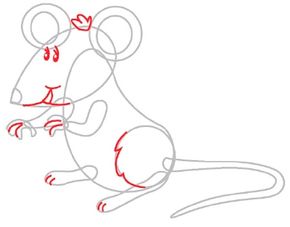
Draw ovals for the eyes. Add some curved lines for the hair and eyelash details and some more for mouth and toe details.

Almost done! Check out the last page to learn how to perfect your work.

Advertisement

4. Trace the Lines

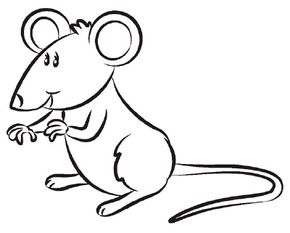
Trace the pencil lines you want to keep with a felt-tip pen, and erase any extra lines.Don't worry if your mouse drawing isn't perfect. You can practice drawing it again and again to hone your drawing skills.

Now that you've learned to draw a tiny animal, maybe you'd like to learn how to draw a giraffe.

Advertisement

Advertisement

Loading...