How to Draw a Geranium in 5 Steps

Flower Image Gallery Learn how to draw a geranium and other flowers and plants with our easy instructions. See more pictures of flowers.
Publications International, Ltd.

Geraniums are commonly found­ in the eastern part of the Mediterranean. Not only are these f­lowers attractive, but they also have the ability to grow just about anywhere -­- if properly cared for.

Colors run the gamut from mauve, red, and maroon to pink, white, and even two-tone.

Advertisement

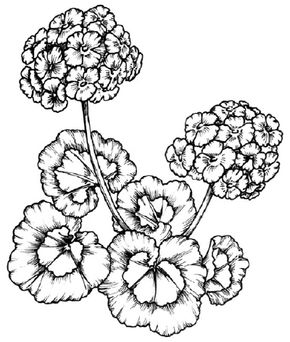
In this section, we'll show you how to draw the above geranium. You can draw this flower freehand while looking at your computer monitor or print out this page to get a closer look at each step.

Follow the red lines in each illustration to learn exactly what to draw in that step. The lines drawn in previous steps are shown in gray. Here, we'll show you an illustration of each step and then give you a description of how to draw it.

Advertisement
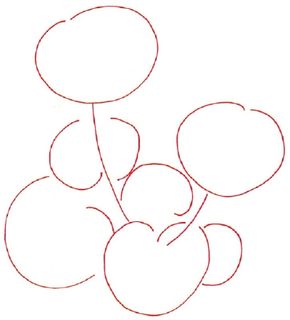
1. Outline

Show the positions of the two groups of flowers by lightly sketching two large circles. Sketch in stems using two lines curving down from the circles.

Around the bottom of the stems, sketch large shapes that look like rounded hearts.

Advertisement

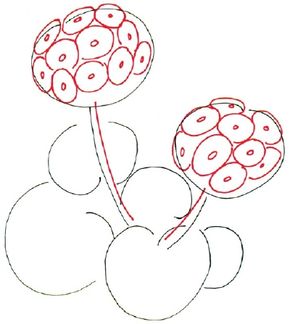
2. Blossoms

Finish each stem by drawing a second line parallel to the first one. Lightly fill the large circles with smaller circles to show individual blossoms.

For the centers of the blossoms, draw a small circle inside each of these circles.

Advertisement

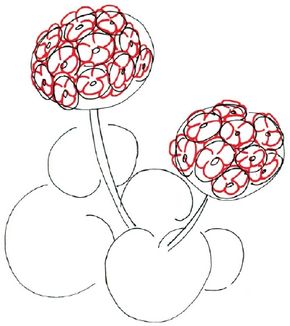
3. Petals

For the petals, surround each center circle with four rough oval shapes. Draw these shapes lightly. Some blossoms will overlap others so that the bottom blossoms can't be seen completely. 

Advertisement

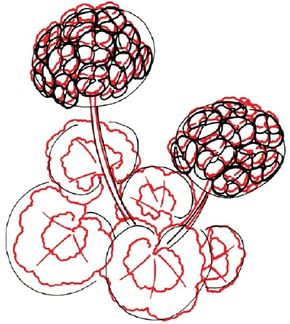
4. Scallop the Edges

Redraw the petals with scalloped lines to make the petals look ruffly. Redraw the centers of the blossoms. Redraw the stem so that it ends at the bottom leaf shape.

Draw the edges of each leaf with a roughly scalloped line. Draw a similar scalloped line around the center of each leaf. Draw three veins for each leaf with curving lines. 

Advertisement

5. Shading

Use several short lines to shade near the centers and edges of each petal. Shade the top and bottom of each stem with a few short lines.

Shade the outside sections of each leaf and darken the center of each leaf.

Advertisement

Are you beginning to feel like a pro? Great! Now let's move on to a fruit whose popularity peaks around Halloween and Thanksgiving.

In the next section, learn how to draw a pumpkin.

Advertisement

Advertisement

Loading...