How to Draw a Baseball Pitcher's Windup Cartoon in 5 Steps

Baseball Image Gallery Learn how to draw a baseball pitchers windup cartoon with our easy steps. See more baseball pictures.
Publications International, Ltd.
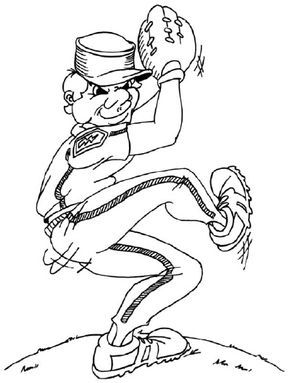
Want to le­arn how to draw a­nd pitch at the same time? If you follow our step-by-step instructions below, you'll learn how to draw a familiar scene from Ameri­ca's favorite pastime. Learn how to draw a baseball pitcher's windup cartoon!

In this section, we'll show you how to draw the above baseball pitcher's windup cartoon. You can draw this cartoon freehand while looking at your monitor or print out this page to get a closer look at each step.computer

Advertisement

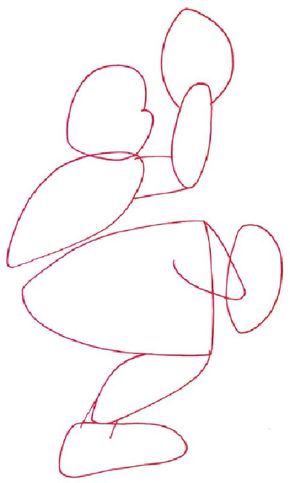
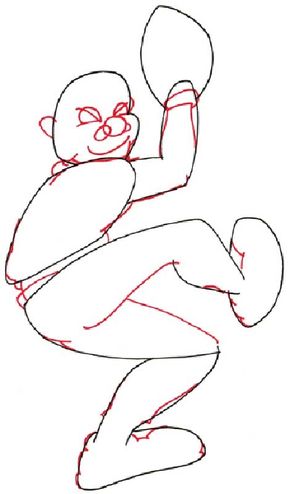
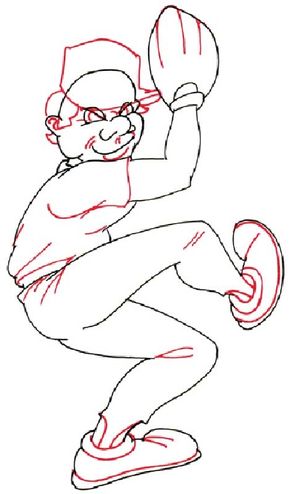
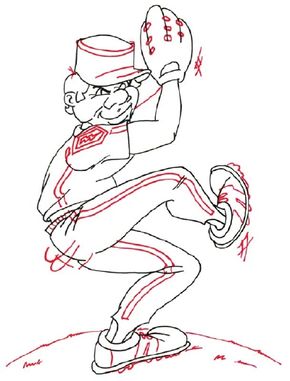
Follow the red lines in each illustration to learn exactly what to draw in that step. The lines drawn in previous steps are shown in gray. Here, we'll show you an illustration of each step and then give you a description of how to draw it.

1. Outline

Start with a large rounded triangle to show the position of the legs. Above it, sketch a pointed oval for the body. Draw a rounded heart-shaped head. Add a vertical oval shape for an arm.

Attach it to the body with two lines. Form a pointed oval around one end of the arm for the mitt. For the raised leg, draw a rounded V-shape and a pointed oval.

Advertisement

Show the other leg as an oval. Below it, draw a rounded triangle for the foot. Use two short lines for the ankle.

2. Face, Arms and Legs

Add a curved line and a U-shape for the ears. Show the eyes as half circles with diagonal lines through them. Use a circle connected to a small oval and a half circle for the nose.

Draw the mouth as a broad curve. Define both sides of the chin with two short curves. Show the cuff of the glove as a comma-shaped figure.

Advertisement

Redraw the uniform with curved lines. Finish the legs by drawing a curved Y-shape. Outline the shoes with attached curved lines.

3. Hat, Glove and Shoes

Form the pillow-shaped cap, adding two short curved lines to the lower end on your right. Show the underside of the visor as an oval. Shape the hair like a paddle.

Place a curved V-shape behind the ear for more hair. Put a curlicue in the ear. Use S-shapes for the eyes and eyebrows. Add curved smile lines, and draw two short curved lines under the nostrils.

Advertisement

Form the lower lip with a curved line. Shape the mitt's fingers with curved lines and an upside-down U-shape. Draw a curved L-shape and J-shape for the sleeve.

Show the folds in the uniform with curved lines around the knees and waistband. Draw the stirrups on the pants as curved lines. Detail each shoe with curved and straight lines.

Advertisement

4. Finish the Uniform

Place two curved lines around the cap's rim. Finish the visor with two curved lines. Show a cowlick by the hat using three curved lines. Draw ovals between the mitt's fingers.

Use a five-sided figure drawn in double lines for the patch. Draw a lightning bolt inside it. Form the other arm with a line from the cheek to the mitt. Put stripes on the sleeve, shirt, and pants legs using curved double lines.

Advertisement

Detail the shoes with ovals and curved lines. Add cleats with attached U-shapes and lines around the soles. Use a curved line with jagged parts for the pitcher's mound. Draw a few jagged lines for grass. Crisscross curved lines near the mitt, back, and raised foot to show movement.

5. Shading

­Darken the irises and the visor's underside. Use evenly spaced lines to partially darken the stripes. Shade the cap and mitt with curved lines.

So how's your windup now? I'm guessing, just as good as your drawing skills!

Advertisement

Well, it looks like your creative journey is almost over, so it's only fitting that our final drawing is a character at rest.

Continue to the final page in this article to learn how to draw a napping old man cartoon.

Advertisement

Advertisement

Loading...