Ultimate Guide to Recycled CD Crafts

Pile of reusable busted cds.
These old CDs could be recycled to make a plethora of fun, creative crafts.
iStockphoto.com/JobHopper

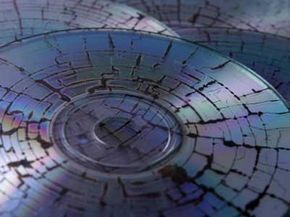
When it comes to recycled-object crafting, compact discs have a lot going for them. They're shiny, lightweight, round, and easy to hang. And they have a smooth surface for attaching pictures, gemstones, fabric or whatever else suits your fancy. So just what can you do with the dozens and dozens of old CDs you have sitting around at work and home?

Super creative crafters have recycled CDs to make everything from eveningwear to decorative wall art. For example, you could make a fashion statement stepping out in a sleeveless cocktail shift made of CDs held together by gold jewelry hooks. Or you could make a fashion statement at home by decorating your den with a funky lamp that uses stacked CDs as its base and wall hangings with links of shiny CDs strung from bamboo rods [source: HGTV].

Advertisement

Others have used old CDs to make disco balls, sun catchers, wreaths, mosaics, mobiles, party invitations and even bird treats -- just coat the disc with peanut butter or bacon grease, dip it in bird seed, attach it to a tree with yarn and watch the birds flock to your yard.

The difficulty level for CD crafts depends on how fancy you want to get. Some projects are more labor intensive than others are. You can make a simple Christmas ornament in about 15 minutes or spend hours cutting up CDs and gluing the pieces to make a mosaic picture frame. The good news about CD craft projects, besides being cheap and fun, is they can be tailored to suit children or adults of all ages. But, as with any craft project, be sure to supervise small children closely while they're working with scissors and other crafting items.

Read on to find out how to use your old CDs to make ornaments, photo frames, candleholders, coasters, bowls and even clocks.

Advertisement

Recycled CD Ornaments

The shiny side of a CD is the perfect backdrop for creating an eye-catching ornament. You can decorate just one side of the disc or get fancy and glue two CDs together with the shiny sides facing out so it glitters from every angle.

From here, you can use any number of materials to decorate your ornament -- ribbon, lace, beads, gemstones, sequins, glitter and acrylic paint. Decorate the outer circle with any design you like, then glue a piece of ribbon to the back or drill a hole at the top to attach it to a door, wall or branch on your Christmas tree. CD ornaments can get very fancy if you have the time.

Advertisement

One popular craft project includes cutting out a picture from a newspaper or magazine or printing one from the Internet and gluing it on the shiny side, over the center covering the original label of the CD. For Christmas, you could use pictures of snowmen, snowflakes, Santa Claus or you could cut out images from old Christmas cards.

For Valentine's Day, you could paste pictures of hearts or angels on your CD ornaments. For Halloween, you could use pumpkins, witches and black cats. For the Fourth of July, try pasting pictures of stars or the American flag in the center. You can even make these festive CDs for St. Patrick's Day or Easter.

For holiday parties, you can decorate the border of the CD with glitter glue, take Polaroids of your guests and paste them into the center. Just drill a small hole in the top, loop 10 inches (25 cm) of string or ribbon through the hole and voila -- a party favor everyone will remember [source: Make-Stuff].

Another variation involves tracing stockings, bells, trees, stars or snowmen on the shiny side of the CD and cutting out the shapes using a small electric scroll saw. Use a dremel to smooth the edges and punch a hole in the top for string. You can paint the CDs with acrylic paint and write kids' names across the front with a metallic permanent marker [source: Make-Stuff].

Feeling inspired? Read on to find out what CDs can do for your photos.

Advertisement

Recycled CD Photo Frames

No idea what to get grandma for Mother's Day? How about a picture of the grandkids showing off their pearly whites against a shiny backdrop?

Making CD photo frames is as easy as making holiday ornaments. Simply cut a picture into a 2-inch to 3-inch (5 cm to 7.5 cm) circle and glue it to the center of the CD's shiny side. Cover the back with felt, drill a hole in the top, loop a string or ribbon through the hole and there you have it -- an instant Mother's Day gift.

Advertisement

As an alternative, you could attach a magnet strip to the back so that you can hang the CD photo on the fridge. You can also cut the photo into different shapes. Instead of going for a standard square or circle, follow the actual outline of the kids and then paste the closely cropped photo onto a border of construction paper, felt or fabric. Use glue to secure the photo-covered fabric to the CD.

If you want the CD to be freestanding like a regular picture frame, you'll need to make a base. That's as easy as mixing some flour, water and a scoop of salt. Preheat the oven to 250 degrees Fahrenheit (121 degrees Celsius), mix together 1 cup of flour, ½ cup of salt and ½ cup of water. Then mold the dough into the shape of a base.

You can make a square, rectangle or oval-shaped base but make sure it's at least 1 inch (2.5 cm) deep and 2 inches (5 cm) around so the CD doesn't fall out. Use cardboard or a knife to make a slot in the base and wiggle it back and forth until it's the right size for the CD to sit snugly inside.

Place the base on a cookie sheet inside the preheated oven and bake for up to two and a half hours. Remove the cookie sheet from the oven and let the base dry over night. The next morning, use acrylic paint to color and/or glue and glitter to decorate the base [source: Family Corner].

Once the decorations are dry, you're ready to slide the CD into the slot and put it on the bookshelf or mantel as an instant family heirloom.

Read on to find out how CDs can help you make your candles glow even brighter.

Advertisement

Recycled CD Candleholders

Infrared light isn't the only kind of light that works well with CDs. Candlelight does, too. Using a CD as a candleholder is a simple way to brighten your room.

The simplest way to use a CD as a candleholder is to set a small pillar or votive candle in the middle of the disc with the shiny side up. As the candle burns, its flame will reflect in the mirror of the CD, creating a warm glow. Once the candle has burned and the disc is covered with wax, you can throw it away or use the CD for another crafting purpose. Chipping the wax off may damage the reflective finish of the CD, so you could use it to create a photo ornament as described on the previous page.

Advertisement

You can also glue the candle to the middle of the shiny side of the CD and cut out a piece of felt or foam to glue to the other side for cushioning. Then surround it with a wreath, potpourri, flowers, leaves or tree branches. Or, depending on the mood you're going for, you can glue beads or lace along the edge. Be sure to leave space between the candle and any flammable add-ons though.

You can even use CD candle setups as centerpieces for buffet tables. They're inexpensive and easy to make so they can be used for parties or just a quiet night at home. It's your light, so let it shine.

If the table use interests you, keep reading to learn how CDs can keep water stains off your coffee table.

Advertisement

Recycled CD Coasters

Though you're normally trying to protect CDs from damage, in this case, they can be the protectors -- as beverage coasters. CDs are the perfect shape and size for resting your coffee mug or water glass on top, protecting your table from unattractive beverage rings.

For a rock 'n roll flavor, take your old Rolling Stones, Eric Clapton and Beatles CDs, cut out a piece of felt the same size as the CD and glue it to the bottom. Use the same process to create other themes, like children's movies (using DVDs) or jazz musicians. Any old CD with a pretty design on the cover will do the trick. And, if you don't want to delve into your personal collection - grab used CDs and DVDs from yard sales or check out local bargain bins.

Advertisement

If you'd rather personalize the coasters, you can buy a CD labeling kit and print out templates from the Internet, or create your own [source: DLTK]. You can also give your kids some pens or paint to make works of art on each CD. Or personalize each coaster by printing out labels with the names of your family members and decorate the borders only.

Once you're done with the design, glue a clear adhesive plastic sheet or contact paper over the top of the CDs to protect the artwork from getting wet or stained. And be sure to glue felt to the bottom to keep the coasters from sliding and scratching your furniture.

Read on for how to create your own CD bowl and impress all your friends.

Advertisement

Recycled CD Bowls

How do you transform something hard and flat into something soft and round? You just have to melt it.

To make a CD bowl, preheat your oven to a low temperature -- perhaps 250 F (120 C) or so. Place a small, oven-safe bowl on top of a cookie or other flat baking sheet. Next, place the CD shiny side up on top of the oven-safe bowl so it overlaps the top. Put the baking sheet, bowl and CD in the preheated oven and "bake" until the CD starts to get soft and bends to the shape of the bowl. Remove from the oven - be sure to use potholders or mitts, as the CD and bowl will be hot. Let it cool, then get out your paints [source: Associated Content].

Advertisement

Using acrylic paints, draw a design on the outside of the CD bowl or paint it a solid color. If you want to fill the hole in the middle, you can glue a small piece of plastic or fabric inside the bottom of your bowl. Or, you could glue your bowl to a small saucer or plate to create a base and seal the hole. Then, simply use your new bowl as a decorative item, or fill it with cotton balls for the bathroom, potpourri for the living room table or with paperclips for your desk.

If you prefer to mold the shape of the bowl, remove the CD from the oven just after it's softened, then use a spoon or chopsticks to bend it into the curves you want. Be sure to wear protective gloves and bend the CD gently to keep it from breaking [source: Associated Content]. Again, if you want to fill the hole, find something to glue to the center or affix the bowl to a small plate.

You can put many things in your CD bowl, but don't use it for food because the plastic and aluminum in the CD may contain contaminants that aren't suitable for eating. Keep its use to a pretty sit-about or as a container for non-edible items.

Read on to find out how CDs can help you keep time.

Advertisement

Recycled CD Clocks

What's shiny, round and tells you you're late? A CD clock. This simple and fun craft project can be inexpensive and useful.

To make a CD clock, you'll need a CD, a variety of art supplies (no need to buy anything new, you can use whatever you have around your home) and a clock movement or clockwork, which you can buy online or at a crafts store.

Advertisement

First, you should have an idea of what you want your clock face to look like. You may want to consider the design you plan to use before you purchase the clock movement, because they come in different sizes. If you add a lot to the surface of your CD, you will need a thicker clock movement. The best thing about using a CD to create a clock is that the hole for the clock is already there.

After gathering all your supplies, it's time to get started. You can paint a design onto the front and write or use stickers to create the numbers around it edge. Or you can glue a variety of items to the CD to create a design and your numbers. Once the decorating is done (and dry), follow the instructions for the clockwork to attach it to the CD, putting the hands through the ready-made hole in the center [source: eHow].

If you don't feel inspired or creative enough to come up with your very own design, you can print out a clock face design from the Internet onto card stock. Cut it out with a craft knife or scissors, cut a circle in the middle for the clock hands to go through and attach the clock face to the front of the CD with double-sided tape. Assemble the clock movement components as directed on the package.

Once the CD clock is ready, you can hang it from the wall using fishing line. And don't forget the batteries.

If these CD crafts weren't enough to keep you busy, see the links on the next page for more ways to turn your trash into treasures.

Advertisement

Lots More Information

Related HowStuffWorks Links

  • Associated Content. "How to Make Decorative Bowl Out of a CD." (Accessed 4/7/09)http://www.associatedcontent.com/article/1108141/how_to_make_a_decorative_bowl_out_of.html?cat=24
  • Danielle'sPlace. "Christmas Crafts for Kids." (Accessed 4/7/09)http://www.daniellesplace.com/HTML/christmas.html
  • DLTK's Growing Together. "USA Coaster." (Accessed 4/7/09)http://www.dltk-kids.com/usa/musacoaster.html
  • eHow. "How to Make a CD into a Clock." (Accessed 4/7/09)http://www.ehow.com/how_2096609_make-cd-clock.html
  • Essortment. "DIY Crafts: How to Make Coasters." (Accessed 4/7/09)http://www.essortment.com/hobbies/diycraftshowm_siih.htm
  • Family Corner. "CD Crafts." (Accessed 4/7/09)http://www.familycorner.com/family/kids/crafts/cd_crafts.shtml
  • Family Corner. "CD Photo Frame." (Accessed 4/7/09)http://www.familycorner.com/cgi-bin/print/friendly.cgi?doc=http://www.familycorner.com/family/kids/crafts/cdphoto.shtml
  • HP. "CD Clocks." (Accessed 4/7/09)http://h10025.www1.hp.com/ewfrf/wc/acProject?project=cdclocks&extsubcat=specialcollections&lc=en&cc=us&dlc=en&page=acCategoryAll&extcat=partykitsdecorations
  • Hu93. "CD Bowl 1 - Chapter 5: Crafts from Trash." (Accessed 4/7/09)http://recycle.hu93.com/cds/cd_bowl_1_-_chapter_5_crafts_from_trash.htm
  • Make-Stuff. "Recycle Those Old CD's." (Accessed 4/6/09)http://www.make-stuff.com/recycling/cd.html
  • Making Friends. "Recycled Disco Ball." (Accessed 4/7/09)http://www.makingfriends.com/recycle/cd_discoball.htm
  • My Craftbook. "Recycled CD Valentine's Day Craft." (Accessed 4/7/09)http://www.mycraftbook.com/craftidea.asp?craftID=579
  • Squidoo. "How to Reuse Old CD or DVD." (Accessed 4/7/09)http://www.squidoo.com/oldcd

Advertisement

Loading...