Top 10 Ways to Dress Up Your Boring Corkboard

Sticky paper and magnetic clip
Corkboards, which are often chore boards, could use a little whimsy and decoration. A festive butterfly tack is just one way to accomplish that.
©iStockphoto.com/ANATOL ADUTSKEVICH

It's functional. It keeps your notes where you can see them. It displays photos from that magical trip to Paris, next to the lovely postcard your sweetie sent, the takeout menu for that Thai place you've been meaning to try and the unlikely words of inspiration you found inside a fortune cookie.

It's ... brown. You've had it since college. It's your cork bored -- er, board.

Advertisement

There's nothing wrong with an unadorned corkboard, exactly. Cork is lightweight and resilient. It has natural properties of insulation and sound absorption. It's an environmentally sound choice.

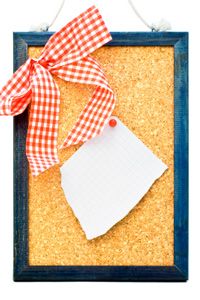
But if you're looking for a way to freshen up your decor, changing the corkboard is a fast, fun way to do it. Most corkboard projects can be completed in a day or less. They can be as simple or as involved as you care to make them. The basic supplies and tools -- paint, fabric, paper, scissors, craft knives, tape and glue -- are easy to obtain and use. You'll need a clean, uncluttered work area, but in most cases, you can accomplish everything within a small space.

The fastest way to change a corkboard is to take down what's currently pinned up, and replace it with new postcards or images. However, if you use your corkboard mainly for reminders, shopping lists and the like -- content that changes regularly -- decorating with postcards may not be an option. It may be time to look at some more permanent ways to add brightness and color to your board.

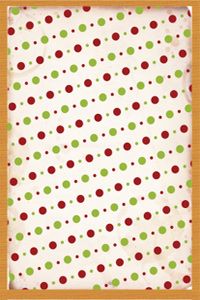
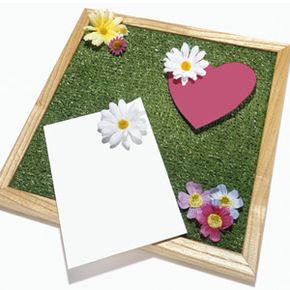
In this article, we'll look at ways to modify the setting of a corkboard, as well as to change the color and texture of the cork itself. We'll also explore a more subtle modification: custom thumbtacks. First, let's take a look at the frame. Read on.

10: Frame It

Framed cork board
Embellishing the frame of this corkboard could take it from plain to pretty.
©iStockphoto.com/Edyta Pawowska

Your corkboard may already have a frame, but chances are it's fairly boring, as frames go -- a plain strip of wood stained to approximate the color of the cork. You have many options to dress it up.

Paint and stain, for example, work well. If the frame is already varnished, sand it before staining or painting. Sanding creates a rough, porous surface to which the paint can more easily adhere. Next, protect the cork by lining it with wide masking tape around the inside of the frame. You may also want to spread newspaper over any uncovered areas of cork.

Advertisement

The best method of paint will depend on the effect you want. If you want a light coat of color, spray paint is a good option. If you want something that has the thicker, high-gloss effect of enamel, choose a brush-on acrylic or enamel, and follow it with a few coats of clear, brush-on sealant. In addition, you can create patterns or use stencils.

Another option is to cover the frame with a decorative surface. You could paper it with wallpaper samples. You could add decoupage images or gold and silver leafing. You could use a staple gun to add fabric and battening for a quilted effect.

You can also glue on items that not only resurface but also reshape the frame. For example, you could glue old playing cards around the edges of the frame, and then varnish them several times to add strength. Or you could flatten aluminum cans and shape them into burnished ornamentation for the edges. (See How Recycled Aluminum Can Crafts Work for tips.)

What if your corkboard doesn't have a frame? If the board is a standard size, you may be able to use a ready-made frame from a poster shop. Most of these frames have glass or Plexiglas panels, which you'll need to remove -- a corkboard isn't so useful if you can't get to the cork.

Many frame and art supply stores also have customizable frames, which are sold in incremental lengths. You can buy the lengths that fit your board. Assembling the frame may require some special framer's supplies and tools, such as points and a point driver.

On the next page, we'll look at ways to add color to the cork itself.

9: Paint It

Cork board with pinned piece of paper and checked red and white ribbon.
A simple coat of paint has taken this board from bland to bold.
©iStockphoto.com/Susanne Karlsson

Some people like the natural look of cork, but you might be tired of all that brown. If that's the case, you're in luck -- cork is easy to paint and stain. A stain will let you match the corkboard to other wood furniture in the room. Paint gives you many options in both color and surface. A metallic-paint corkboard is a great way to brighten up a dark corner.

Check to make sure your corkboard is unwaxed. Paint and stain won't adhere to a waxed surface. Most corkboards are not waxed, so you're probably safe [source: Jelinek Cork Group].

Advertisement

If you can, remove the cork from its frame before painting it. If it won't come out, use masking tape to cover the frame. Run a craft knife lightly around the inside of the frame to make sure you have created a straight, uniform edge. Be gentle -- you should be cutting through the tape but not the cork.

Because cork is porous, it can soak up a fair amount of paint. Be prepared to apply more than one coat if you want an appearance of even color. You could start with a layer of primer or gesso, but it isn't really necessary unless you want the cork not to look like cork at all.

For an even, matte color, spray paint is your best and quickest option. Work outside, and use a drop cloth or newspaper beneath the board to protect the surrounding areas. After you've gotten the color to your satisfaction, you may want to coat it with a spray fixative or sealant; spray paint pigment can rub off onto adjacent surfaces.

Brush-on acrylic paints will give you a thicker coating of color. Brush marks may show, so unless you want that effect, use a sponge brush. You can also use a sponge to layer multiple colors, creating mottled effects of tarnishing or marbling [source: Better Homes and Gardens].

On the next page, we'll look at a way to add color and pattern at the same time.

8: Dress It

Cork board in need of paint
A layer of fabric could quickly -- and inexpensively -- revive this faded corkboard.
©iStockphoto.com/thumb

Covering a corkboard in fabric is one of the cheapest, fastest and easiest ways to revamp it. A corkboard covered in faded denim makes a room casual and friendly. A velvet corkboard announces your inner diva. Suede or leather-look vinyl adds class and richness; tapestry-style fabric gives a room a sense of classic tradition.

Iron or steam the fabric, according to the manufacturer's directions. With scissors or a rotor cutter, trim the fabric to fit the frame. Mask the corkboard's frame, and then spray the cork evenly with spray adhesive. Be sure to open a window and turn on a fan; the fumes from spray adhesives are not good for you. Press the fabric into place. You may want to use a roller to smooth out any bubbles.

Advertisement

Not every fabric has a good weight or opacity for covering a corkboard. Jersey knits will be almost impossible to stretch evenly, and the unevenness will show. Some lightweight cottons, linens and rayon will show the cork beneath. Other fabrics, such as silks, will pull or snag at the first contact with a thumbtack. With a heavier raw silk, though, in which slubs and irregularities are an attractive part of the texture, pulls might not be a problem.

At fabric stores, look for remnants -- the marked-down leftover pieces of fabric too small to be used for apparel or major projects. Some stores carry interior design fabrics as well as apparel fabrics. These textiles are designed to stand up to heavier use, and the color palette may be more likely to match your decor. Because the fabric is heavier, it is also more expensive than most apparel fabrics, so again, look for remnants.

Covering a corkboard in fabric means you can trim the frame with fabric trimmings: ribbons, beads, fringes, feathers, tassels, rhinestones -- the sky's the limit. Try running a slender trim along the inside of the frame. However, don't overlook the striking combination of fabric within a wood or metal frame.

On the next page, we'll look at a low-cost, temporary way to achieve a similar effect.

7: Wrap It

Image of an old, grungy, piece of XXL isolated on a white background with a retro green and red christmas pattern overlayed on top. Great holiday background file/design element.
A wrapping paper background can perk up any plain corkboard.
©iStockphoto.com/Nic Taylor

A paper background adds color, pattern and brightness to your corkboard. You don't have to do much. With a craft knife, trim the paper to fit inside the board's frame. If your board doesn't have a frame, fold the paper neatly over the edges as though you're wrapping a present. Score the edges with your fingers to make them look crisp.

You can affix the paper with thumbtacks, double-sided tape or spray adhesive. Liquid glues can cause the paper's grain to warp, and you may not be able to achieve a smooth surface. Additionally, many types of glue will leave some sort of adhesive residue -- either a sticky patch or a bit of black, rubbery goo that never quite comes off.

Advertisement

Why does that matter? Because paper is temporary. Over time, it will acquire thumbtack holes -- in some cases, enough that the paper can't adhere or hold together any longer. Some colors will fade, especially if your board sits in direct sunlight.

Specialty paper stores have large sheets of gorgeous handmade papers in every color. Some have patterns -- an Art Deco motif or Japanese floral could be especially striking on your wall. Some papers have metallic leafing. These papers can cost between $3 and $10 a sheet. Before you use one, you might want to figure out how often you'll need to replace it.

A cheaper option is to use wallpaper samples or remnants, which you can obtain free -- or close to free -- from interior decorators or creative reuse centers. You can also use wrapping paper, or repurpose old wrapping paper from gifts. Pay attention to the size of the pattern; some wallpaper designs are scaled for walls, and they'll look odd within a corkboard's frame.

You may not have a piece of paper large enough to cover the entire board, but that's fine. Use a quilter's approach. With a craft knife, trim the paper into squares or diamonds. Then tack them or glue them to the board in a grid or a harlequin pattern.

On the next page, we'll look at a often-ignored touch: the thumbtacks and pins.

6: Pin It

kid's children's bulletin board
A decked-out corkboard deserves decorative accessories like these floral pushpins.
steve wisbauer /Photodisc/Getty Images

After decorating the cork and the frame, don't spoil the effect by using the same old thumbtacks in the same old colors -- yellow, red, blue, green and white. Scrapbooking stores and craft stores have striking thumbtacks in unusual colors and shapes. Options to look for include metallic silver and gold, clear enamel, colorful bead styles and die-cut metal in flower shapes.

You can repurpose old post-style earrings into thumbtacks without making any modifications to the earrings. In some cases, you'll need to file the tip of the post into a point. If you have any mismatched earrings, that's the obvious place to start. Larger, costume-jewelry designs can look terrific. Check out thrift stores and garage sales for more of these. While you're there, look for tie tacks and lapel pins, which can be repurposed in the same way.

Advertisement

If that's not quite enough for you, you can make your own thumbtacks. Borrow a technique from crafty jewelers, and make bottle caps with images set within. You'll need several bottle caps, somewhat flattened, and images (which can be from ads, greeting cards, drawings or anything else) trimmed into circles to fit inside the caps. Glue each image, face up, within a cap. Then fill the cap with Diamond Glaze, a thick, clear, glossy "dimensional adhesive" [sources: DIY Network, Diamond Glaze]. Use epoxy to glue the cap to a flat-topped thumbtack.

You can also use Diamond Glaze without the bottle cap to create smaller tacks that have the appearance of rounded glass beads containing images. Using a craft knife, trim the image into a circle. Then drop a dollop of Diamond Glaze on top of it. Once the glaze has dried, epoxy the bead to a thumbtack.

Many craft stores sell decorative gemstones with flat backs. To glam up your corkboard, affix some of these gemstones to thumbtacks. You can use clear gemstones to create much the same effect as the Diamond Glaze beads -- but with facets and sparkle rather than gloss. Glue old buttons to thumbtacks for a charmingly different approach [source: Allison].

Next up: Bring a touch of yourself into your board.

5: Repurpose and Personalize

Take a photo of a post-it note with an organizational category written on it (for example, "To-do" or "Memories"). Then print this photo and pin it to a portion or column of your corkboard dedicated to that category.

You could even take this idea one step further by taking a clear, high-resolution digital photo of your entire corkboard (with all its current adornments, photos and tacked memos). Then have this image printed onto media the same size as the corkboard (or photograph, print and reassemble one section of the board at a time). Glue or tack this image to the corkboard, and then re-adorn it to your liking. The background image of favorite photographs pinned to the cork board may even allow you to put the originals away, freeing up space on the cork board while retaining the images you love in the background.

Advertisement

Pages from old textbooks or instructional manuals specific to your field of interest or expertise can make great, personal background adornments for your corkboard. For instance, if you enjoy travel, you can cover your cork board with old road maps or atlas images. Wordsmith? Create a background of old dictionary pages.

Next, borrow some design ideas from your kitchen counter.

4: Tile It

Many people looking to spruce up their corkboards may be short of time or know-how when it comes to crafts. Join the club. Others may find that artistic additions to their corkboards make it look too "busy." Implementing a tile design on corkboard offers an easy solution to both of these problems.

A tile design can be reproduced using paints, markers and even spray paint. Just be sure to use a straight-edged object, like a ruler, to keep your lines nice and neat.

Advertisement

Play around first with a pencil and piece of paper, and doodle out different designs. You can also look to your kitchen floor or counters for inspiration -- a cork board with a tile design that matches other tile designs in your home may please even the most hard-to-please design critics (including your visiting mother).

The entire corkboard doesn't have to be "tiled." You can draw or paint a single square (which itself could be tiled into smaller squares that can be colored to taste) or create a few interlocking triangles in the corners.

Another option, if you don't like to draw, is to attach actual tile to your corkboard using glue. A square here and there (or any other shape you have handy) of thin ceramic tile can add a lot of life to the corkboard. Of course, this will create areas of the board on which pinning won't be possible, but to some people, that might be an advantage: It means the board will be less likely to become overrun with reminders, notes and collected ephemera.

Next up: To knit or not?

3: Needlecraft

dress up cork board
Scraps you have on hand from previous quilting projects will work perfectly for your corkboard.
©iStockphoto.com/Camrocker

Mixing mediums can produce interesting results when you're getting crafty. One excellent way to do this is by adding the fruits of your needlecraft labors into your corkboard project.

Depending on the size of your corkboard, you may already have some abandoned or otherwise unused scraps on hand from previous quilting, knitting or crocheting projects that will work perfectly. These may be large enough to use as a border-to-border corkboard background, or at least provide a strong head start toward making a background piece that size.

Advertisement

If you have smaller pieces handy, you can incorporate them into a pattern, or use one to dress-up the center of your corkboard. You can mix quilt patches with hand-painted designs that mimic or complement the design of the patch.

Attaching a doily or swatch of crocheted lace is as easy as pinning it to the cork board, and since there will be plenty of holes and open spaces to work with (unlike pieces of wallpaper, for example), you won't have to worry about damaging the material as you pin.

What do you do when you have a lot of design materials you want to work with? We'll show you how to make them all work together on the next page.

2: Collage Background

dress up cork board
You can use anything from postcards to magazines to album covers in your collage.
©iStockphoto.com/danilovi

While some may want to strip their corkboard of excess paper and visual clutter, others prefer adding a sense of wild visual design to the cork background. One great way to do this is to make a collage on your corkboard.

A fun and simple way to create a collage is to use magazines. You can either cut out images, or use entire magazine covers. For a "retro" look, pick up a stack of old magazines on the cheap at a thrift store. While you're there, check out some old vinyl album covers to see if any of the images would look good in your collage. Use them in their entirety, or cut out images or band logos from the album covers to use in the collage.

Advertisement

If you have some paperback novels that are falling apart, you can also use their covers for your corkboard collage, or tear out the inside pages to create a background of "word soup." Images from DVD cover-inserts can also make for a fun visual splash, and inexpensive movie posters can usually be purchased at DVD rental shops.

Next: Go big (or small, whatever).

1: Build Out

One thing you've probably encountered while using your corkboard is that space quickly gets scarce. With photographs overlapping newspaper cut-outs and memos fighting coupons for your attention, you may find yourself digging around to find the very thing you intended to make easy to find.

So why not expand your corkboard horizons? Of course, this can be accomplished with a trip to an office supply store. Corkboards come in a number of different sizes, and you don't have to be stuck with the size you have.

But you don't have to be confined to available sizes of corkboards, either. You can purchase cork rolls from builder supply stores or online. These generally come in units that are 3 feet wide, and up to 20 feet in length. Of course, you can cut and shape the cork to dimensions of your choosing. Then, affix it to backer board that you can attach to the wall.

You can even take your current corkboard and cut it into a smaller shape or design. You may then choose to re-border it if you like, or leave it without a border. And if you make a mistake in shaping the corkboard, just remember: That's not a really mistake -- it's "avant-garde."

Keep reading for lots more information on dressing up your boring corkboard.

Cork Board FAQ

What should I put on my cork board?
There are many ways you can adorn your cork board. A few suggestions include to frame it, paint it, covering it with fabric, or adding colorful pins.
How do you make a cork board with a cork roll?
You can use a cork roll to make a cork board. Cork rolls generally come in units that are 3 feet wide, and up to 20 feet in length. You can then cut and shape the cork to the dimensions of your choosing. Lastly, affix it to a backer board that you can attach to the wall.
Can you buy sheets of cork?
Sheets of cork, or cork rolls, can be bought from builder supply stores or online.
What can I use to cover a cork board?
You can cover a cork board with many different materials from paper to fabric to paint.
What can I use cork board for?
Cork boards can be used as both decor or a functional piece to tack notes, to-do lists, memories, and more.

Lots More Information

Related Articles

  • Allison, Colleen. "Fabric-Covered Corkboard Tutorial." Fresh Vintage. January 17, 2008. (Accessed 4/20/09) http://freshvintage.typepad.com/freshvintage/2008/01/post-2.html
  • Better Homes and Gardens. "Sponge Painting How-To." BHG.com. (Accessed 4/20/09) http://www.bhg.com/decorating/paint/decorative-painting/sponge-painting/
  • DIY Network. "Bottle-Cap Jewelry." DIY Network: CRAFTS: Jewelry and Accessories. (Accessed 4/20/09) http://www.diynetwork.com/diy/cr_jewelry/article/0,,DIY_13762_4420630,00.html
  • Doyle, Nancy. "Painting Lesson 1: Stretching and Preparing a Canvas." Nancy Doyle Fin Art. (Accessed 4/20/09) http://www.ndoylefineart.com/stretchcan.html
  • Jelinek Cork Group. "Cork Coverings for Walls and Ceilings." (Accessed 4/20/09) http://www.jelinek.com/wall.htm
  • Michaels, Wendy. "Using Corkboard in Interior Design." Love to Know. (Accessed 4/20/2009) http://interiordesign.lovetoknow.com/Using_Cork_Board_in_Interior_Design
  • Smithsonian Museum Conservation Institute. "Acid Free Tissue Paper for Textiles and Costumes." Smithsonian Institution. 2008. (Accessed 4/20/09) http://www.si.edu/MCI/english/learn_more/taking_care/acidfree.html
  • S., Emma. "Unusual Corkboard Gifts You Make Yourself." Associated Content. August 7, 2006. (Accessed 4/20/2009).
  • Spazztic Crafts. "The Crafter's Glue Guide." Spazztic Crafts. (Accessed 4/20/09) http://www.spazzticcrafts.com/glue-guide.php
  • Taylor, Kelley R. "Fabric Covered Memo Boards." Do It Yourself. (Accessed 4/20/2009). http://www.doityourself.com/stry/memoboard

Advertisement

Loading...