Top 5 Recycled Items You Can Use in a Collage

Creating collage art is a great way to recycle a variety of materials.
iStockphoto.com/Amanda Rohde

You may think of collage as something you did in kindergarten, pasting magazines clippings onto construction paper. But in some circles, collage is a serious art. In the early 1900s, cubists like Pablo Picasso and George Braque sparked a new movement when they started gluing fragments of paper and fabric to the surface of their oil paintings to give them a more abstract, textured look [source: Britannica].

Today that tradition continues in organizations like the National Collage Society, a trade group that promotes collage; Global Collage, an online forum for collage artists throughout the world; and The International Museum of Collage, Assemblage and Construction in Fort Worth, Texas, which features works of contemporary collage artists and the early modernists who popularized it.

Advertisement

That doesn't mean you have to be a serious artist to wield a glue stick. But you are in good company.

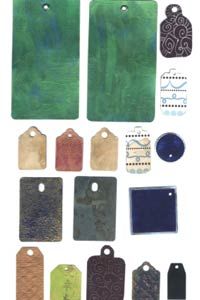
To get started, all you need is a background (usually thick paper or poster board, but wood, metal and other sturdy materials work, too), the appropriate glue and random objects. A good place to look for materials is your junk drawer, your magazine pile or the box where you stash things you don't know what to do with, but can't seem to throw away [source: Love To Know Crafts]. Then rummage through your recycling bin.

During your search, keep in mind that with collage making, anything goes -- including the materials you use. You can be spontaneous or work with a theme like travel, bodies of water, romance, pets, childhood or holidays. You can arrange the whole montage and glue the items on the background once you've perfected the design or you can glue as you go [source: Grant].

A collage should represent who you are, what your interests are and what speaks to you, including the objects you choose to assemble on your canvas.

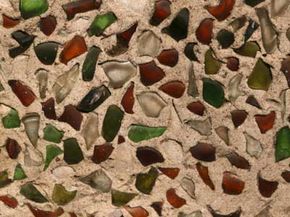
Read on to find out how you can use recycled plastic, glass, nature, metal and paper to create your masterpiece. Picasso would be proud.

5. Plastic Items

Bright plastic buttons like these can add texture and color to a collage.
iStockphoto.com/Gina Luck

Think of your collage as a puzzle. You're putting pieces together to form a whole. But in this case, the pieces don't have to fit exactly together. In fact, it's better when they don't. That's the point of collage and why it's called mixed media -- using all different kinds of materials in one piece.

Something to consider throwing into the mix is plastic items like buttons, board game pieces, beads, toy soldiers, miniature dolls, doll furniture, dice, soda bottles, plastic bottle caps, plastic eyeglass frames and barrettes [source: Collage College].

Advertisement

You can make an environmental statement by incorporating plastic bags or create an electronic theme by including a plastic computer circuit board in the design.

When it comes to collage, anything goes. But the good thing about plastic items is they will give your collage a three-dimensional effect, which adds texture and diversity to the mix. Don't be afraid to use weird color combinations or seemingly unrelated items like a toy soldier next to your favorite photo [source: Grant].

To hunt for interesting plastic objects, start in your house. Hit the kids' toy box, the recycle bin, the kitchen, garage and sewing box. Then take your hunt on the road. You can find compelling plastics at garage sales, flea markets and dollar stores [source: Collage College].

One thing to remember when using plastics is you need the right glue to make sure it stays attached. Veteran collagers recommend using adhesives like Golden Matte Medium, Liquitex or Tacky Glue [source: Collage College]. Then give it plenty of time to dry. If you're using a plastic item that may fold or bend when you apply the glue, use something heavy to keep it in place until the glue dries.

Read on to find out how to add sparkle with recycled glass.

4. Glass Items

Recycled glass will add sparkle, texture and color to your collage.
iStockphoto.com/Anna Kontowicz

Did the dog knock over and break another glass vase? It's OK -- it doesn't have to be a total waste. Turn the broken pieces of glass into art.

Glass is another element perfect for collage. It adds sparkle, texture, color and yes, magnification.

Advertisement

When looking for glass materials to incorporate into your collage, consider using chandelier crystals, watch faces, miniature perfume bottles, marbles, colored beads, broken beer or wine bottles, pocket mirrors and rhinestones [source: Hunot].

Collect these items from around the house, put down newspaper or a drop cloth and make a big pile on the kitchen table or floor of the living room. Add in the other material you've discovered on your treasure hunt and start picking out the pieces that catch your eye. Decide whether you want to be abstract or work around a theme.

The word collage comes from the French word "coller," meaning to glue. But as you know, it's much more than that. It's what you glue onto the background that makes the difference. So choose carefully but not at the expense of spontaneity [source: Grant].

When attaching recycled glass to your background, don't forget to use heavier glue or a hot glue gun to make sure it stays attached. And if you're working with broken pieces of glass, be sure to keep safety in mind. Wear gloves to protect your hands and once you've glued the glass to the background, you may want to outline the glass with clear caulk or colored puffy fabric paint to cover any sharp edges.

Read on to find inspiration in nature.

3. Nature Items

Let Mother Nature inspire you -- create a collage using natural items such as leaves, stones and twigs.
iStockphoto.com/Elena Ray

When it comes to nature, there's no end to the materials that lend themselves to art. The world is your oyster -- and an element in your ocean-themed collage if you'd like.

A simple walk in the park can yield a pocketful of ideas. So can a daytrip to the seashore.

Advertisement

You can pick anything that catches your attention. But some materials you may want to look out for include branches, sticks, leaves, pebbles, acorns, pinecones, flowers, clover, sand and driftwood. When designing your collage, you can use these items to create a literal image -- like a beach scene or forest [source: Beal]. Or you can make it more abstract, mixing leaves with industrial things like screws and bits of wire.

Don't know what to do with all those seashells you collected on vacation? Maybe it's time to get out some glue and turn your collection into a creation you can frame and put up in your living room. You might consider painting, drawing, stamping or stenciling the background before affixing your sea treasures. You could even spray paint or sparkled varnish on top of them to create a different effect.

Want to cherish memories from a recent hiking trip? Make a collage to commemorate the family outing by incorporating pieces of bark, flowers and stones you collected, trip photos, a piece of nylon from your tent and the wrapper from the chocolate you used to make s'mores.

If you want to make a large-scale collage, you can use panels of wood, cardboard, large canvases or poster board commonly found at your local craft store [source: Collageart].

Read to find out what you can do with metal trinkets and doodads.

2. Metal Items

Metal is a magnificent material for collage art.
iStockphoto.com/Lunagraphica

Metal is a great material for collages. With a little imagination, old bake ware, forks, spoons, belt buckles, thimbles, pet tags, jewelry, candy tins and foreign coins can all be repurposed into art.

Muffin tins, pie pans and miniature loaf pans can act as a natural frame for an array of tchotchkes you can glue inside including photographs, little dolls, plastic animals, costume jewelry, broken watches, bobbins, board game pieces, alphabet letter, marbles, dollhouse furniture and tiny perfume bottles [source: Hunot]. Other metal materials you may consider include old typewriter keys, zippers, cuff links, service pins, jacks and bottle caps.

Advertisement

If you're going to be gluing a metal object to a metal background, you need to roughen up the surfaces first. Use sandpaper to scratch each piece of metal. And if you want to work out the arrangement of your collage before you start gluing, you have two options. You can put all the pieces in place temporarily with removable adhesive like scotch tape and then permanently affix each piece one by one [source: Hunot]. Or, you could take a photo of your temporary arrangement and then use it for reference when gluing everything together.

Belt buckles can become picture frames by cutting the belt off the buckle and using pliers or a jeweler's saw to remove the prong. Then all you have to do is trim a photo to fit the buckle frame and glue it into place [source: Hunot]. The same concept could be used on old metal bangle bracelets, large hoop earrings and large metal washers.

If you're low on belt buckles but have a cache of bottle caps, create bottle cap frames. Find the photos you want to use and, using the bottle cap as a reference, cut out several tiny images and set aside. Next, squirt a dollop of craft glue into the middle of a cap and spread it around using a toothpick or the glue nozzle. Finally, place your tiny photo in the center of the bottle cap. If you want, you can sprinkle the photo with a little glitter, which will adhere to the excess glue around the edges of the photo [source: Hunot]. Now you can add these bottle cap frames to a collage -- dot them around individually or add in one large cluster.

Besides the metal you have lying around the house, you can also find unique pieces at second-hand shops, antique stores, flea markets and estate sales.

Read on to discover the beauty of paper as a collage medium.

1. Paper Items

When people think of collage art, they often envision a paper collage, which makes sense since paper materials come in all kinds of forms, colors and textures. Paper is simply great for collage making. Photographs, magazine clippings, newspaper articles, shopping bags, tin foil, can labels, matchbooks, old letters, historic documents, discarded textbooks, maps, wallpaper, doilies, postcards, sheet music and playing cards are all fantastic collage materials. And that's just a start. There's almost no end to the paper trail. For variety, you can incorporate unusual materials like sandpaper or blurry photos. Or stain the paper with tea or walnut ink to give it an antique look [source: Grant].

You can also experiment by trimming the materials in rounded or wavy edges and irregular shapes, or use pinking shears to get zigzags and other edging patterns. You can cut out words or letters to make phrases or merge two different photographs together [source: Grant]. You can cut out a whole picture or just a portion -- a nose, half a leaf, a dog's tail or a doorknob. You can tear the paper to make jagged edges, or fold or crumple the pieces to create a different texture. And remember, not everything has to be glued flat because when it comes to creating a collage, there are no rules.

Advertisement

Using a cutting mat can help protect your table and help you make smooth cuts with a utility knife or scissors. Using an adhesive like rubber cement can keep the paper from crinkling. Glue sticks or Mod Podge will also work.

When you're done, you have a couple of options for protecting your collage. You can frame it under glass, get it laminated at a copy shop or apply a light coat of Mod Podge to the surface with a foam paint brush or spray some varnish on it to act as a sealant [source: Love To Know Crafts].

For more crafting fun, see the links on the next page.

Lots More Information

Related HowStuffWorks Links

  • Beal, Janet. "How to Make Collage Posters." eHow. (Accessed 4/12/09)http://www.ehow.com/PrintArticle.html?id=4793758
  • Britannica. "Collage." (Accessed 4/12/09)http://www.britannica.com/EBchecked/topic/125396/collage
  • Collageart. "Sources of Tools, Supplies & Technical Information for Collage Artists." (Accessed 4/12/09)http://www.collageart.org/info/
  • Collage College. "Starting Collage." (Accessed 4/12/09)http://www.collagecollege.com/starting.html
  • Global Collage. (Accessed 4/12/09)http://www.globalcollage.com/
  • Grant, Joanna. "Live Studio: A Lesson in Collage." EBSQ. March 2005. (Accessed 4/12/09)http://www.ebsqart.com/artMagazine/za_370.htm
  • Hunot, JoAnne. "Muffin Tin Collage and Recycled Metal Frames." HGTV.com. (Accessed 4/12/09)http://www.hgtv.com/decorating/muffin-tin-collage-recycled-metal-frames/index.html
  • Love To Know Crafts. "Make a Collage." (Accessed 4/12/09)http://crafts.lovetoknow.com
  • Meenaghan, Anna. "Amazing Ideas for Making Collages." Gossip Barf. (Accessed 4/12/09)http://gossipbarf.com/amazing-ideas-for-making-collages
  • MoMA. "Louise Nevelson." (Accessed 4/12/09)http://www.moma.org/collection/browse_results.php?criteria=O%3AAD%3AE%3A4278&page_number=1&template_id=1&sort_order=1
  • National Collage Society. (Accessed 4/12/09)http://www.nationalcollage.com/
  • The International Museum of Collage, Assemblage and Construction. (Accessed 4/12/09)http://collagemuseum.com/

Advertisement

Loading...