Ultimate Guide to Recycled Wine Bottle Crafts

Mixed group of wine bottles.
These old wine bottles could be repurposed into vases, lights, plant nannies or even a chandelier.
©iStockphoto.com/Tracy Hebden

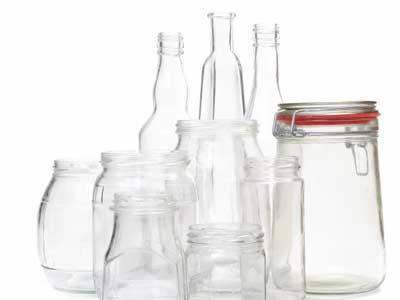
Brilliant colors, sturdy materials ... it seems like such a shame to throw those wine bottles away. There must be something you can do with them, right?

Absolutely. Glass bottles are the material -- and the inspiration -- for a wide variety of crafts. Creative recyclers have converted old bottles into any number of household objects and works of art. Some craftspeople slice the bottle's neck into rings that become the components of wind chimes and mobiles. Some wire the bottles for electricity. Some mortar the bottles together into striking, colorful walls. Still others "slump" the bottles -- that is, melt them into unusual new free-form shapes.

Advertisement

You'll need a few tools for bottle crafts, including a tile cutter, stained-glass saw or diamond-bladed wet saw for cutting the glass and a power drill with a glass-cutting tip. A carborundum stone or a buffer wheel can be used to smooth out edges [source: Alpine Glass]. Make sure the wheel is designed for glass or ceramics. If you have a rotor tool, such as a Dremel, you can probably find a buffer attachment for it.

Nail polish remover will get rid of any painted labeling -- but remember, it will take off almost any paint or finish, so be careful where you use it. You can soak the bottle in a solution of water and bleach or use Goo-Gone or a similar product to remove the paper labels. A crimper will be handy for installing wiring. And finally, you'll want a smock, gloves and safety goggles.

To slump bottles, you'll need a kiln. This may be a larger investment than you're willing to make at first. As an alternative, look for local potters or craft and design schools -- they may be willing to let you use their kilns.

In this article, we'll explore a few different bottle crafts, including chandeliers, lights, plant nannies and vases. Throughout this article, we'll discuss wine bottles, but most of these ideas will also work for beer, liquor and glass water bottles. Remember, the only rules are practice safe crafting and satisfy your own creativity and ingenuity. Since these projects require working with glass and major tools, they are not intended for young teens and children.

These ideas are just suggestions. You can probably come up with many additional creations. Read on to get started.

Advertisement

Recycled Wine Bottle Vases

An unaltered wine bottle can't function as much more than a bud vase. The neck is simply not wide enough to accommodate more than one or two flower stems.

If what you want is a bud vase, then great -- you don't have much work to do. As with all wine bottle crafts, start by cleaning the bottle thoroughly. Remove the labels and paint (unless you like them, in which case your project is going to be really easy).

Advertisement

You might decide to leave the glass unadorned. For a vase, decoupage -- the art of decorating a surface with paper cutouts -- can be a beautiful option. Decoupage images are traditionally affixed to the inside of glass vessels. Since your vase will hold water, you might want to ignore tradition on this one. Glue the images to the outside, and then coat with several layers of acrylic sealant or varnish to achieve an even, translucent surface [source: National Guild of Decoupeurs].

If you'd like your vase to be a bit more capacious, or you simply want to remove the threads of a screw-top bottle, it's time to enter the world of cutting glass. You'll be removing the neck of the bottle and smoothing out the edges of its new mouth. This sounds a bit intimidating, but it's mostly a question of having the right tools. You'll need a tile cutter, an axis glass cutter, a stained glass saw or a diamond-bladed rotor saw.

The cutting method will vary depending on the tool you're using. Usually you score the glass and then make a controlled break. Take it slow, wear your safety goggles and follow the instruction manual. If you've never cut glass before, try it on a few practice bottles first. (This may mean you need to drink a few more bottles of wine. No one ever said art was easy.) Smooth out the new edges with a carborundum stone, an emery cloth or a buffer wheel.

On the next page, we'll look at ways to create something more complicated: a chandelier.

Advertisement

Recycled Wine Bottle Chandelier

One of the most attractive aspects of glass is the way it plays with light, so a bottle chandelier is a natural project. A chandelier can be a fairly traditional shape, or a Chihuly-esque profusion of color. Some designers create modernistic grid-style chandeliers [source: Droog]. Some create rounder, more organic shapes. Some opt for a line of single-bottle lights [source: Apartment Therapy]. Slumping the bottles creates free-form bases for light bulbs. Leaving the labels on creates a funky, relaxed feeling.

Plan your chandelier according to the space where you plan to hang it. If it will be above a table, remember to leave adequate headroom, so your dinner guests can see each other. In general, the chandelier should not be as wide as the table; a good rule of thumb is that its diameter should be a foot less than the table's width [source: Lowe's].

Advertisement

Some crafters simply arrange bottles, either mobile-style or on a grid structure, around a light source. (Do an image search on Google for "wine bottle chandelier" and you'll find several examples.) The effect can be gorgeous, particularly if you're working with a high ceiling that allows for drama.

For this discussion, though, let's assume you're taking a more involved approach -- turning each wine bottle into a lampshade. You'll cut the bottom off the bottle and then install a light bulb in the bottle neck. Depending on how much light you want to create, you could install a string of mini lights (or, even better, energy-efficient mini-LEDs) instead of a large bulb. If you take this approach, you may want to leave the bottom of the bottle intact.

If you have a single light source, a simple hanging-light kit -- which includes a bulb mount attached to wire -- will suffice. The wiring gets more complicated when you have multiple bulbs. The wire from the ceiling to the chandelier will be a multi-strand wire, and you'll need to connect the central strands to the wires for the individual bulbs.

Installing a chandelier takes some care, but you can do it. You'll need a metal hanger bar or brace to support the new fixture. Step-by-step photos of the installation process are available online [source: Hammer Zone]. And remember, electricity can kill you if you don't observe safety precautions. Review chandelier installation tips and ways to connect your new fixture with your home's wiring [source: Lowe's].

On the next page, we'll look at a way to go from green bottle to green thumb. Read on.

Advertisement

Recycled Wine Bottle Plant Nannies

As long as you're redecorating, you might be thinking about adding some greenery around the house. Plants add a colorful, soothing presence to any room. But not everyone succeeds with plants on the first try. If your plants typically die a slow, thirsty death, or if you overwater so much that your floors and tables get soaked, you may be a bit hesitant to try again. Guess what? You need a plant nanny.

A plant nanny is a nifty little device that gradually feeds water into the soil over a matter of days. It also happens to be one of the easiest ways to recycle a wine bottle.

Advertisement

Commercially available plant nannies consist of a water reservoir and a ceramic stake, which is driven into the potting soil. Because the ceramic stake is porous, it responds naturally to the amount of water in the soil. When the soil dries out, the stake does too, and that means it draws water from the reservoir down toward your plant [source: Best Nest].

You can purchase ceramic stakes fitted for wine bottles at a variety of garden supply stores and online. Recycling your wine bottle doesn't involve much more than cleaning it thoroughly and filling it with water.

If you don't want to see labels amid your plants, you'll want to spend a little elbow grease getting rid of them. Swab nail polish remover on painted labeling. For paper labels, use a product like Goo Gone or soak the bottle in a mixture of water and bleach and then scrub with a wire brush.

If you want to decorate the bottle, try etching the glass with a subtle design. You don't have to trust your drawing skills -- some kits let you create stencils on your computer. A glass etching kit will run you about $20 at a craft store. Remember to follow safety procedures -- after all, that's acid eating a pretty path into the bottle.

On the next page, we'll take a look at ways to turn wine bottles into lights. Read on.

Advertisement

Recycled Wine Bottle Lights

A wine bottle lamp works much the same way a chandelier does, but on a smaller scale. Because a lamp usually has a single-bulb setup, for most designs you'll be able to use a lamp kit [source: Lowe's]. That leaves you relatively free to play with design, without worrying so much about technical needs.

Your first decision is whether you want the light inside or outside the glass. The easiest option is to treat the bottle as the base, with the bulb and shade mounted atop the bottle neck. You'll need to make sure the base is heavy enough to support the shade and bulb you've chosen, so you may opt to fill the bottle with colorful rocks or other trinkets. (You could decoupage or paint the outside, or let the inside arrangement show as part of your design.) You'll also need to drill a small hole near the base for the cord.

Advertisement

A lovely option is to paint the bottle with translucent stained-glass paint, and then fill it with a string of mini-lights in lieu of a single bulb. Remember that, like any other light bulbs, mini-lights get hot. They could very well heat the bottle so much that it scars the surface it's resting on or -- worse -- poses a fire hazard. Work to arrange the mini-lights in such a way that the bulbs are evenly distributed, with no bulbs touching the base of the bottle. Keep the lamp on a ceramic trivet to reduce the risk even more.

If you decide to use the bottle as the shade rather than the base, the design becomes more flexible. As with the chandelier, you'll need to remove the base of the bottle. You'll also need to figure out how to support the glass shade. Free-form coils of sturdy wire are an artful option. This arrangement also lets you turn the bottle into a wall-mounted lamp or sconce. Stained-glass paint can be particularly effective in these lights.

Finally, don't forget the simplest arrangement of all. Take a tall, taper-style candle. Light it, and drip wax around the mouth of the bottle. Then, blow out the candle and insert it into the mouth of the bottle. The melted wax will help stabilize it. (You may need to trim the candle to fit with a paring knife.) Voila! Instant candlestick -- and an instant classic.

To learn more, visit the links on the next page.

Advertisement

Lots More Information

Related HowStuffWorks Links

  • Apartment Therapy. "How to Cut Glass Bottles for Use in Other Projects." Re-Nest: Abundant Design for Green Homes. May 7, 2008. (Accessed 4/5/09) http://www.re-nest.com/re-nest/how-to/diy-how-to-cut-glass-bottles-for-use-in-other-projects-049526
  • Best Nest. "PlantFurniture Add-a-Bottle Wine Nanny." (Accessed 4/6/09) http://www.bestnest.com/bestnest/RTProduct.asp?SKU=PFC-6053&src=froogle&kw=PFC-6053
  • Brown, Connie. "Proven Glass Cutting Techniques." Glass Fusing Made Easy. 2009. (Accessed 4/5/09) http://www.glass-fusing-made-easy.com/glass-cutting.html
  • Crafters Love Crafts. "Wine Cork Trivets." 2007. (Accessed 4/6/09) http://www.crafterslovecrafts.com/wine-cork-trivets.html
  • Discover Decoupage. "FAQs." Decoupage Artists Worldwide: National Guild of Decoupeurs. (Accessed 4/6/09) http://www.decoupage.org/faq.htm
  • Droog. "Milk Bottle Chandelier." Kaboodle. (Accessed 4/10/2009) http://www.kaboodle.com/reviews/droog--milk-bottle-chandelier-lamp
  • Ferhenbacher, Jill. "Recycled Bottle Cascade Chandelier." Inhabitat. May 28, 2007. (Accessed 4/10/2009). http://www.inhabitat.com/2007/05/28/recycled-water-bottle-cascade-chandelier/
  • Google. "Bottle Wall." (Accessed 4/10/2009) http://images.google.com/images?hl=en&q=bottle%20wall&btnG=Search%20Images&gbv=2
  • Instructables. "How to Cut a Glass Bottle" (Video). Instructables: Make, How To, and DIY. (Accessed 4/6/09) http://www.instructables.com/id/How-To-Cut-A-Glass-Bottle./
  • James, Paul. "Container Planting." HGTV. 2009. (Accessed 4/6/09) http://www.hgtv.com/landscaping/container-planting/index.html
  • Lowe's. "Chandelier Installation." Lowe's Hardware. 2009. (Accessed 4/5/09) http://www.lowes.com/lowes/lkn?action=howTo&p=Improve/ChandelierInstall.html
  • Lowe's. "Making a Lamp." Lowe's Hardware. 2009. (Accessed 4/5/09) http://www.lowes.com/lowes/lkn?action=howTo&p=HomeDecor/MakeALamp.html
  • OSHA. "Hazards of Using Flammable Liquids in Cutting Laminated Glass." U.S. Department of Labor Safety and Health Information Bulletin. October 6, 2008. (Accessed 4/5/09) http://www.osha.gov/dts/shib/shib100608.html

Advertisement

Loading...