Milk Jug Crafts

Cable Car craft

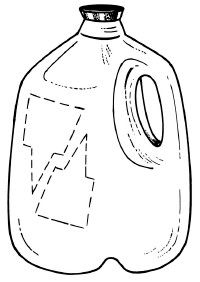
Milk jug crafts for kids are a reason to drink up and then recycle empty jugs into craft projects to brighten a rainy day or make games more challenging. You can liven up a game of catch, customize cars for a road rally on the living room rug, or take a cable car on an imaginary trip in the Swiss Alps.

Start with a clean, empty container. Add a box, some string, or some stickers. Apply a little imagination, and you'll have a kids' craft that will provide hours of fun.

Advertisement

Follow the links below to learn how to make your own milk jug crafts:

Milk Jug Catch

Make a game of catch more sporty with milk jug scoops.

Garden Markers

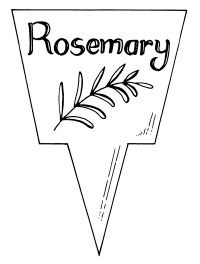
Know where your plants are -- and what they need -- with garden markers.

Box Cars

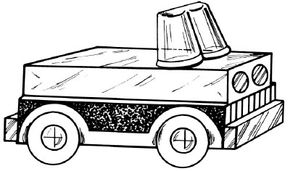
Customize box cars, trucks or vans for a rainy-day road rally or miniature roadway.

Cable Car

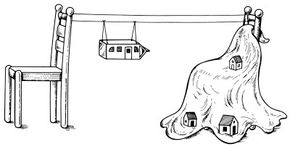
Create a cable car that takes your imagination to the top of the mountain.

Keep reading to learn how you can turn jugs into scoops for Milk Jug Catch.

For more art crafts and fun activities, check out:

Advertisement

Milk Jug Catch

Milk jug ready to be cut.

Milk Jug Catch is a great game to play indoors or outdoors. It's especially fun for kids because they make the scoops themselves.

What You'll Need:

Advertisement

  • Two clean plastic milk jugs
  • Scissors or craft knife
  • Permanent markers
  • Soft foam ball or plastic ball

Step 1: With an adult's help, cut the bottom off two clean plastic milk jugs as shown to make a scoop. (For an easy game, use gallon jugs. To make the game more challenging, use quart jugs.) Keep the caps on the jugs.

Step 2: Decorate the plastic scoops with permanent markers.

To play the game, first pick a partner and each take a scoop. Toss a ball to your partner, who will catch it in the scoop. Then your partner throws the ball back to you to catch in your scoop.

To make the game harder, throw the ball when it is still in the scoop. Use a soft foam ball to play the game inside and a plastic ball to play outside.

Having trouble remembering what's planted where? Keep reading to discover how you can make garden markers for your plants.

For more art crafts and fun activities, check out:

Advertisement

Garden Markers

Cut shapes from the jug.

With garden markers, you'll never forget where you planted the carrots! You can even make notes about watering needs and harvest time.

What You'll Need:

  • Permanent markers
  • Plastic milk jugs
  • Scissors or craft knife
  • Garden seeds

Step 1: On a plastic milk jug, draw cut lines for a square with a spike shape at the bottom, as shown in the illustration.

Advertisement

Step 2: With an adult's help, cut out the garden marker shape.

Step 3: Draw the plant's picture shown on your package of garden seeds. Write the name of the plant as well.

Garden marker

Step 4: Add the plastic markers to your garden.

You can also make a set of garden markers for your houseplants. Learn all the names of your plants and how to care for them, and then write the instructions on the plastic markers.

Look on the next page to learn how you can turn boxes and milk jug lids into customized box cars.

For more art crafts and fun activities, check out:

Advertisement

Box Cars

Box car with milk jug lids as wheels

With a few materials and a little imagination, you can make box cars like a race car, a sports car, or even a minivan.

What You'll Need:

Advertisement

  • Old boxes
  • Blunt scissors
  • Construction paper
  • Craft glue
  • Markers
  • Plastic milk jug lids or cardboard
  • Clear plastic cup
  • Aluminum foil

Step 1: Save some small boxes from the kitchen or from gifts about the size of a butter box, a cocoa mix box, or a necklace box.

Step 2: Cover the boxes with different colors of construction paper. Decorate the paper-covered boxes with markers.

Step 3: For the wheels, glue on plastic milk jug lids or cut circles from cardboard.

Step 4: Make a windshield from a clear plastic cup cut in half. Glue it to the box.

Step 5: Use aluminum foil to make headlights and bumpers.

If you want, cut holes in the top of the boxes for clothespin people. Use the people to drive your cars around town.

Keep reading to find out how you can take an imaginary trip to the Swiss Alps with a milk-carton cable car.

For more art crafts and fun activities, check out:

Advertisement

Cable Car

Cable car made from a milk or juice carton

Make a cable car to take your imagination to the top of a snow-covered mountain.

What You'll Need:

Advertisement

  • Half-gallon milk or juice carton
  • Scissors
  • Permanent markers
  • String

Step 1: Make a cable car from a half-gallon milk or juice carton. Ask an adult to cut out windows and a door for the cable car.

Step 2: Decorate your car with permanent markers. If you want, write the name of your cable car company on the carton.

Step 3: With an adult's help, poke four small holes in the carton, one at each corner of one side of the carton.

Step 4: Set up two chairs a short distance apart. Tie a long piece of string between the backs of the chairs in a loop.

Step 5: To make the cable cords, cut four pieces of string, all the same length. Tie a knot at one end of each piece of string, and thread the string through each hole in the cable car. Tie the other end of the string to one line of the looped string. Pull the other side of the loop to make your cable car move between the chairs.

If you want to create a ski scene, throw a white blanket around one chair to make a mountain. Make little chalets and trees from small boxes, and set them on the blanket. Make clothespin people, and give them a lift in the cable car.

For more art crafts and fun activities, check out:

Advertisement

Advertisement

Loading...