How to Draw a Waterfall in 4 Steps

Waterfall Image Gallery Draw an unforgettable waterfall landscape in just four steps. See more pictures of waterfalls.
Publications International, Ltd.

­The centerpiece of this landscape is a majestic, rushing waterfall. Surrounded by stone and plants, this waterfall landscape promises a wonderful escape. ­

In just four steps, we'll show you how to draw this waterfall landscape. You can draw it freehand while looking at your computer monitor, or you can print out this article to get a closer look at each step.

Advertisement

On each page,­ we'll show you an illustration of each step and then give you a description of how to draw it. Follow the red lines in each illustration to learn exactly what to draw in that step. The lines drawn in previous steps are shown in gray.­

We'll start by sketching a rough outline on the next page.

Advertisement
1. Sketch the Outline

­

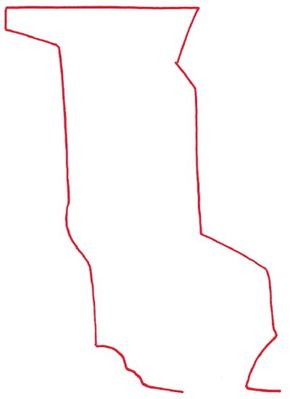
Begin with a rough outline of the watery part of the scene. Form it like a long rectangle with an open, twisted bottom and a boxy, foot-like shape at the top. Use a few curving lines, but most of them should be straight.

Advertisement

2. Draw Cliffs and Boulders

­

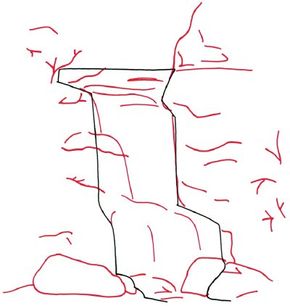
Sketch two enormous boulders at the base of the waterfall with bumpy, oblong shapes. Suggest the movement of water over the falls with gently downward-curving lines. Use curving horizontal lines to indicate the contours of the cliff surrounding the falls. Make tree branches with short, Y-shaped lines.

Advertisement

3. Add Grass and Leaves

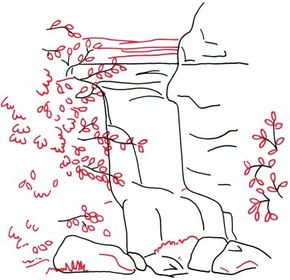
­Add teardrop shapes along the branches for leaves on both sides of the water. Use short, scalloped lines to show clumps of leaves. Make jagged lines to look like grass near the bottom. Create the impression of turbulent water at the base of the falls with some squiggly lines. Provide background and a sense of distance with more horizontal lines at the top.

Advertisement

4. Finish With Shading

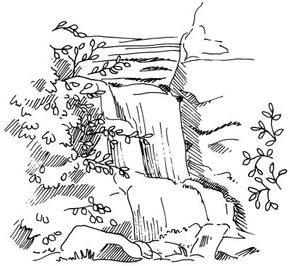
Sketch a series of long vertical lines in the water area to add to the appearance of falling water. Add depth by shading with patterns of diagonal lines alongside the water. Complete the landscape with additional shading in the upper water area, around the leaves, and on the boulders at the bottom.

­Your landscape drawing is finished! Even if you don't get it right the first time, keep practicing until you're happy with your drawing.

Advertisement

Every city has its own spectacular views. Learn how to draw a cityscape in the next article.

See all How to Draw articles.

Advertisement

Advertisement

Loading...